Round 2 saw Cuddle Time up against a three player team whose name I forget! The upshot is that one of our players will be offered up in a random match up against the extra player from another 4v3 match. I end up paired into Mikael’s Empire of Dust (of Team Venereal Taint), but I’m able to choose Plunder, a totally acceptable scenario.
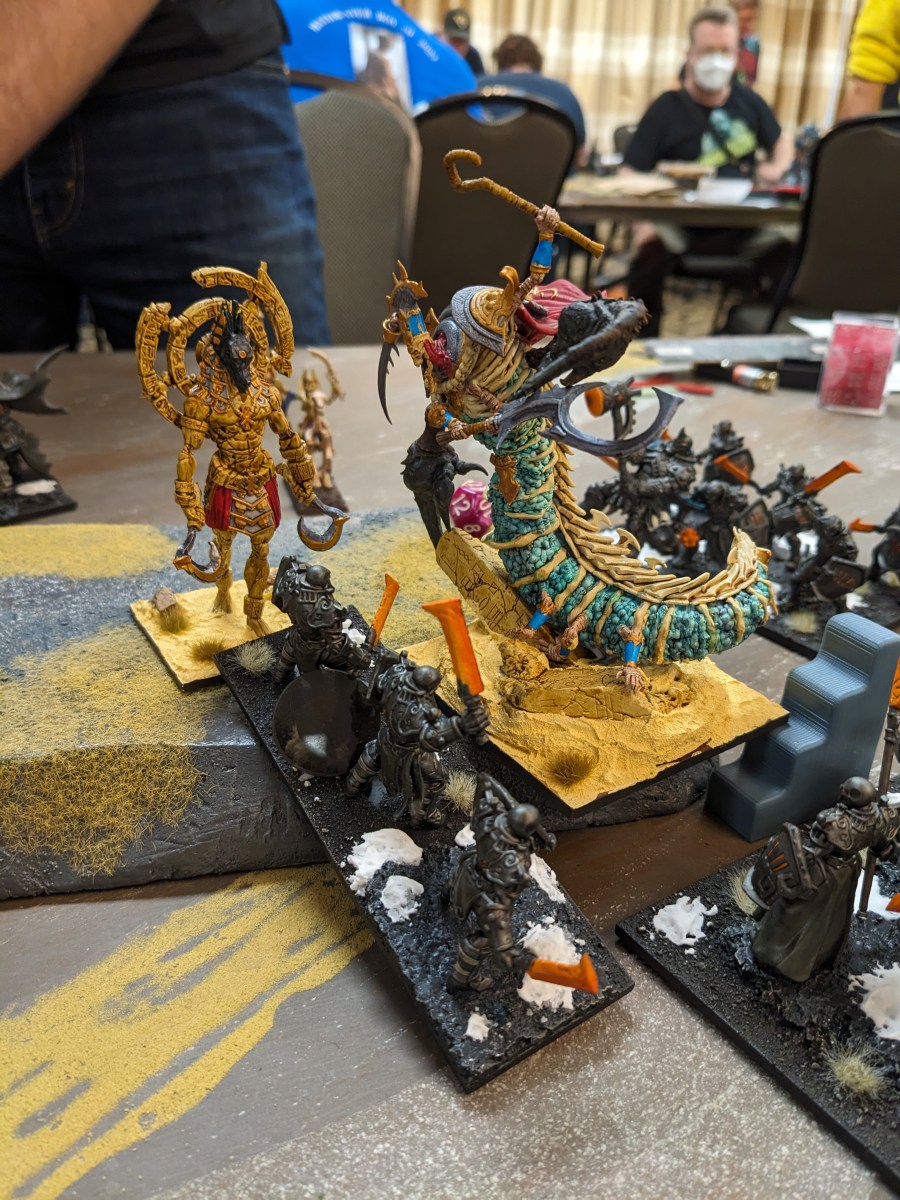
Game 2: Empire of Dust
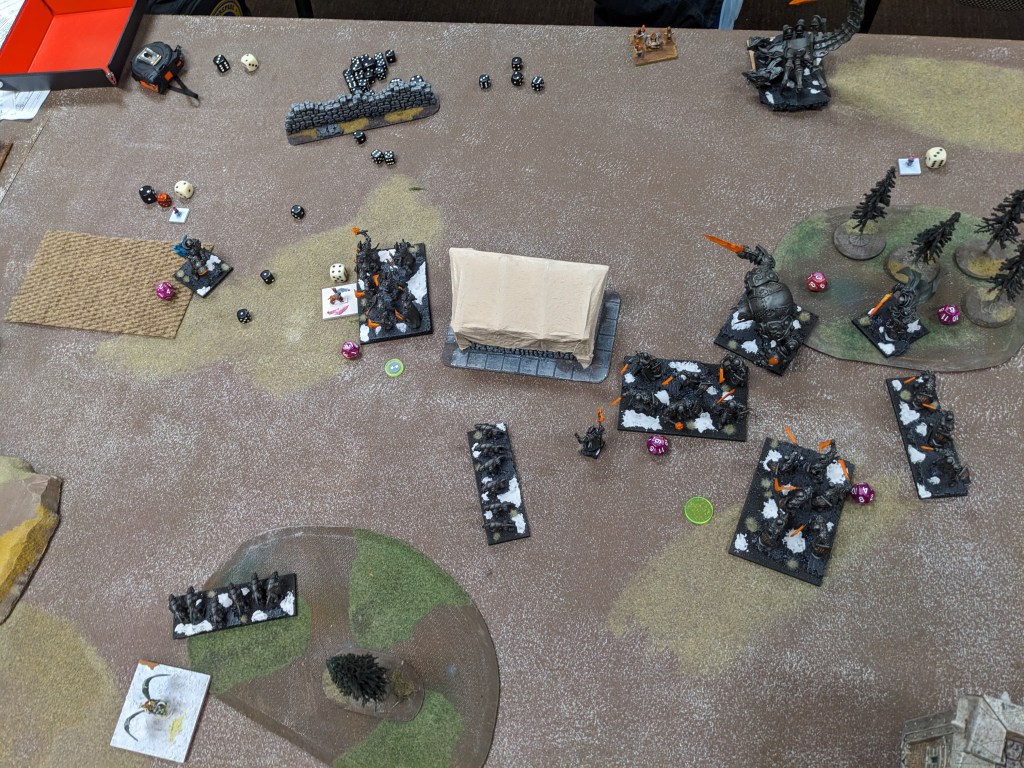
Enslaved Guardians Horde – Brew of Haste
Enslaved Guardians Horde – Boots of Striding
Enslaved Guardians Horde – Sanguinary Scripture
Skeleton Spearmen Regiment
Skeleton Spearmen Regiment
Revenant Cavalry Troop – Skirmisher’s Boots
Soul Snare – Drain Life (9)
Monolith – Surge (8)
Reanimated Behemoth
Undead Wyrm
Idol of Shobik – Heal (5)
Cursed High Priest on Undead Horse – Alchemist’s Curse (4), Scorched Earth (3)
Sebekh-Rai the Accursed – Surge (8), Heal (5)
2300 (13/20)
With 4 out of 5 legends supporting a backbone of Enslaved Guardians and a white hot AC (4) caster (that’s 2 of 2 games for those playing at home), I could see Mikael being on the whole ok with my brick of an army. While I was happy to see a single Wyrm, I was also totally unaware of how good the Behemoth is in 3.5E 😛 I’ve no idea when that happened but damn, you go girl. (Long time readers will remember my efforts to make the Ankylodon Battle Platform shine, and we know how 3E has treated that cousin of the Behemoth!)
I scouted Craggoth up and grabbed a 2 point token before also claiming first turn and taking it with glee. (Mikael later checked the rules on Scout and showed me that you specifically can’t pick up tokens, making it the only move that is not a move in the game, including units that turn on the spot as a combat reform. Kooky but them’s the rules. It didn’t particularly affect our game but I appreciate knowing.)
BATTLE


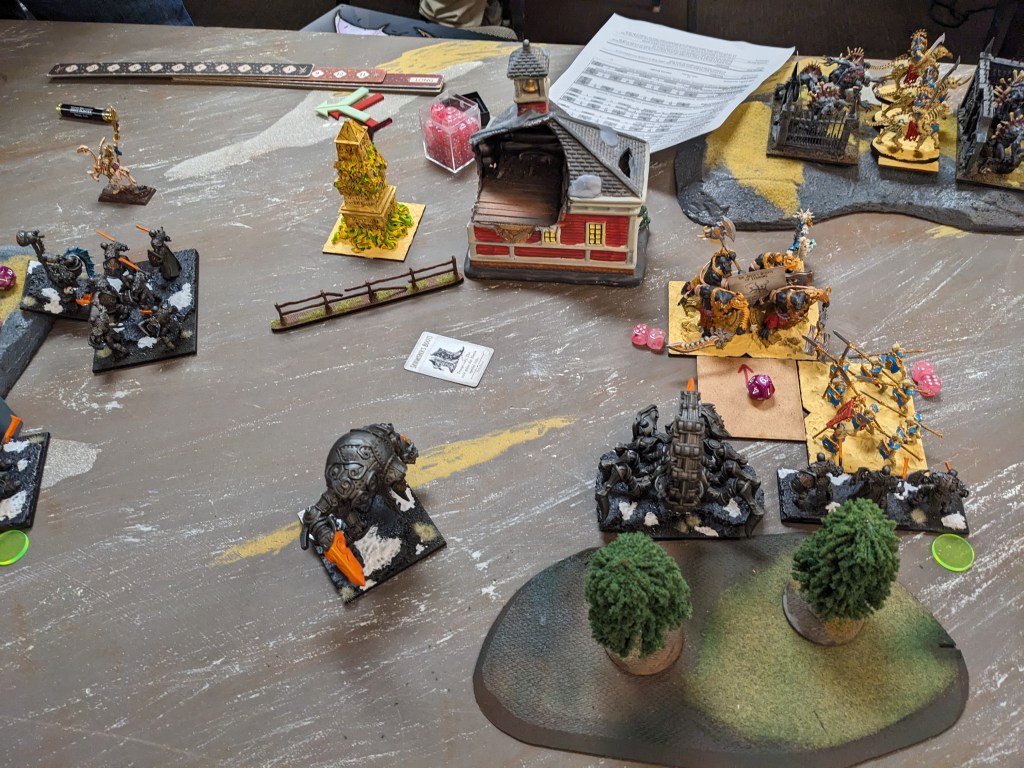
Turn 1: Freeforged trundle forward, with the exception of Craggoth who drags his token backwards behind the woods and some Mastiffs that shoot forward and grab a 1 point token.
The Empire of Dust deploys measuring sticks and advances in a safe and orderly fashion. The Soul Snare drains 4 damage from the token Mastiffs, obnoxiously wavering them, and the sword Beast Lord is hit with scorched earth.


Free Dwarfs 2: Those wavered Mastiffs rotate out of the way, handing their token off to an Earth regiment, while the other Mastiffs hard to the left grab another 1 point token. Out on the right, Craggoth rips into the striding Enslaved Guardians, tossing its 2 pointer to the other Earth regiment. I punch it down in the center as well, sending the sharp Earth horde (bane changed) and the orb Beast Lord into the haste Guardians. The sword Beast Lord (scorched) powers into the lifeleech Guardians to hold them in place as well, and that’s all the Guardian hordes accounted for.
The sharp Earth horde detonates their Enslaved Guardians, backing up to keep Shobik in their front as the orb Beast Lord overruns awkwardly deep into the EOD line. The sword Beast Lord does an unknown amount of damage into the lifeleech Guardians, and Craggoth hammer slams 6 into his horde of can openers.


Empire of Dust 2: The sharp Earth horde cops a front charge from Shobik, a flank from Skeleton Spearmen, and a surge flank from the Wyrm. The beleaguered central Mastiffs are charged by the Behemoth, the right Greater Earth takes the Rev Cav troop to the front, and Craggoth is hit in the front by his Guardians and the flank by the other Skeleton Spearmen. Oh, and the sword Beast Lord is countered by the lifeleech Guardians.
The Mastiffs sneaking off with a token on the left are Soul Snared for 3 damage, the orb Beast Lord suffers 5 damage from alchemists curse (SIGH), and the Guardians fighting Craggoth are healed down to 3 damage and will lifeleech in a moment after the khopeshs begin to fall. Speaking of, the sharp Guardians are beaten into scrap and the Behemoth flattens its Mastiffs. In happier news, the sword Beast Lord takes 8(!) damage but only wavers, Craggoth goes up to 6 damage and doesn’t care, and the Rev Cav do nothing to their GEE.

Free Dwarfs 3: The grind is well and truly met this turn as charges erupt across the field. The left Greater Earth surge charges the Behemoth (with bane chant for CS4), the Wyrm is flanked by an Earth regiment and fronted by an Earth horde (who scoop up a 2 point token in the process), the lifeleech Guardians are comboed by the sword Beast Lord (who passes headstrong! (on my first time rolling it)) and another Earth horde, the other Great Earth counters his Rev Cav troop, Craggoth hits his Guardians again, annnnd the rightmost Earth regiment flanks the Spearmen assailing the big scorpion’s flank. Whew. In non-combat news, the orb Beast Lord turns to glare at the Soul Snare, as the Mastiffs on the left continue dragging their plunder backwards.
I wish I could say combat was decisive, but it really was not. The Behemoth takes only 4 damage from the Greater Earth, the Wyrm surprisingly lives with 8 damage, and both the Guardians to Craggoth’s front (7 damage) and Spearmen (8 damage) cling to unlife. The Rev Cav are turned to dust, however, as are the lifeleech Guardians.


Empire of Dust 3: Brace for the clap-back, dear readers. The Behemoth hits its Greater Earth in the front, with Spearmen into the flank (and off the hill). The Wyrm counters the Earth regiment to its flank, as Shobik saunters into their flank (and off the hill). Craggoth, meanwhile, takes a second round of Enslaved Guardian to the front and Spearmen to the flank.
In shooting, the Soul Snare snaps the Mastiffs up to 5 damage, wavering them, and while the orb Beast Lord escaped the alchemist curse this turn, the sword Beast Lord did not. He’s baked up to 11 damage but holds! Also the last of the damn Guardians are healed down to 2 (and thus 1) damage. In combat, Craggoth is shoved to 13 damage but triumphantly holds as Mikael’s dice betray him. The Behemoth’s Greater Earth Elemental likewise holds on 8 damage, however the Earth regiment in the center is handily flattened by Shobik and pet (handing their token to Shobik in the process).


Free Dwarfs 4: Having survived the grind, the Freeforged oblige the Empire and drop another round of hammers into them. The orb Beast Lord charges and shatters the Soul Snare, the slayer Beast Lord rears the Spearmen fighting the left Greater Earth and one-rounds them, and the Earth horde who fought the Wyrm before grimly finishes the job. Shobik fairs better, absorbing the charge of a bane chanted Earth horde, and the Behemoth continues to prove hard as nails, surviving another assault from a Greater Earth Elemental. Off on the right, the other Greater Earth arrives in the flank of Craggoth’s Guardians, pulverizing them, as Craggoth and the Earth regiment take care of the Skeleton Spearmen.


Empire of Dust 4: Shobik drops his plunder to juke the Earth horde he’s fighting by surging into a different Earth horde (off the hill no less). He delivers them 6 damage. The Behemoth smacks its Greater Earth up to 12 damage but the big guy continues to hold. And the Cursed Priest turns the sword Beast Lord to slag with alchemists curse 😥


Free Dwarfs 5: The Greater Earth Elemental fighting the Behemoth finally gets some help, in the form of a bane-chanted Earth horde thundering off the hill into its flank. The monstrosity is finally ground back into the sands. Shobik is reared by the orb Beast Lord, effectively crushing the old god against the anvil of another Earth horde, routing it. And the Monolith is hit by both a Greater Earth and a smoldering Craggoth, which level it quite effectively.


Empire of Dust 5: While he can’t win the game with just a Cursed Priest and Sebekh-Rai (cowering behind that ruined building and effectively dead to both of us), Mikael can at least kill my large metal children. Alchemist curse puts Craggoth into the dirt, making me sad.


Turn 6: I have little chance of catching that stupid Cursed Priest, but I can hold all the tokens in my grubby metal hands and try to prepare some emergency token grabbing in Turn 7. Mikael flubs his final alchemist curse in Turn 6, and with no Turn 7, that’s a …
FREEFORGED VICTORY
Wowzers. I did not expect to smash EOD so hard, but a combination of getting a jump on his army and receiving 2-3 really clutch low Nv rolls from Mikael’s dice cinched the game. Alchemist curse was definitely brutal this game but, as with the last match, I felt like there was little I could do about it, so just punched harder where I could. Seems legit.
Round 3 put Cuddle Time up against Best MM, a bunch of total gents also circling the bottom tables. Their captain put me up against Justin, a new player with a WIP 10mm (or smaller?) Abyssal Dwarfs army based up for 28mm Kings. We played Dominate as is my want.
Game 3: Abyssal Dwarfs
Lesser Obsidian Golems Horde – Charnox
Lesser Obsidian Golems Horde – Charnox
Blacksouls Horde – Throwing Mastiff
Blacksouls Horde – Throwing Mastiff
*Immortal Guard Regiment – Throwing Mastiff
*Immortal Guard Regiment – Throwing Mastiff
Angkor Heavy Mortar
Angkor Heavy Mortar
Angkor Heavy Mortar
Overmaster on Ancient Winged Halfbreed
*Infernox
Ironcaster – Fireball (10), Surge (8)
Ironcaster – Surge (8), Lightning Bolt (3)
*The Damned Yaygar Formation
2300 (13/22)
It’s been a long time since I’ve faced Abyssal Dwarfs and longer still for triple artillery, and while AD aren’t all that scary anything can happen when it comes to artillery spikes! Apart from that he’s mostly very slow, but very tough and kind of wants the same thing as me. Also Justin has a dragon, even if he foolishly left the AC (4) mage at home 🫠
Craggoth punches up a flank per usual and I go first also per usual. The new usual.
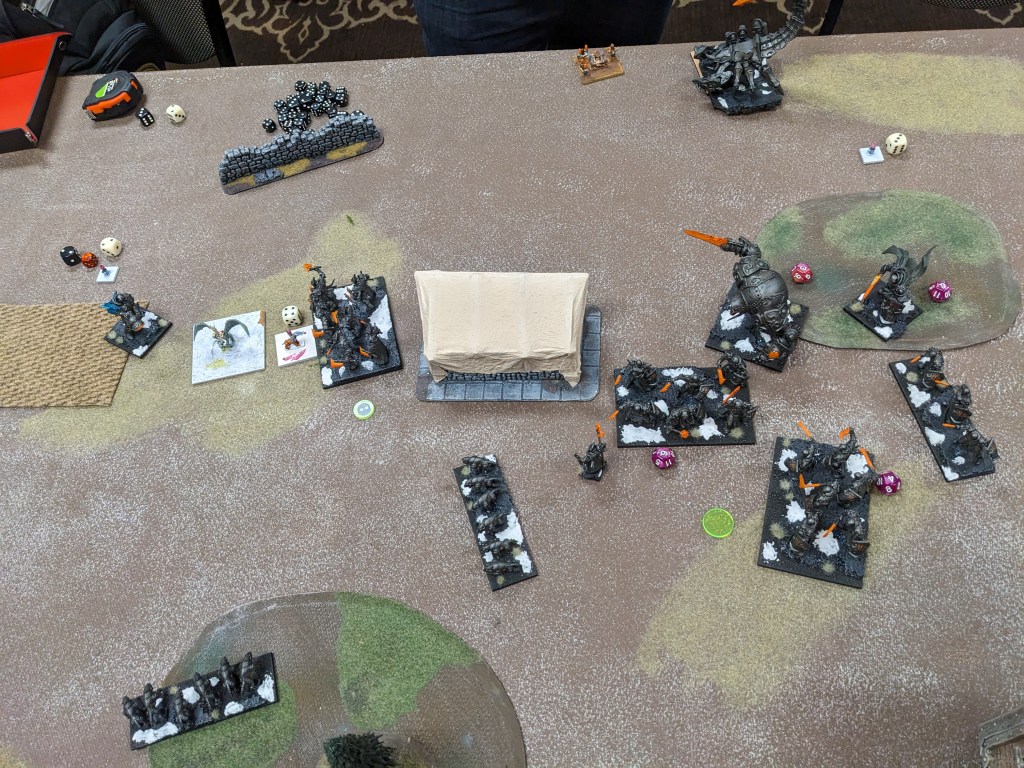
BATTLE


Turn 1: Freeforged, roll out! Craggoth fireballs 1 damage into the right Blacksouls horde and I surge an Earth horde an extra 1-2.”
Our twisted cousins advance apace, with Lesser Obsidian Golems enjoying some surge boosts of their own. The first artillery volley targets a central Earth Elemental horde but only 2 damage is caused.


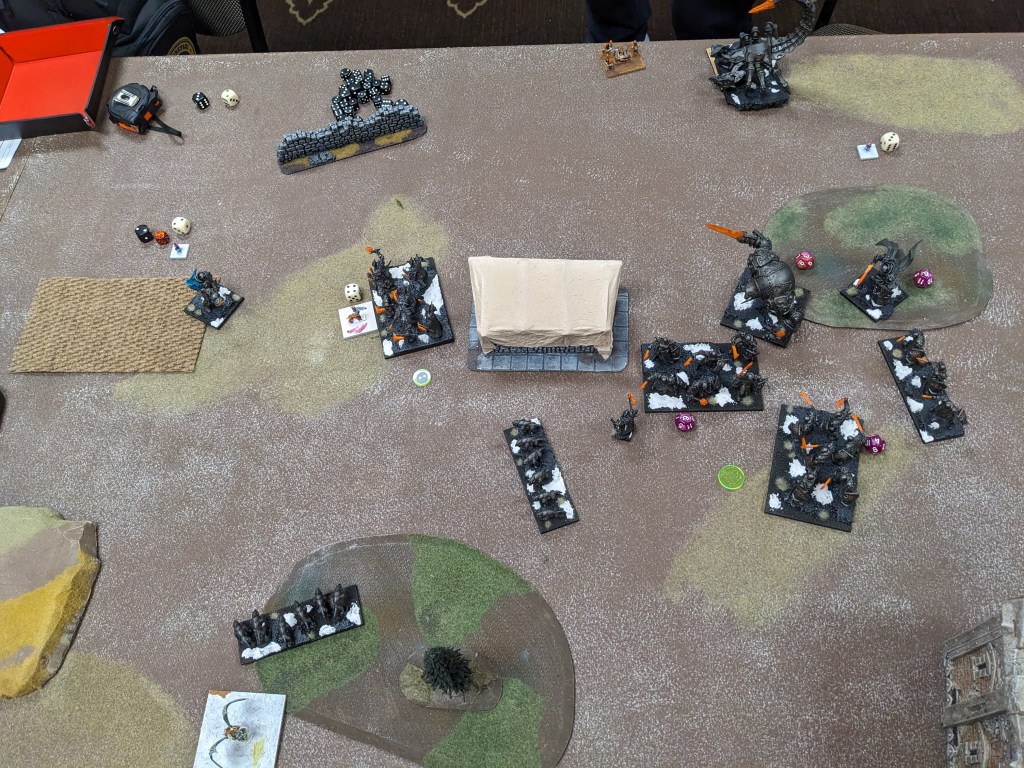
Free Dwarfs 2: The iron line shuffles along for the most part, although the orb Beast Lord joins Craggoth in a combo-charge on the right Blacksouls. They hold comfortably on 9 damage.


Abyssal Dwarfs 2: The Golems continue leading the AD advance, moving into Charnox range. Combined with the artillery barrage, 1-2 damage is dealt across the Freeforged line to no real effect. Shortly afterwards, the Blacksouls counter-charge on the orb Beast Lord does 4 damage. Not bad, stunities, but not enough. (Those central Golems may or may not have been able to flank surge the orb Lord, it looks like a hard cut and a fairly long charge to make it in. But I can’t recall if I couched him either way at the time.)


Free Dwarfs 3: I pile into his Golems, with the left one copping a front from sword Beast Lord and Greater Earth, and a flank from the sharp Earth horde; and the right one assailed by an Earth horde (bane chanted) and regiment in the front and a Greater Earth in the flank (off a hill no less). Both LOG hordes bite it. The left Blacksouls, meanwhile, are blocked by an Earth regiment (taking 2 damage in the process) and the right Blacksouls are driven off by the orb Beast Lord and Craggoth. I send the scorpion skittering towards the artillery in the backfield. Finally, the red Immortal Guard regiment takes a preposterous 9 damage from one very lucky horde of Earth Elementals.


Abyssal Dwarfs 3: Those Immortal Guard regen 1 damage (😬) and do 3 damage back to their Earth Elemental assailants. The surviving Blacksouls horde dismantle the Earth regiment fighting them, and artillery and/or fireballs push the other central Earth horde to 4 damage.
Notice that big white base behind the wall in his deployment zone? That’s the Overlord on Ancient Winged Halfbreed, just chilling. I confirmed a few times that he was not being forgotten, but content to make me nervous. The Infernox is behind the central building, looking to the left.


Free Dwarfs 4: Driven by an endless desire for murder, my robot dudes storm on. On the left, a Greater Earth Elemental and the sharp Earth horde blend the Blacksouls horde, as the sword Beast Lord bops just 2 damage into the Ironcaster babysitting them. Centrally, the red Immortal Guard are splattered by a Greater Earth in the flank and Earth horde (bane chanted) in the front, with the orb Beast Lord similarly slapping 3 damage into an Ironcaster. Then Craggoth eats his first Mortar.


Abyssal Dwarfs 4: The Overmaster descends! He swoops into the left Greater Earth’s front, and shockingly one-rounds the De 6+ titan with the help of the Infernox in the flank. Damn, Justin! The other Greater Earth cops some artillery damage (3 total), shortly before the surviving Immortal Guard push the central Earth horde up to 6 damage.

Free Dwarfs 5: Retaliation is, of course, swift. The sharp Earth horde hits the Infernox in the front (I explained the weirdness of facing a square to Justin when reforming after killing the GEE), but do only 4 damage despite bane chant. The same can’t be said of the Immortal Guard, who are given the same treatment as the previous batch, GEE in the flank and all. Craggoth eats his second Mortar.
Abyssal Dwarfs 5: Having appeared, the Overmaster swiftly flits off to the safety of the enemy deployment zone 😀 Leaving the Infernox to punch 2 damage into the sharp Earth Elementals. I wish I could say that Justin’s final mortar shot was impactful but I think it missed or failed to wound like most of the previous volleys.


Free Dwarfs 6: Infernox dies to a Beast Lord with CS3+TC2 in the rear. Poor guy. Craggoth eats his third and final Mortar, settling down to digest.

Abyssal Dwarfs 6: The Overmaster flaps into the Dominate zone, ensuring that he’s got at least 1 US to his name 👍

Turn 7: Buuuuut then I surge and bane chant an Earth horde into the Overmaster, which yields just 7 damage. The Overmaster returns the favor in Justin’s turn, routing the already damaged horde and closing the points gap just a bit more. All the same, this is a convincing …
FREEFORGED VICTORY
I think this was Justin’s 4th or 5th game of Kings? He took his lumps like an absolute prince, here’s hoping he had some fun throughout the tournament and maybe even a win or two. (I asked Best MM’s captain why he paired Justin into me, rather than taking me himself, and he told me it was because he knew Justin would have a good game. I really appreciate that and hope it was true, as this looks like a real stomp writing it up!)
Next Up: Northern Alliance!


