SCUTTLIN’ REALM 46: ORDER OF THE GREEN LADY

After a late night of playing Kill Team, watching board games, talking about Warmachine 4E and obligatory drinking, I passed out only to rise far too soon 😩 It’s Day 2 and time to slam into the bottom tables, Cuddle Time style.

ROUND FOUR: TEAM BIG DEAD ONE

  • Order of the Green Lady
  • Trident Realm
  • Empire of Dust
  • Undead

BDO was made up of two dudes whose team fell apart plus two of my clubmates (the Empire of Dust and the Undead (yes that’s Jeff from all my scrumming beforehand)). True to my captaining plans, I matched our Ogres into Trident Realm, Riftforged into Empire of Dust, Ratkin into Undead, and took the Order of the Green Lady for myself.

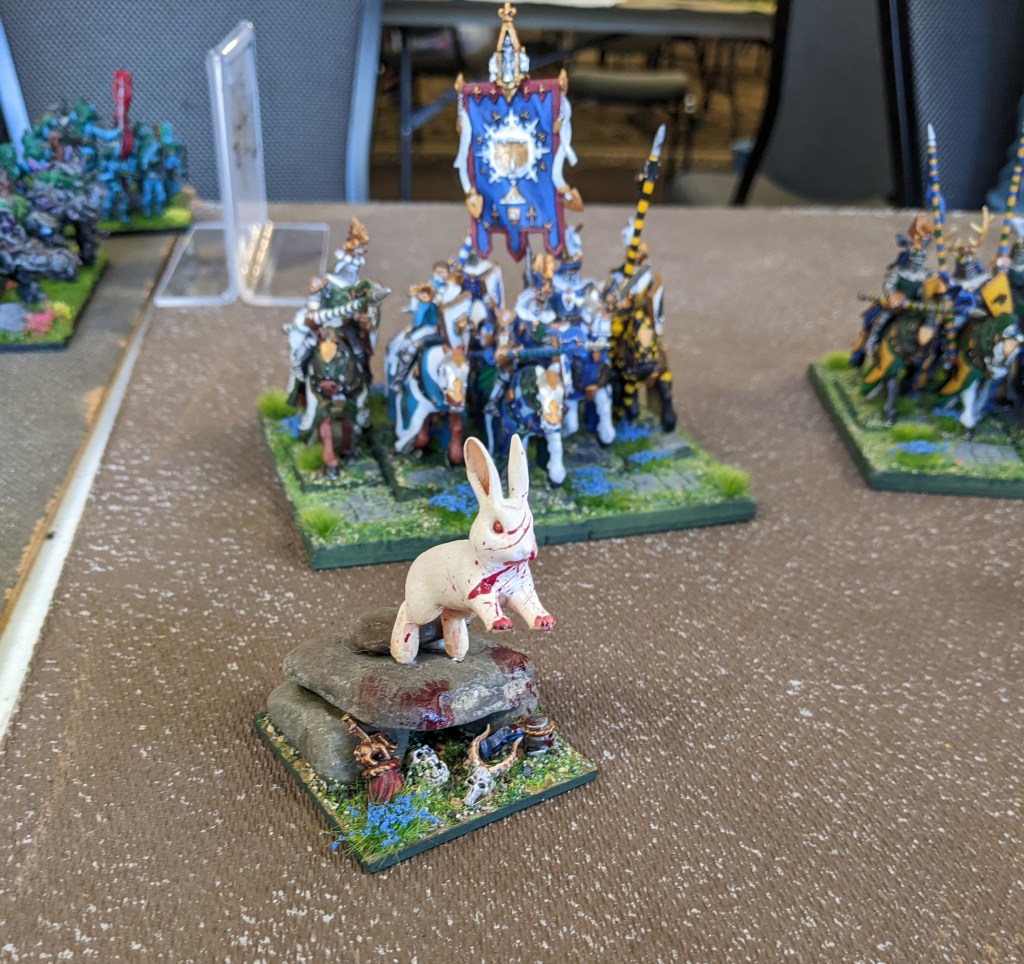
Brotherhood: Order of the Green Lady 2300
Order of the Forsaken Horde – Boots of Striding
Earth Elementals Horde
Order of Redemption Regiment – Brew of Strength
Order of Redemption Regiment – Mead of Madness
Order of the Brotherhood – Banner of the Green Lady [1]
Naiad Ensnarers Regiment
Centaur Bray Hunters Troop
Pegasus
Exemplar Redeemer – Blade of the Beast Slayer
Druid – Shroud of the Saint, Heal (2(4)), Bane Chant (2), Surge (4)
Devoted – Heal (3), Surge (7)

Bryant was super excited to play me, as we’d either always narrowly avoided each other or played once back in 2E or even Fantasy times. I’m a fan of his army, great Bretonnian feel and a faction I very rarely face. The list itself seemed legit? If hamstrung by cavalry’s middling place in this edition.

We played Pillage (or maybe Salt the Earth without any salting), with the Brotherhood going first one way or another.

BATTLE

Battlelines!

Green Lady 1: The Order canters forward, with caution on the wings and a trudging wall of rock in the center.

Trident 1: Crabs respond with a generalized scuttling. I’m content to make his life hell on the left flank, as he’s put a ton of points over there when the only token is the one on his side. Heartpiercers punch 2 damage onto the Centaur troop hanging out on the upper right token.

Bun Bun, Killer Rabbit of Caerbannog, prepares to sate her hunger for crab flesh.

Green Lady 2: Indecision racks the Order’s lines, ultimately seeing the right advance a bit, the center widen its coverage, and the left mobilize Centaur chaff while preparing to thunder into combat next turn.

Trident 2: Placoderms advance on the right, being a terrible charge target for the cavalry over there, as I try to swap the Coral Giant and Water Elementals without touching the forest. Heartpiercers back up and put 6 damage on the strength Redemption reg on the right and 1 on the annoying Centaurs on the left. The slayer-trident Centurion fires at the Forsaken horde and fails to get a single damage, leaving them free to fly. What a champ. The Kraken don’t take the bait, letting the Order deal with their own chaff.

Bunny Pegasus with the #promove block.

Green Lady 3: While the right side of the Order line faffs around – and heals all the damage on the Redemption cav! – the left goes hard. Redemption knights (hindered) and Forsaken horde (striding boots) slam into the Kraken in the woods, ensnare be damned, as the Pegasus charges the other Kraken to block him up. Despite taking 11 damage, the multi-charged Kraken only wavers. And the Peg does a tight 3 damage from 3 attaks, nice.

Trident 3: The right arm of the crab war machine grudgingly pumps Heartpiercer rounds into the strength Redemption (2 damage, which I know will vanish), presents terrible Placoderm charges and unjams the Coral Giant / Water Elemental situation. We’re both still avoiding the LOS blocking void that is that forest.

Over on the left, the wavered Kraken skitters 4.5″ backwards and regenerates down to 3 damage (hahaha I love it). The other Kraken bops the Pegabun for 6 damage but flubs the rout (might have wavered her). Heartpiercers and trident Centurion combine fire into the Forsaken, doing a bunch of damage and wavering them. I’ll take it.

Kraken getting pumped to power lift a second time.

Green Lady 4: The Order pushes the center at last, with the strength Redemption finally giving up the right flank and skirting the woods to reinforce the middle. On the left, the mead Redemption charge back into the Kraken they’ve been hunting, with the support of the Forsaken again … which was illegal, as he forgot they were wavered and when we remembered during my turn, he rolled their headstrong test and failed it. The Kraken held solid on 10 damage (hindered and ensnared is rough), so vaguely a moot point, but Bryant tore himself up about it all game.

Trident 4: The whole Forsaken issue is cleared up when Bun Bun’s Kraken corkscrews their flank and smashes them into man/horse/bird parts. Heartpiercers from the center punch across and kill Bun Bun, while the trident Centurion strips the TC from the Brotherhood knights. The other Kraken counter-charges the mead Redemption, slapping 5 damage into them, but ominously only regening down to 8 damage himself.

Elsewhere, Placoderm invite the Order to have a go in the center, the Coral Giant breaks the wood line to become a Problem next turn, and the Water Elementals attempt to punch through the Exemplar Redeemer and into the flank of the strength Redemption. It’s a tall ask, so of course the gigantic crab/horde does next to no damage 😀

And finally, the Heartpiercers on the right skewer the Ensnarers that had dared to come into view around the house.

The sweet, sweet overrun that was not to be.

Green Lady 5: With about 10 minutes left on their clock, the Order lets rip. Mead Redemption and pathfinder Brotherhood knights on the left crash into a Kraken each, thunderous be damned. Both Earth Elemental hordes bash into the waiting claws of the Placoderms (one hindered), and the Redeemer counter-charges the Water Elementals.

It took three charges, but the Order of the Redemption finally drop the titanic crab beast they’d spent the game dueling. The other Kraken lucky wavers on 7 damage (box cars!), however that luck doesn’t hold for the Earth Elementals, which do a paltry 6 damage to the central Placoderms. The Redeemer carves 3 into the Water Elementals.

Trident 5: Vengeance is swift as the Water Elementals batter down the Redeemer, even if regrettably missing the ~4″ overrun into the strength Redemption regiment behind. No other combat is as decisive, with the Coral Giant tearing chunks out of one Earth Elemental horde, the Placoderms poking the other, and the central Heartpiercers and trident Centurion pushing the mead Redemption up to 10 damage but only finding a waver.

Green Lady 6: The last 4 minutes of the Order of the Green Lady’s clock is largely spent frantically rolling combat dice. (The mead Redemption reg failed their headstrong, though the strength Redemption hit the Water Elementals with Centaurs in the flank.)

The Water Elementals are triumphantly torn down, but that signals the last of the Order’s momentum. The Brotherhood knights waver their Kraken again and Earth Elementals waver the Placoderms and apparently do nothing at all against the Coral Giant (he may have clocked out before rolling it).

Trident 6: Heartpiercers shoot off the mead Order of the Retribution, the Coral Giant dunks his Earth Elemental horde, and the Heartpiercers on the right I believe tried and failed to remove the Centaur troop they started the game shooting at. With no Turn 7 and 3 objectives to 2, this is a decisive …

TRIDENT VICTORY

All told a very fun match against an enthusiastic player. Bryant was really down about his play not being clean that morning – the waver token, undoing moves without marking corners, etc – and despite me assuring him it was cool he felt pretty bad. Regardless, I hope to face him again some time in a non-team event.

Speaking of teams, Cuddle Time did very well this round, scoring the maximum 60 points or just shy of it. With this hearty bounce buoying our spirits we headed into the final match-ups.

UP NEXT: Eager Beavers!

SCUTTLIN’ REALM 29: BROTHERMARK

With my sweet 4 points, I’m matched up against a gorgeous Moorish (?) army likewise wallowing down here at the bottom. Wyatt’s a good guy with some serious tools in his list, who must have been smacked by some heavies in the first couple rounds.

Brothermark 1995
Order of the Abyssal Hunt Regiment – Blessing of the Gods
*Paladin Knights Regiment – Aegis Fragment, Potion of the Caterpillar
*Paladin Knights Regiment – Aegis Fragment, Boots of Striding
Men-at-Arms Spearmen Horde – Veteran Command, Hammer of Measured Force
Villein Bowmen Horde – Fire-Oil
Villein Skirmishers Troop
*High Paladin on Dragon – Staying Stone
Exemplar Hunter on Horse – The Gauntlet, Scythe of the Harvester
Exemplar Chaplain on Horse – Battle Hymns, Knowledgeable, Host Shadowbeast (8), Crown of the Wizard King
Exemplar Chaplain – Battle Hymns, Zephyr Crown
*Defenders of Righteousness Formation

He walked me through the Exemplar Hunter + Shadowbeast wombo-combo, which definitely has legs, especially against individuals (thanks to duellist) but really anything (thanks to both rampage and slayer). Otherwise it’s three serious knight units, one helluva dragon, and some loathsome peasant Nerve blocks / scenario pieces. He did admit at some point that there’s a severe lack of inspiring, calling it a “design flaw” 😀

Third round was Pillage, with the seven tokens already placed on the map. Brothermark went first whether or not they wanted to.

BATTLE

Battlelines! The Abyssal Hunt are behind the hill, along with Hunter. The shadowbeast Chaplain is next to the dragon, along with the rest of the formation. My heroes are Hex > Bastion (lake) > Centurion, and you can just see the other Kraken there on the right.
Brothermark 1: Despite their hunger to smite the crustaceous menace, the Brothermark manage to advance with caution across the line, largely staying out of LOS. The Bowmen move into range of the leftmost (uninspired!) Heartpiercers, and despite 7+ to hit do 2 damage thanks to Fire-Oil.
Trident 1: Placoderms park themselves in that central wood, in range of both the High Paladin and one Paladin Knight regiment. I make sure every other target can only be charged by one unit, and toss bastion on a Kraken in case. The right Heartpiercers burn the right Paladin Knight’s aegis fragment, the central Heartpiercers can’t do 2 damage to the left Knights, and the Heartpiercers on the left cower behind their hill from the Bowmen’s flaming arrows.
Brothermark 2: After some deliberation, the Brothermark slam through the woods and into the crabby arms of their quarry! Paladin Knights (phalanxed) and dragon (hindered) hit the Placoderms, while more Paladin Knights hit the advanced Heartpiercers. Abyssal Hunt jam the other Placoderms, with Hunter in tow. The peasants hold tight for now.
That’s High Paladin Leeroy Jenkins to you, cur! (And his cloak of death already doing work …)
Bowmen stick 2 damage on the left Placoderms, shortly before they’re wind blasted sideways (!), for all it’ll do next turn. In combat, the Heartpiercers explode but the Placoderms hold on 8 damage like champs. Hell yea.
Trident 2: Looks like we’ve got a game! Both Kraken hit the right Paladin Knights in the flank, the Placoderms counter the dragon, and the other Placoderms charge the Abyssal Hunt to get that started. Heartpiercers jockey for shots on the unengaged Paladin Knights in the center of the board.
Those Paladin Knights escape the crossfire relatively unscathed (3 damage), then bastion goes up on a Kraken. Speaking of Kraken, they rampage through their Paladin Knights, with one sidestepping to give some maneuver options. Placoderms manage to ground the High Paladin and poke the Abyssal Hunt for token damage.
Brothermark 3: It would appear there’s plenty of smiting to be had, so the Bros get back to it. The Paladin Knights flank the dragon’s Placoderms, as the dragon counters them and the Abyssal Hunt counters their Placoderms. Also the Exemplar Hunter charges into the poor hex Envoy 😐 The various peasant units grow restless and sally forth for reasons. Cloak of death from the dragon splashes everywhere.
[sound of a 20+ attak chainsaw revving up]
A vicious bongo solo from a Chaplain hosts ~4 attaks into the Hunter, moments before he revs up his scythe, activates his gauntlet, and turns the hex Envoy into crab vapor :O The High Paladin and Paladin Knights crack their Placoderms, but happily the other heavy crab bois only go up to 5 damage against the Abyssal Hunt.
Trident 3: Both Kraken pound into the dragon’s front, as the Water Elemental horde skitters from the pond into the Paladin Knights and some Heartpiercers mob the flank of the Exemplar Hunter. Placos counter the Abyssal Hunt. (I spent a long time trying to get the Water Elementals + Kraken into dragon, but I couldn’t get a Kraken into the Paladin Knights, so would have to wear their charge next turn. I could have turned off their TC with the Centurion’s trident? Making the charge less of a thing to worry about.)
I live for Kaiju Big Battle titan fights ❤
The right Heartpiercers start chunking damage on the Spearmen, then bastion fails to cast. In combat, the Kraken boff the dragon up to 8 damage, sadly not saving the Water Elementals from the corkscrew next turn. The Elementals smack the Paladin Knights up to 8 damage as well, again not saving themselves from the dragon corkscrew. Sigh. Anyway, the Placoderms disorder the Abyssal Hunt again (3 damage total after all the iron resolving), and stunningly the Heartpiercers do 2! damage to the Hunter (down to 1). Which is relevant because that dude is CS1 + TC1.
Brothermark 4: The Water Elementals are corkscrewed by the High Paladin, as we both expected, with Paladin Knights in the front. Villein Skirmishers whip off the hill into a Kraken, for violence, and the Abyssal Hunt counters the Placoderms, with the Hunter in their flank.
With 12 total attaks after scythe and shadowbeast, the Hunter is more than capable of cracking some Placoderm shell, and he and the Abyssal Hunt drive them off at last. The Water Elementals are also decimated by the dragon flank. The Skirmishers do an admirable 2 damage to their Kraken, despite all the negatives!
Trident 4: Alright, alright, so that’s a big hole in my lines :/ Kraken have really limited access to the High Paladin, so instead they hit the mangled Paladin Knights and aim to one round the Skirmishers. I point a lot of guns at the dragon.
20 Heartpiercer shots (into cover) and 5 Centurion lasers (into cover plus he’s a muppet) are enough to pop the High Paladin, and I can finally take a breath this turn. 10 spare Heartpiercer harpoons into the Abyssal Hunt convert to a crazy 6 damage, putting them on 8 too. In combat, the Kraken rampage through all that horse flesh, crushing both the Paladin Knights and Skirmishers.
Brothermark 5: While the game feels pretty well in the crabs’ claws, this is a seven token Pillage game, and my lead in scoring units isn’t huge. To whit, the Abyssal Hunt thunder into a unit of Heartpiercers on the left (where there’s no inspiring!), and the Spearmen trip through the woods to tie a Kraken down, where his US1 doesn’t do anything. The Exemplar Hunter slips his gauntlet back on and powers into the Centurion as well.
A shadowy beast is once again hosted into the Hunter, moments before a rain of flaming arrows from the Bowmen remove a full regiment of Heartpiercers! Praise be unto the lords of the deep tho, the Abyssal Hunt is not able to one round the other Heartpiercers, wavering them instead on 10 damage. Likewise the Exemplar Hunter is punished for his zeal, as his whirlwind of attaks is parried and deflected by the Centurion, who wavers on 7 damage. The Spearmen do nothing at all to the Kraken.
Trident 5: A Kraken is unleashed into the flank of the Abyssal Hunt, while its kin counters the Spearmen horde in its way. Lots of regeneration happens (the left Heartpiercers dropping to 3 from 10!)
The Abyssal Hunt’s campaign of righteousness is cut short by a titanic crab in their midst. The Spearmen are stomped and pinched up to 8 damage. While the game has swung back to me, I’m pretty terrified of the Piercing Bowmen horde’s potential and have admitted I can’t do much of anything about the Hunter.
Brothermark 6: The Exemplar Hunter, blind in his rage, charges the Centurion again, hindering and ensnaring be damned. The Spearmen continue prodding their Kraken, as the Bowmen light their arrows …
Have at you, foul spawn of the depths!
A solid 6 damage later, the Bowmen get the Kraken’s attention but leave it free to rampage next turn. In combat, the Centurion once mores duels the Hunter to exhaustion, surviving the storm of blows with just a waver again. And the Spearmen run out of time on the clock to poke their Kraken.
Trident 6: With the Brothermark out of time, I punch the central Kraken forward to draw the game (2 tokens each), and move the left Heartpiercers into position to win on Turn 7. Unless the other Kraken can pound those Spearmen into goo? (Spoilers: He can’t and is doing token damage each turn.) Right Heartpiercers try to shoot down the Exemplar Hunter but it’s hard going.
Trident 7: I move the left Heartpiercers onto a token, solidify the central Kraken’s dominance of that token on the hill, and clock out rolling regen. With 3 tokens to 2, this is a …

SCUTTLIN’ VICTORY (16-4)

There’s a different version of this game where Wyatt didn’t go so ham into a charge I wanted him to take, but I also think my list matches pretty well into his, with my phalanx, speed and rampage (also guns). He had some misgivings about his choices in our game, but wore it well. For me, I won’t pretend finishing Day 1 with a win didn’t feel great. After this we got grub and partied at the house of the TO, which was super nice of him and his spouse.

UP NEXT: Undead!