FREEFORGED 9: UNDEAD

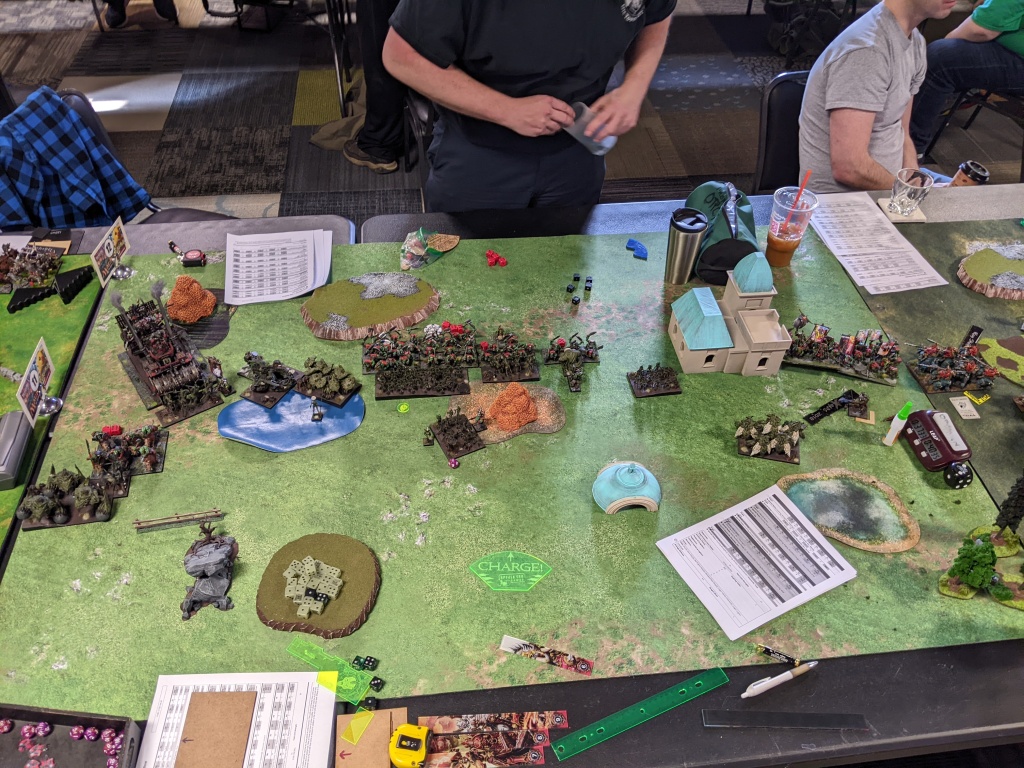
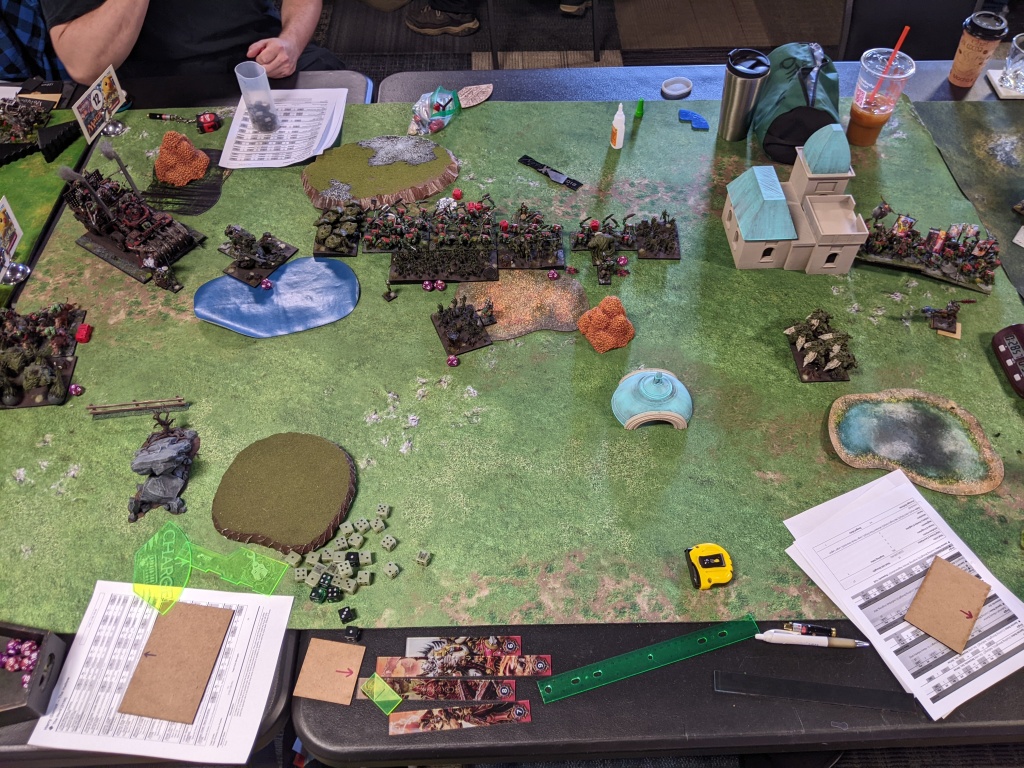
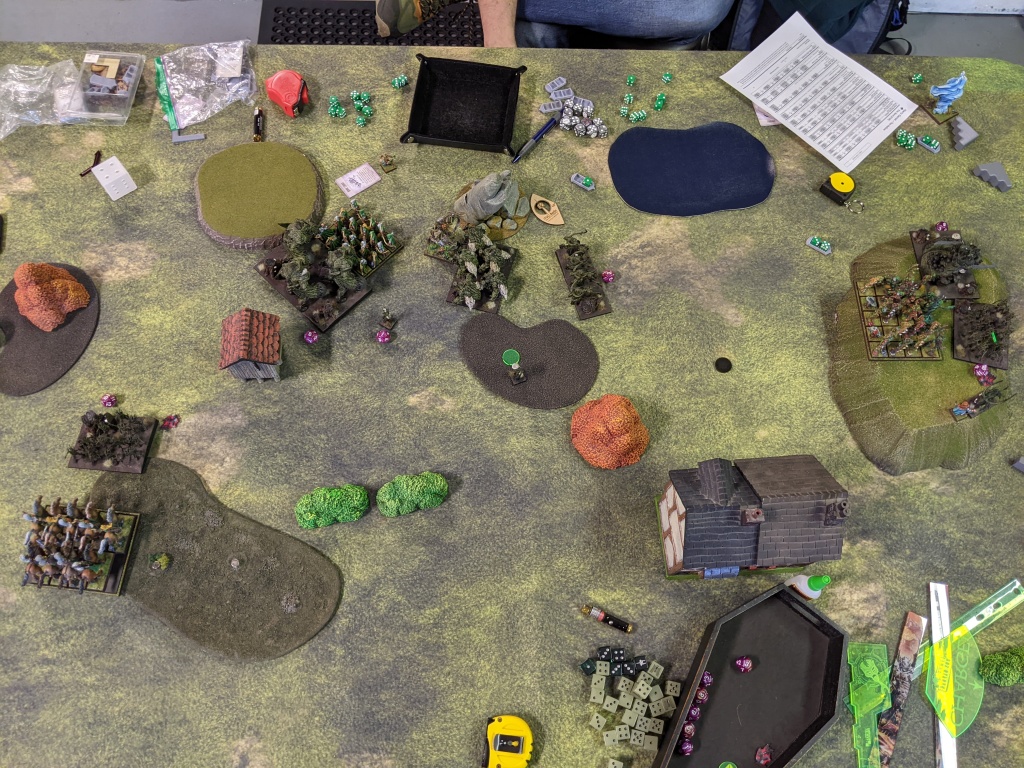
My clubmate Drew is feverishly working on loads of terrain for our Dead of Winter GT in January, but he’s also playing in it and figured he should probably see if he still remembers of Kings works. I’m always down to smash so had him over one recent Sunday afternoon.

FREE DWARFS
Earth Elementals Horde – Brew of Sharpness
Earth Elementals Horde
Mastiff Hunting Pack Regiment – Throwing Mastiff
Greater Earth Elemental – Craggoth & Kholearm
Greater Earth Elemental
Dwarf Lord on Large Beast – Blade of the Beast Slayer
Dwarf Lord on Large Beast – Orb of Towering Presence
Free Dwarf Stone Priest – Conjurer’s Staff, Surge (8), Bane Chant (2)
2150 (12/21)

Yea baby, Craggoth is back! I realized I could get my large resin son on the table at 2150, so even if the Stoneclaws are god tier units I couldn’t resist the temptation. Taking so many triples at an event that only allows triples seems kinda spammy but big ol’ shrug there. Also I took throwing mastiffs again because it was that or bloat up the Stone Priest, which I was still hesitant to do.

UNDEAD
Wights Horde – Brew of Sharpness
Wights Horde – Brew of Haste
Wights Horde – Boots of Striding
Soul Reaver Infantry Regiment – Chalice of Wrath
Zombies Regiment
Zombies Regiment
Zombies Regiment
Wraiths Troop
Wraiths Troop
Vampire Lord on Undead Pegasus – Surge (4)
Vampire Lord on Undead Pegasus
Necromancer – Inspiring Talisman; Surge (6), Bane Chant (2)
Necromancer – Surge (6), Weakness (2)
2150 (13/22)

Drew hasn’t played his Undead in 18 months and as far as I can tell this is basically the same list as back then. Triple Wights make me endlessly salty (spamming mediocre things is cool, spamming amazing things is boring), but when I spend any time thinking about their drawbacks (i.e. very high points and irregular) I grudgingly can see that they aren’t broken. And Sp 7 puts them on the back foot when it comes to alpha-ing things … except when you’re fighting a Sp 4-6 army 🙃 There are things I’d do differently in this list (trash all the items to upgrade the Zombies to Skeletons or turn the third Zombies into something that does something) but Drew can’t paint anything new so is kind of stuck. And he refuses to play his beautiful Gnollgres any more into the modern meta, because “Ogres suck” 😛 Regardless, this list has 4 units capable of really mangling my metal children, plus the Vampasus nonsense.

We tried out Stockpile this game, one of the new missions from Clash ’24. It’s like Loot but each of the three Loot markers can generate 2-3 tokens each (3 for the center, 2 for the other two). After they’ve been ‘dug up’ or whatever they work the same as normal Loot tokens, as far as carrying them around, etc. goes. Drew won first turn and took it.

BATTLE

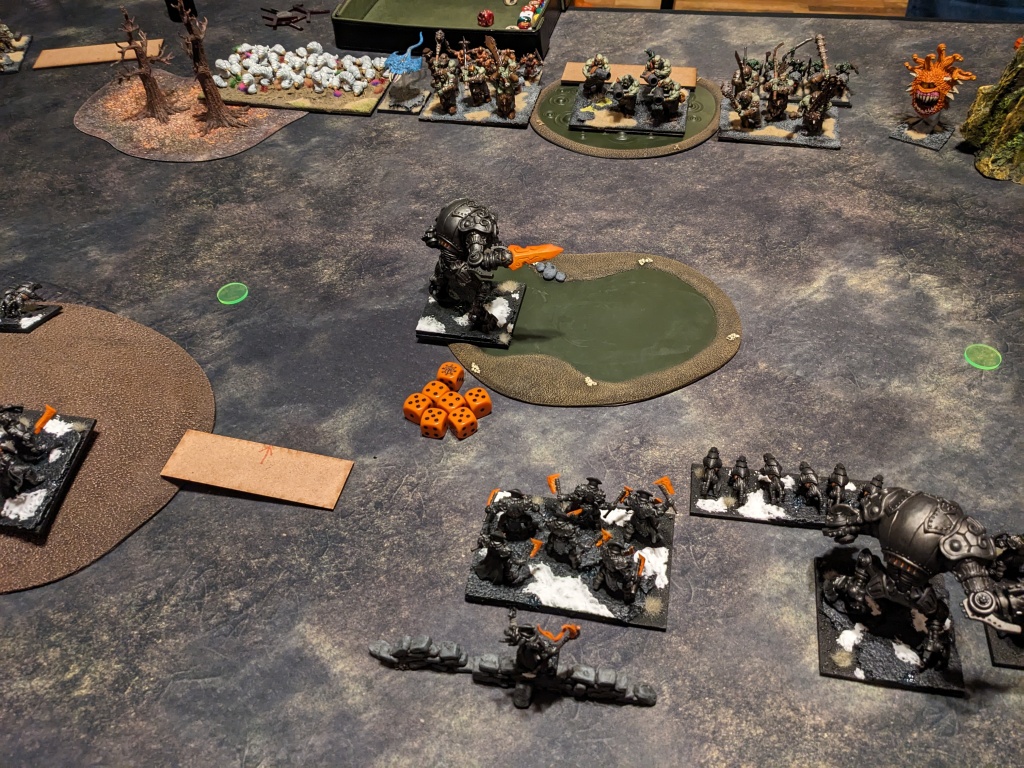
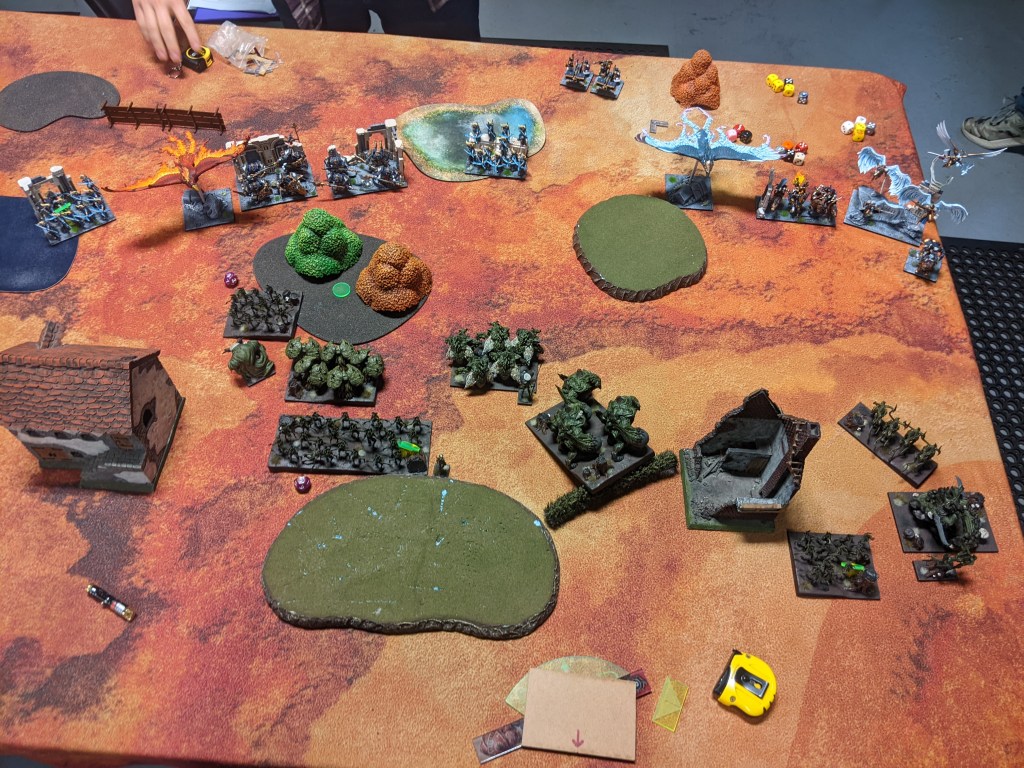
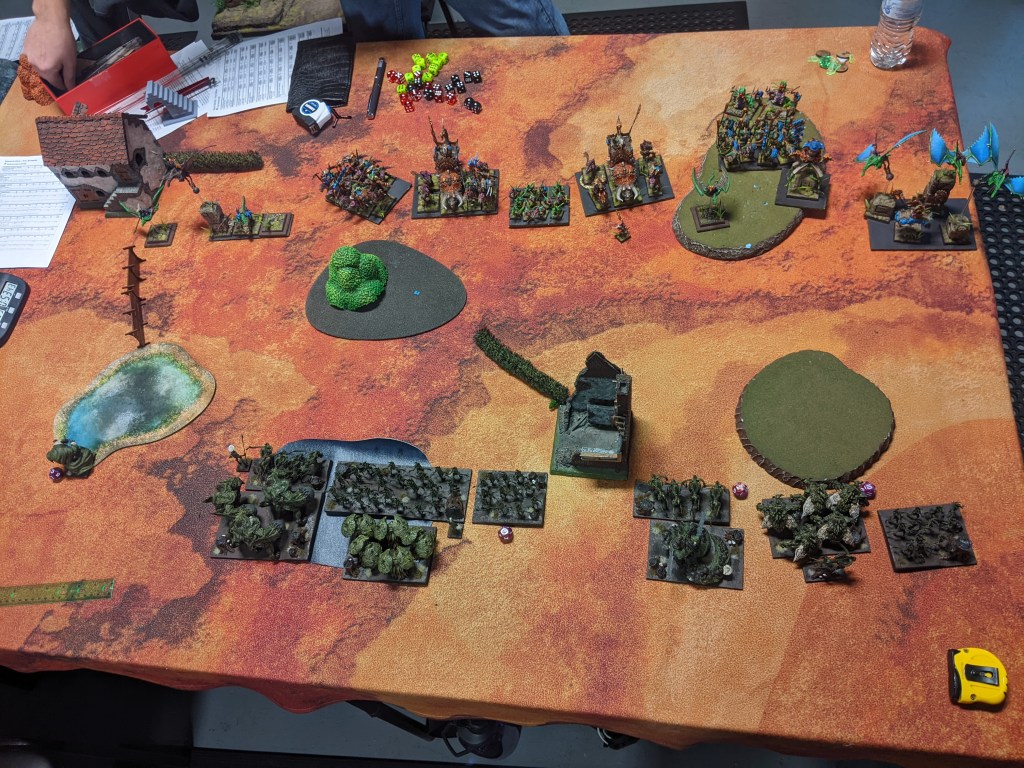
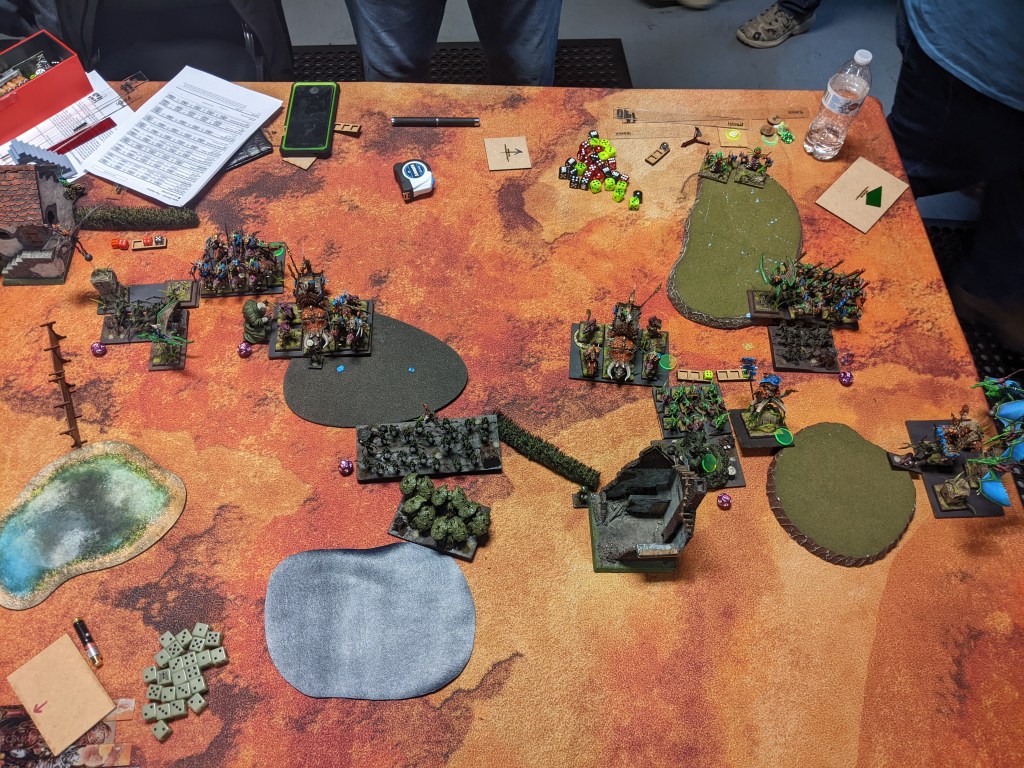
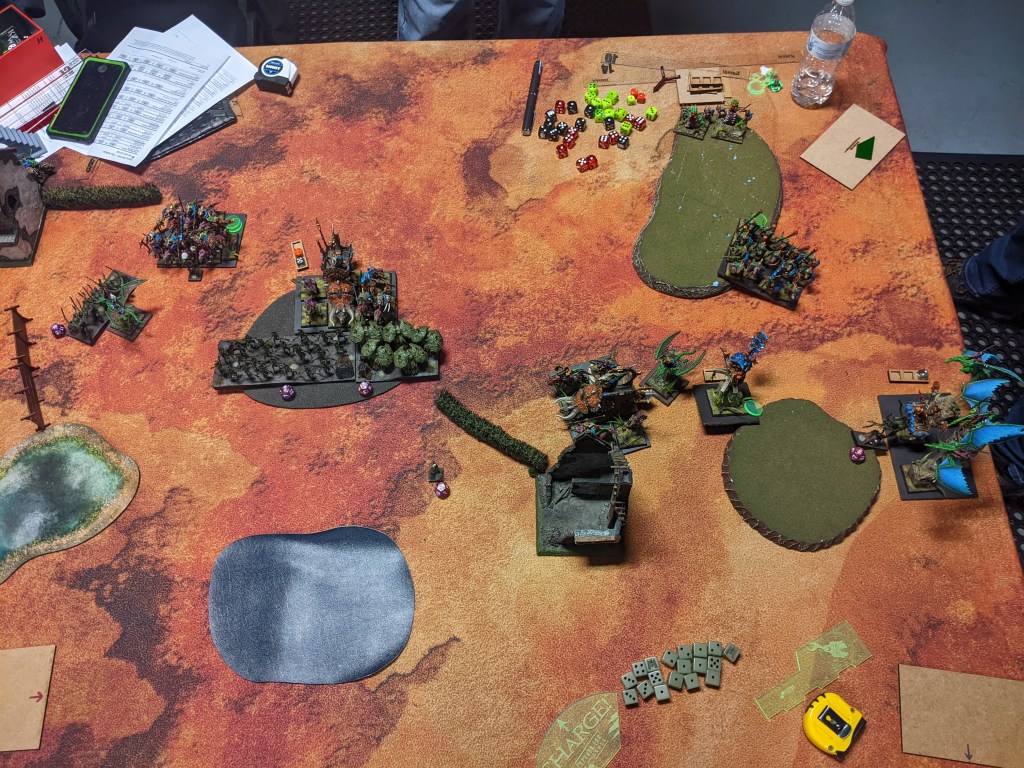
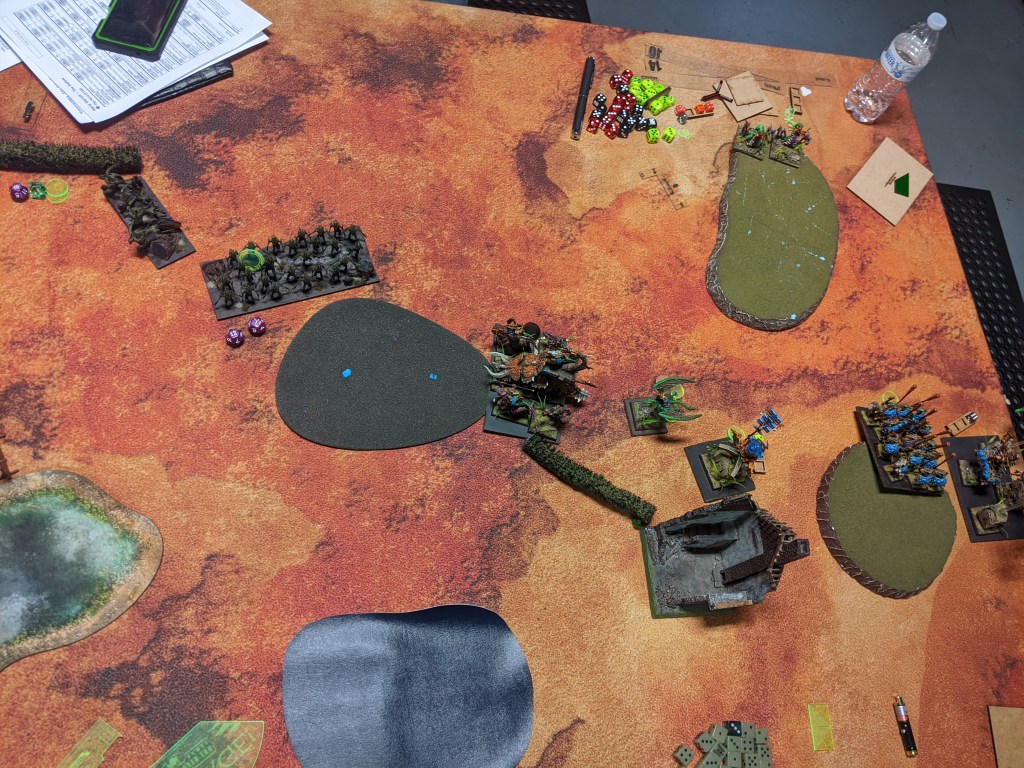
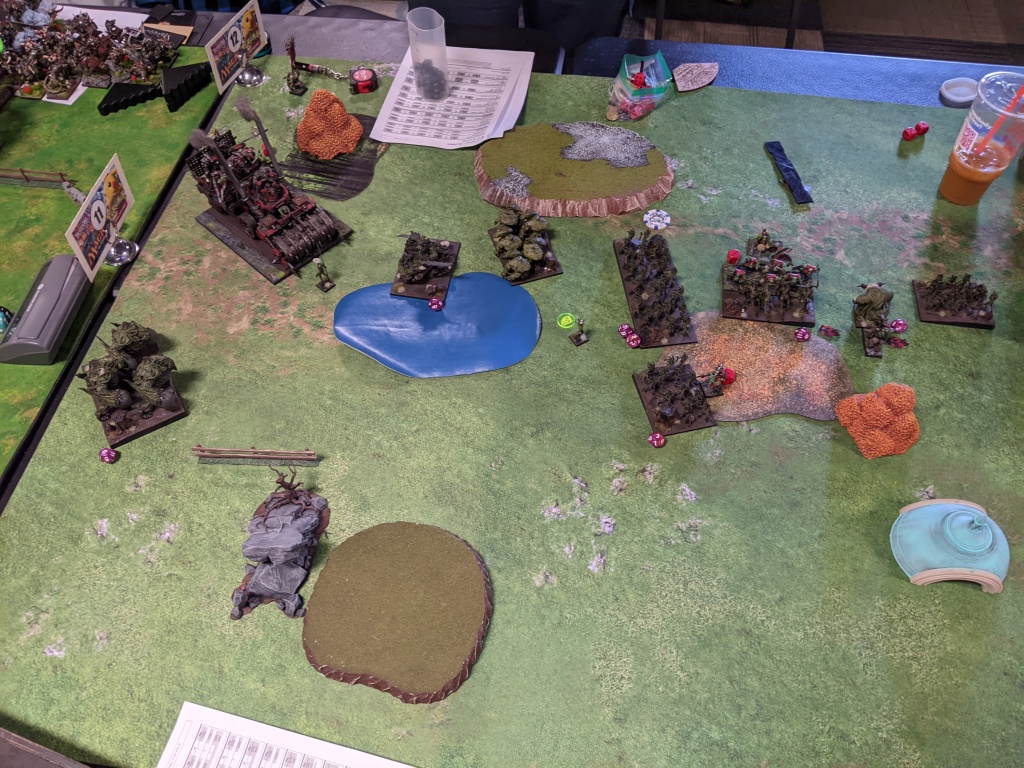
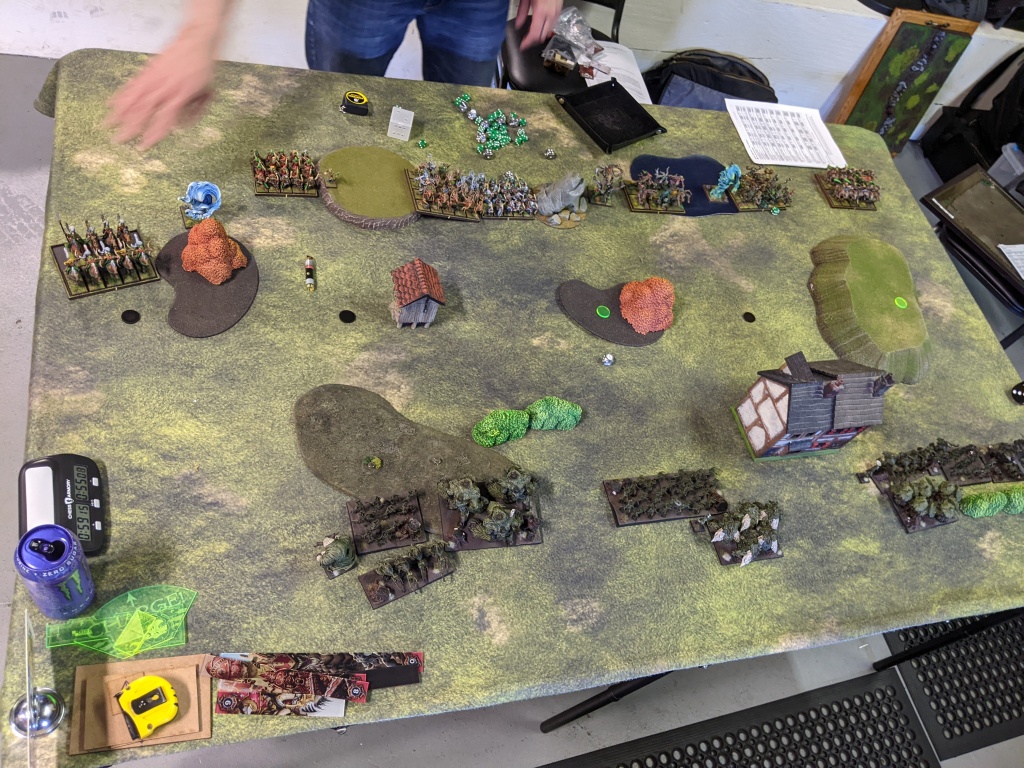
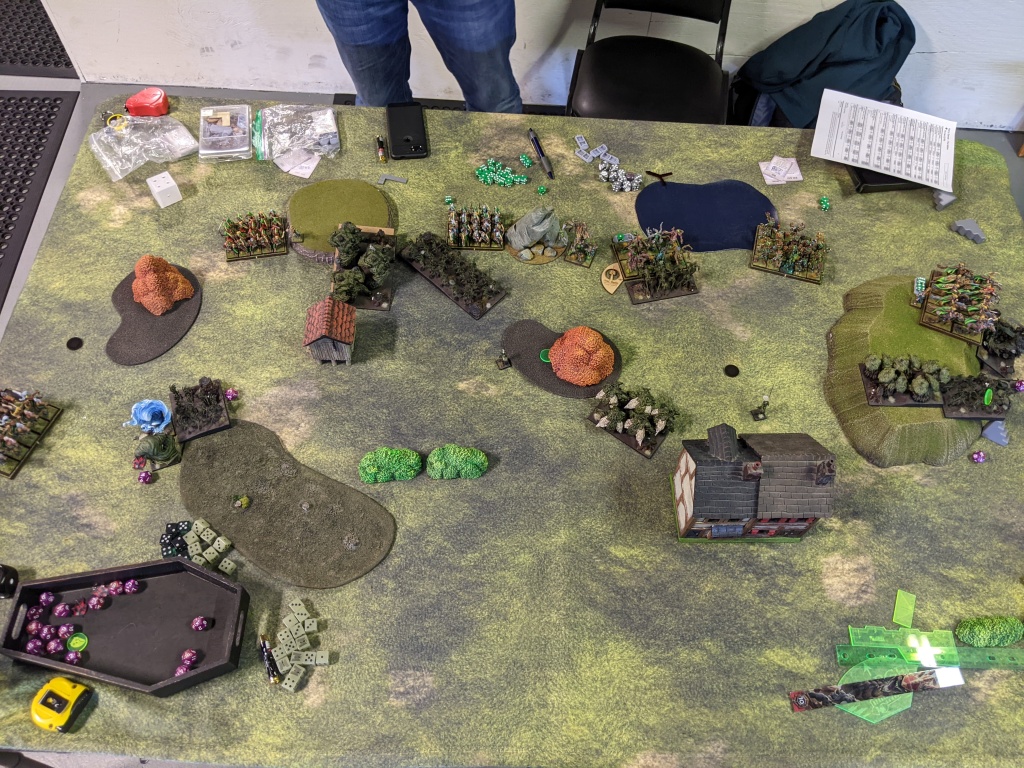
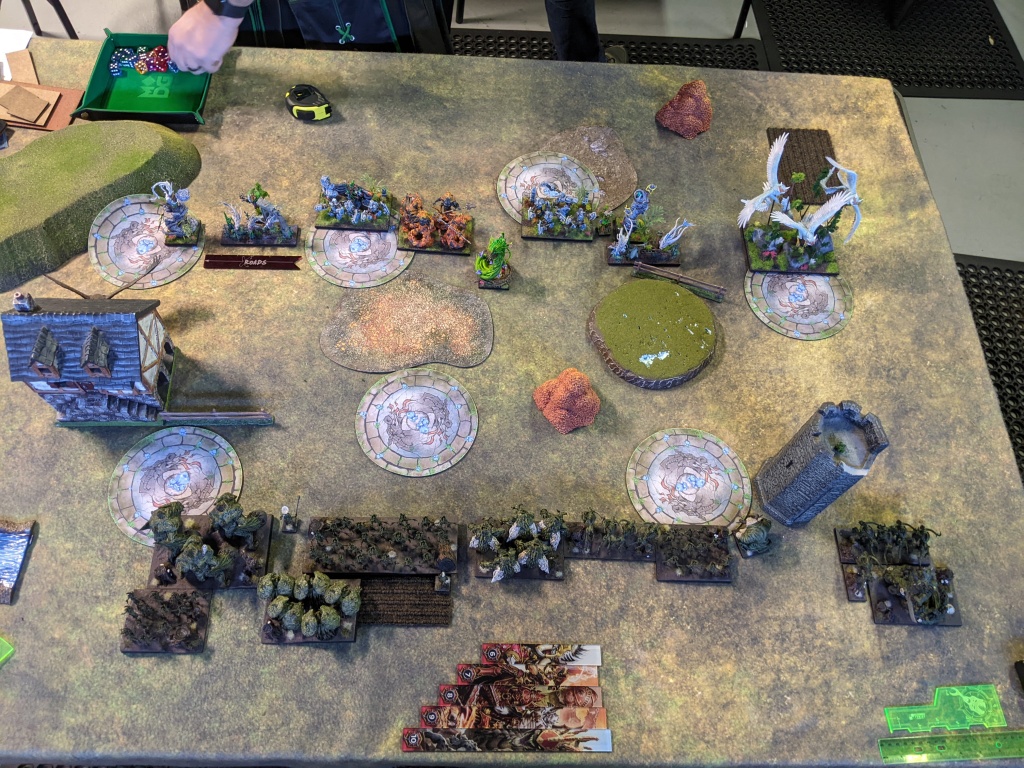
Turn 0: Undead deployment worth noting = the surge Vampasus is on the left, the inspiring bane chant Necromancer is in the center swamp, and the Wights are (left to right) Sp 8, strider, and sharpness. My sharp Earth Elementals are in the center. Craggoth scouts forward directly into the right Vampasus’ face, generally making his life difficult.

Turn 1: The Undead creep forward! After some debate, the right Vampasus abandons the flank, not able to hop past Craggoth. But a Necromander weakens the big robot scorpion for good measure.

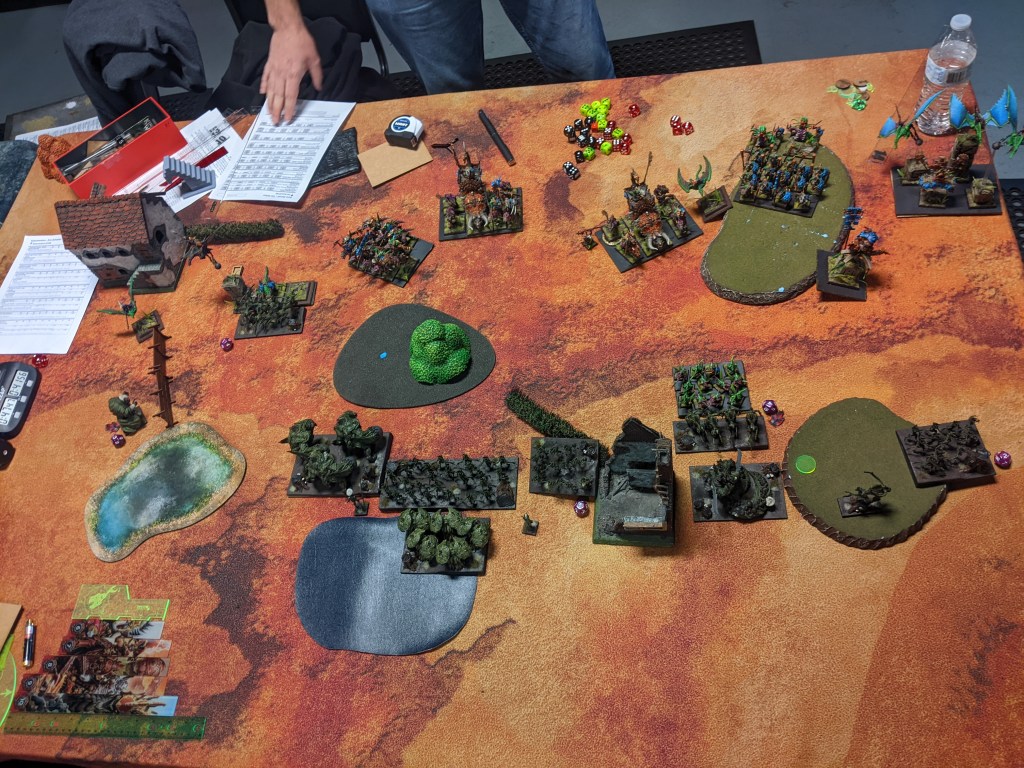
The Freeforged stumble forward in response! All three Mastiff Packs scamper up and dig tokens out of the Stockpile markers. I’m essentially doing the dirty work, assuming Drew will smash the dogs and take my tokens, but I’d rather we were fighting over something so may as put some tokens into play.

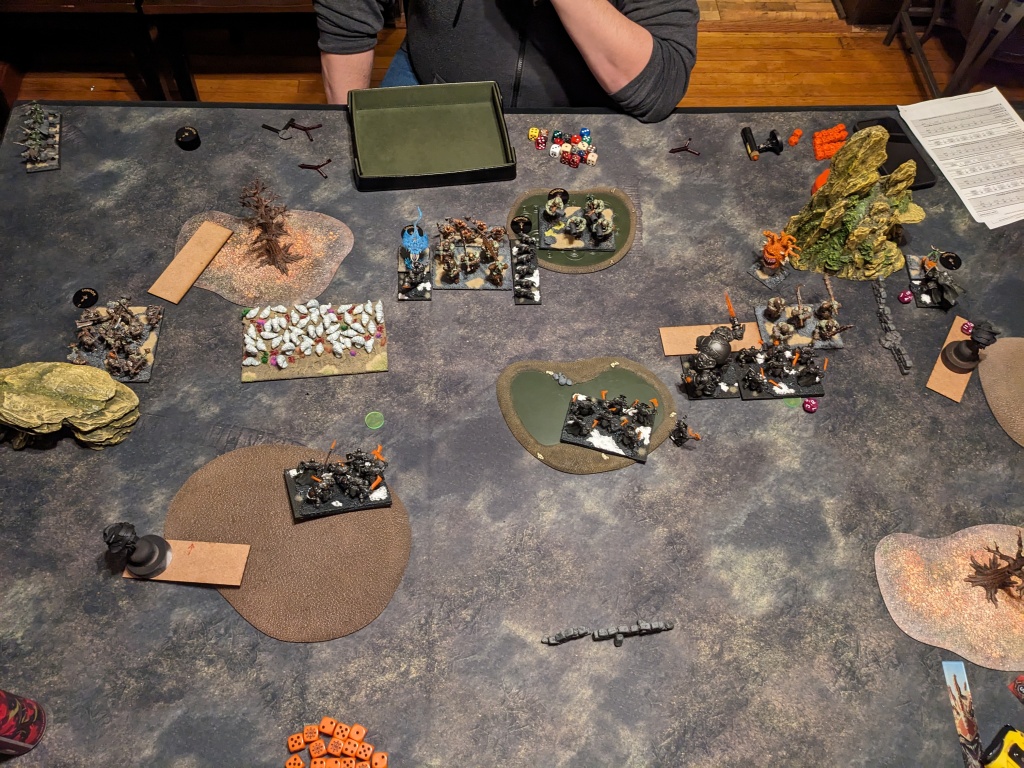
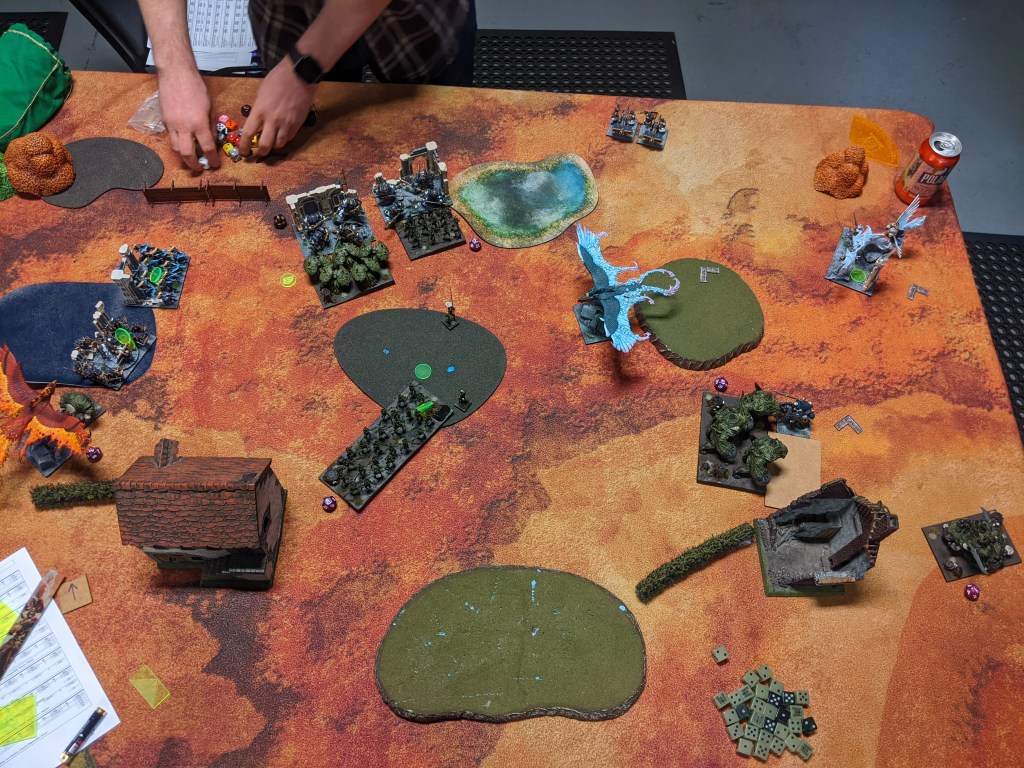
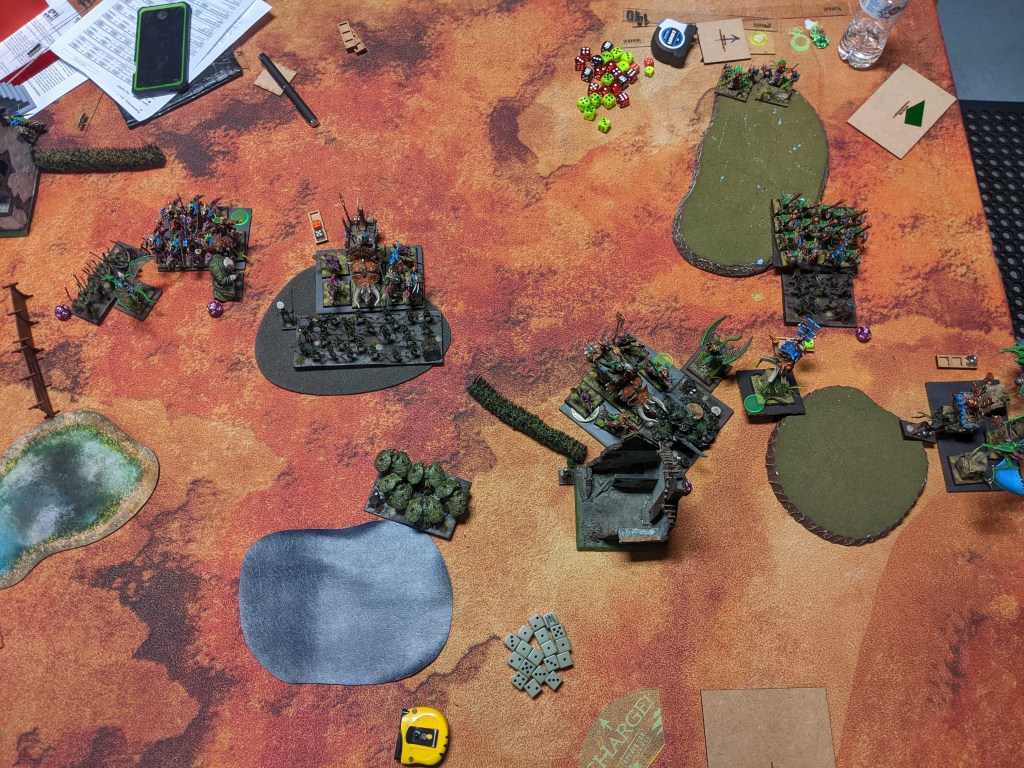
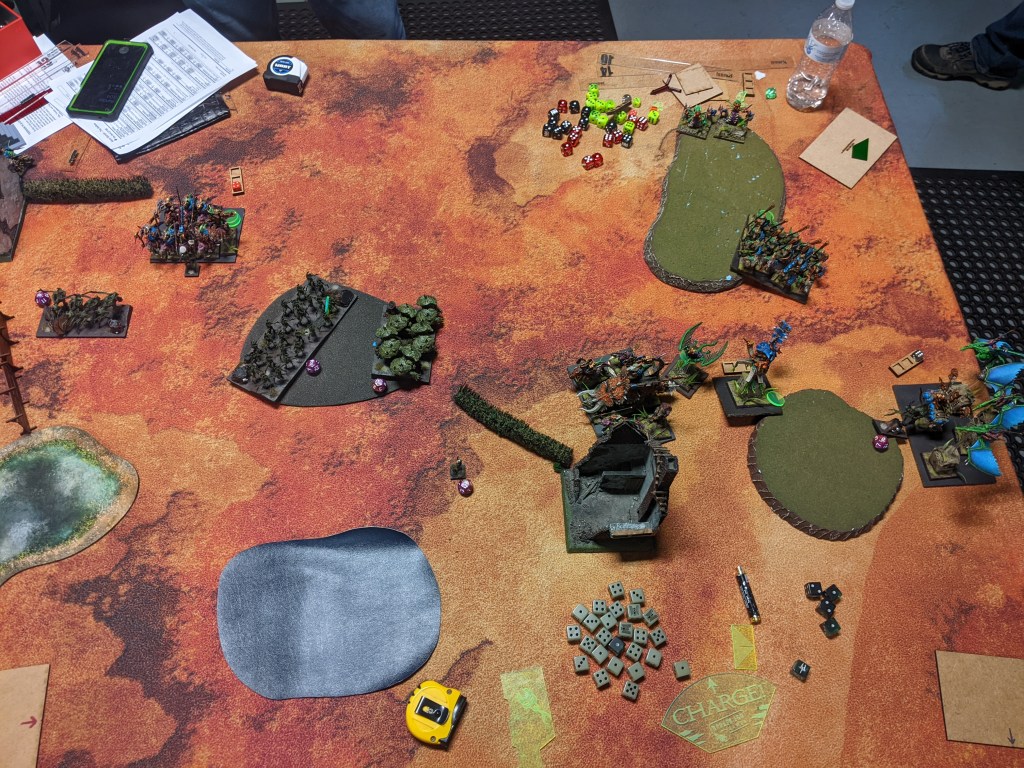
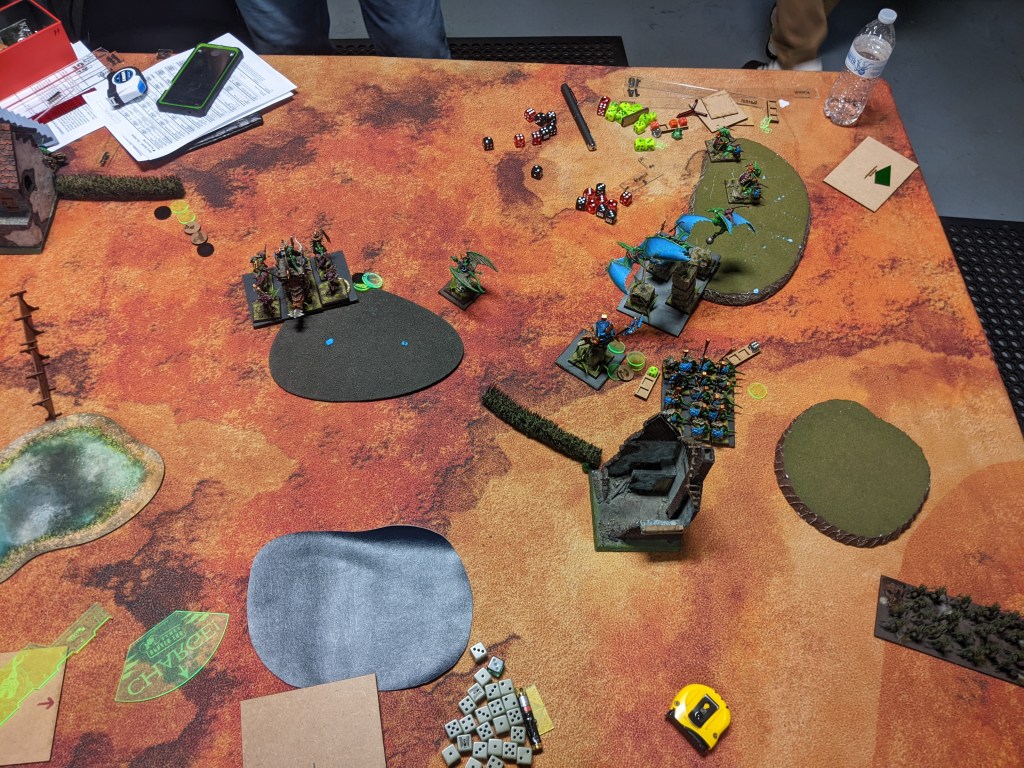
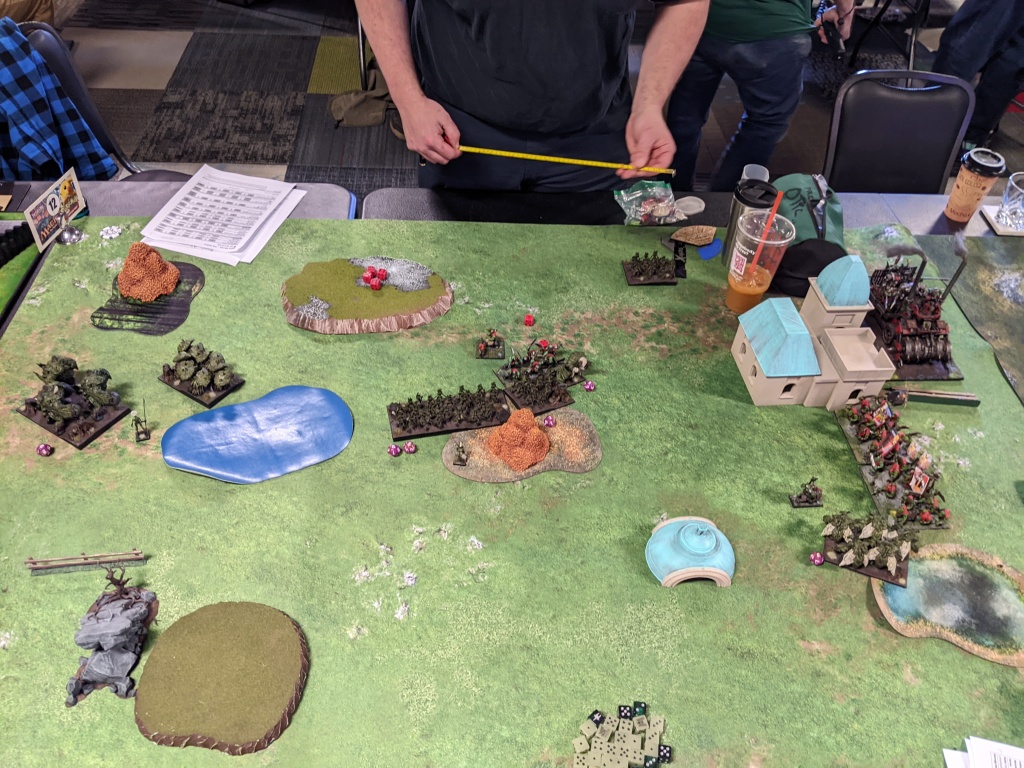
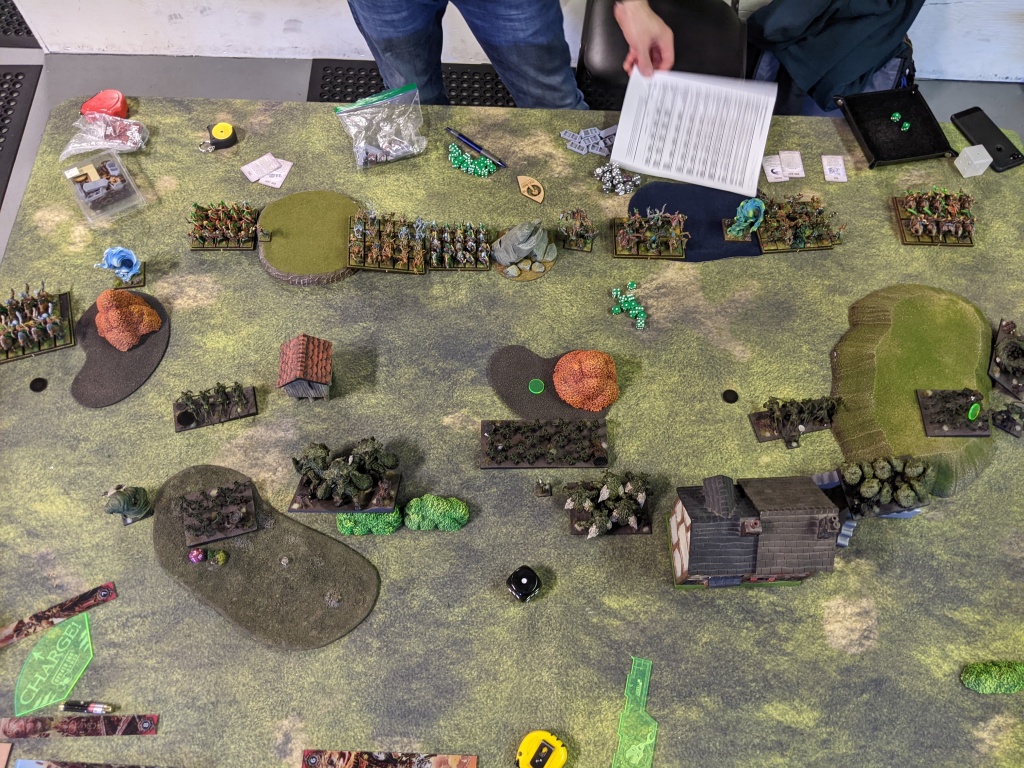
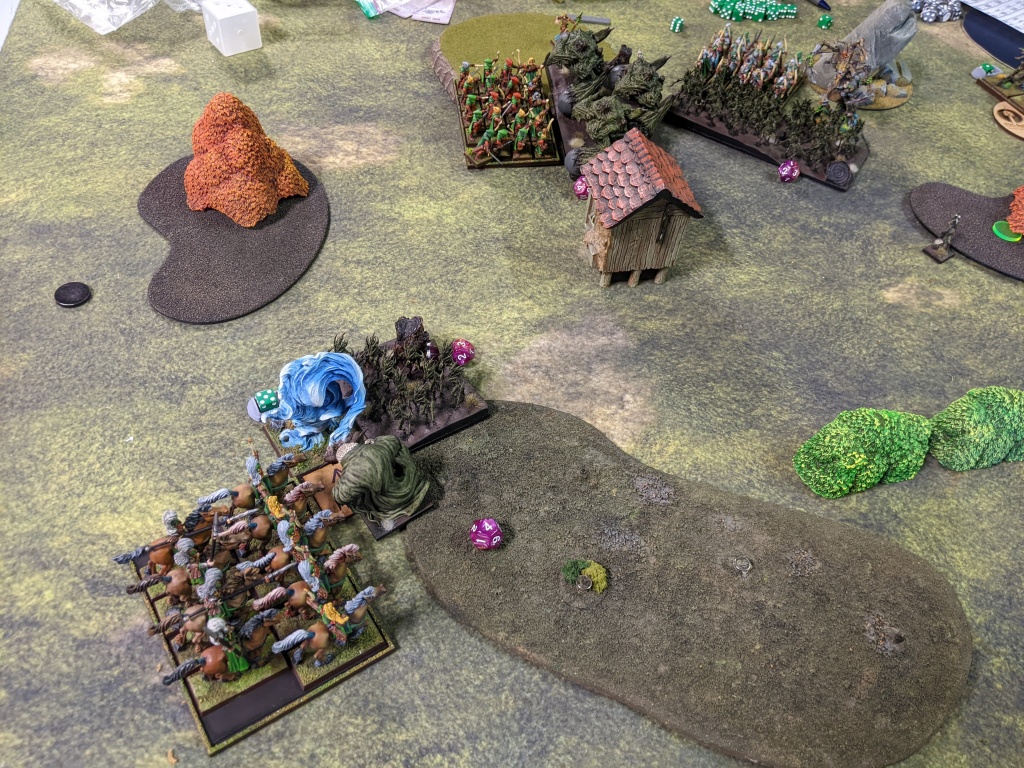
Undead 2: Drew refuses to commit any hammers 😐 Instead it’s a chaff off, with two regiments of Zombies swarming off the hill into Mastiffs on the left (3 damage) and bane chanted Zombies and Wraiths dismembering the pack in the center. Those Zombie units pull more tokens out of the Stockpiles while they’re at it. Also Craggoth is weakened a second time.

Free Dwarfs 2: While they aren’t the trades I want, I figure I might as well go hard and see just how much the premier Undead hammers can lift. Starting on the left, the orb Beast Lord grounds the fast Wights (4 damage), while the Earth Elemental horde on that flank joins up with the Mastiffs to do 6 damage to some Zombies (…). In the center, the sharp Earth Elementals charge off a hill into the 2 token Zombies, doing 15 damage from 18 attaks and obliterating them. They dig up a token in the process, going to 3 tokens and pretty much guaranteed to die next turn. They face the Soul Reavers so at least the strider Wights have to use a surge to flank them. Unfortunately, the Greater Earth and Earth horde (bane chanted!) to their right only manage 8 damage into a troop of Wraiths, then snake eyes the roll. So I don’t even have a reprisal when the sharp rocks die. Boo.

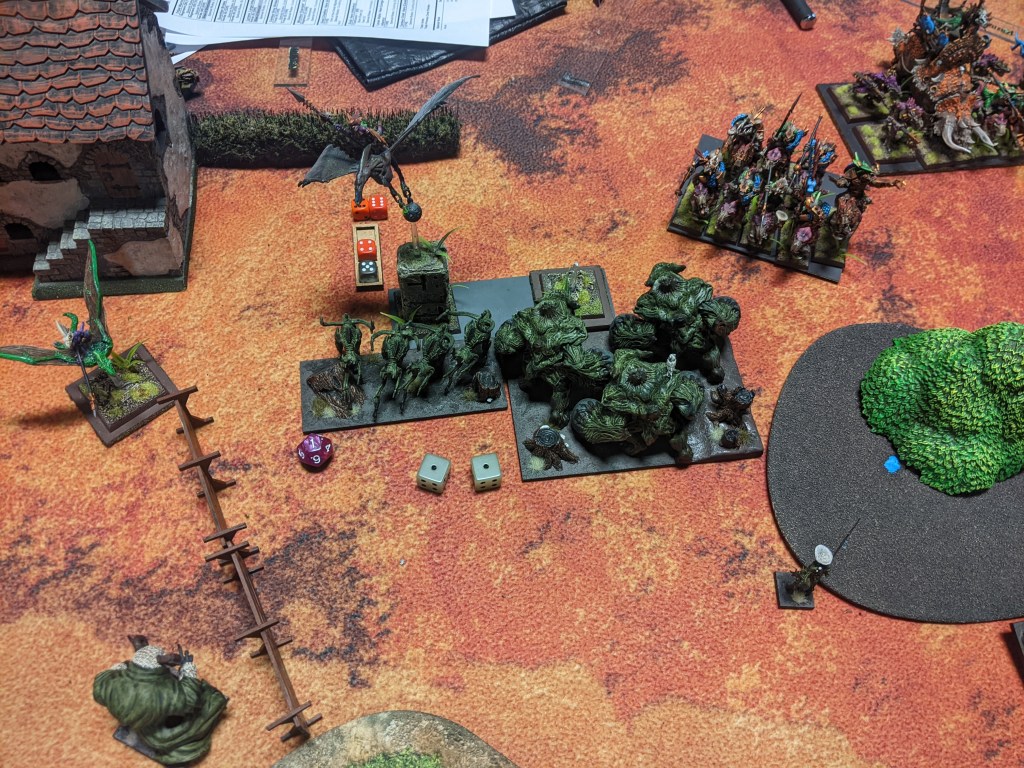
Over on the right, the surviving Mastiffs dig up a second token, step into the woods and unleash bees at the weakness Necromancer! Decent damage is dealt through the magic of throwing mastiffs receiving no negatives to hit. Craggoth skitters forward and hits the decrepit heretic with fireball 10, which adds a couple more damage (and shattering) despite being weakened. The Necro incinerates, which is Very Cool.

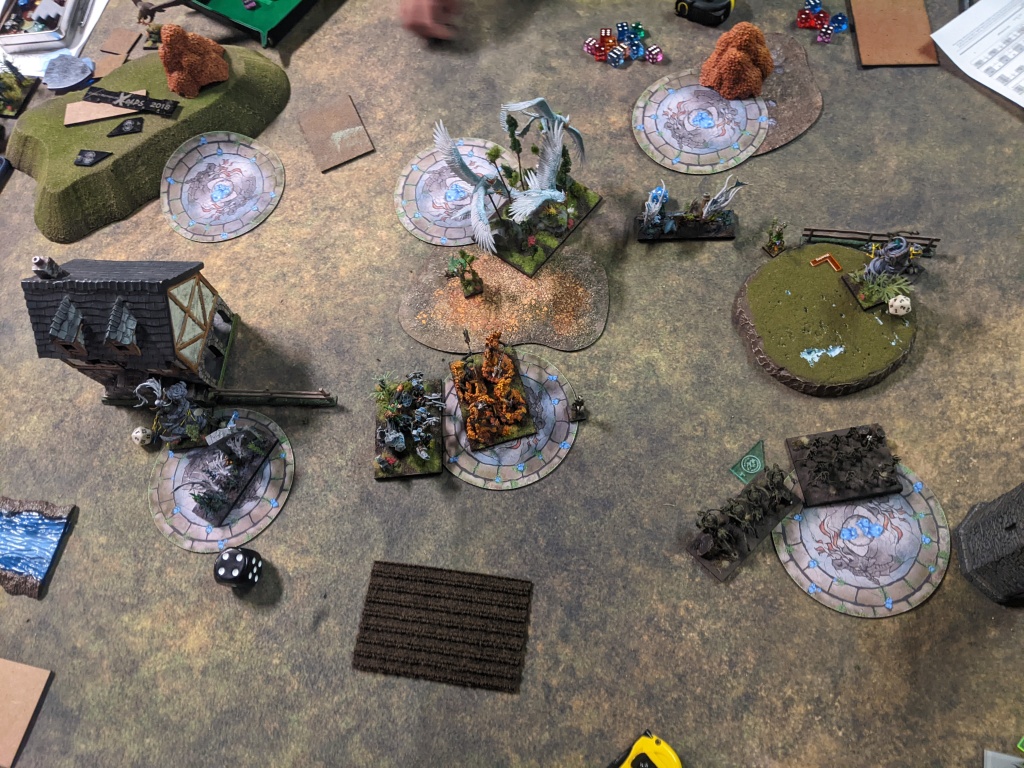
Finally, I hold the other Greater Earth on the left/center back, 12.5″ away from the Soul Reavers but unfortunately within range of the other Wraith troop. I legit forgot that they charge 14″ and thought I was being cagey 😦

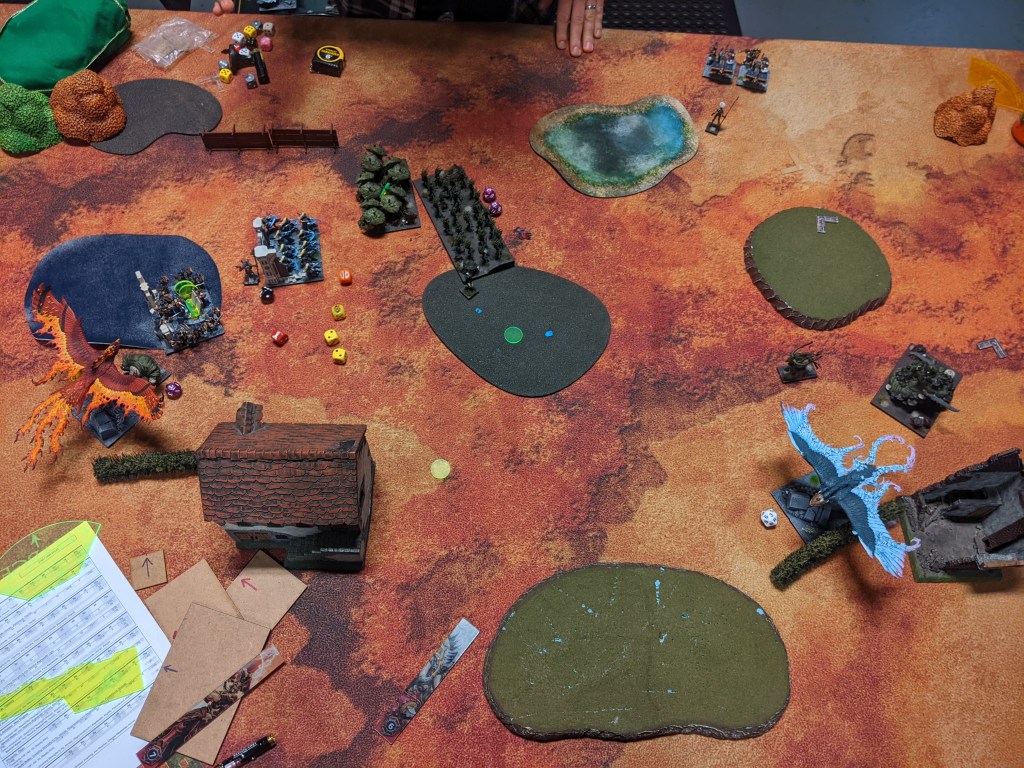
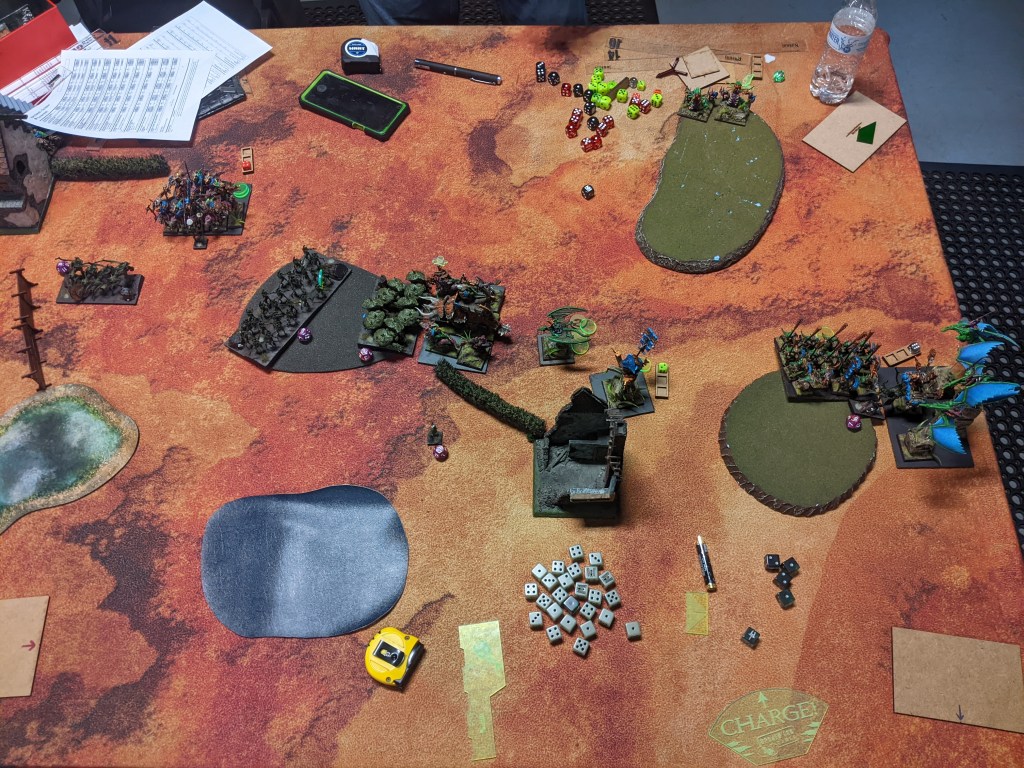
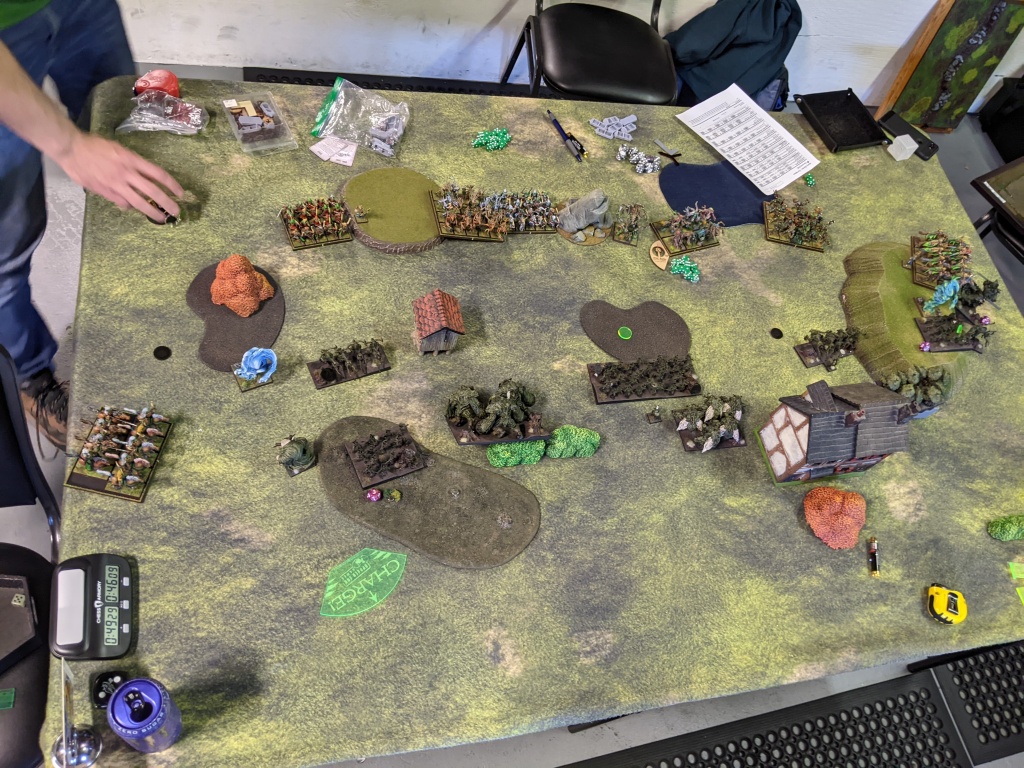
Undead 3: So naturally those Wraiths charge the GEE to block him up. They do no damage but bleh. In other news, the Wights on the left chunk 6 damage into the Orb Lord, wavering him, while the Zombies on that flank mob the Earth horde (0 damage) and the Mastiffs (up to 5 damage). The sharpness Earth Elementals are indeed front charged by Soul Reavers and surge-flanked by the strider Wights. Despite being De 6, my dudes are absolutely wrecked, with their 3 tokens going to the Soul Reavers because Wights lose a lot by picking up a token (-2 Sp, no fly, no surge). Also the Wraiths in the center do a sterling 2 damage to their Greater Earth Elemental.

On the right, the sharpness Wights (hinder) charge Craggoth and do 7 damage, and the non-surge Vampasus (hinder) charges the 2 token Mastiffs in the woods and does nothing. I’ll take it.

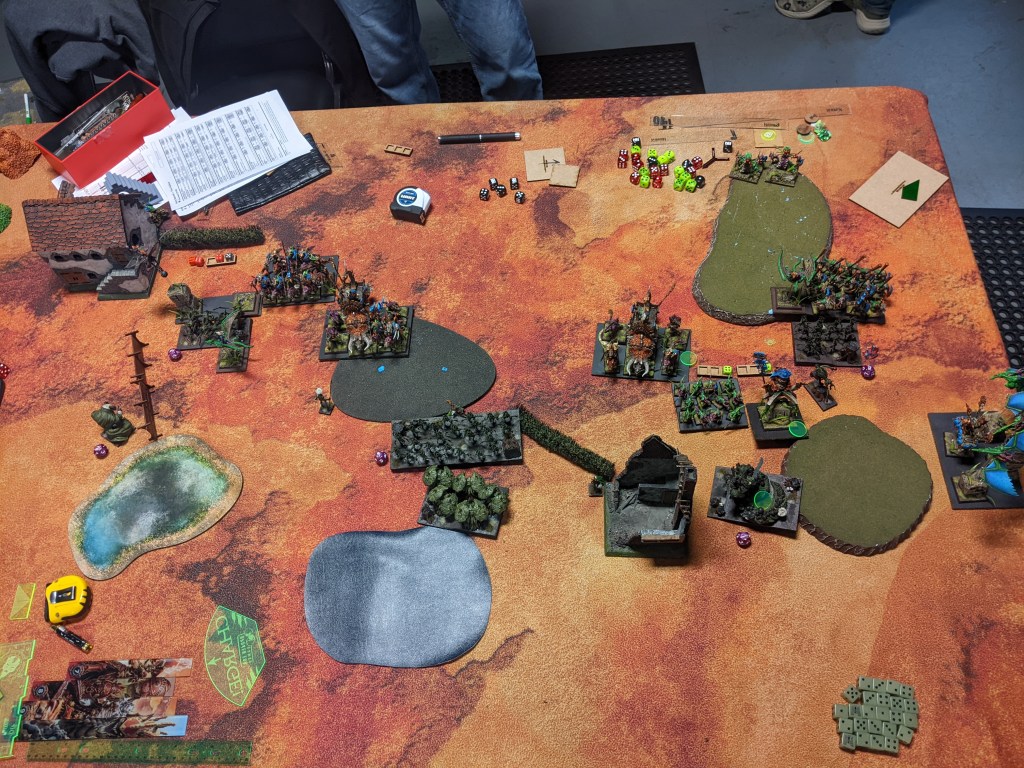
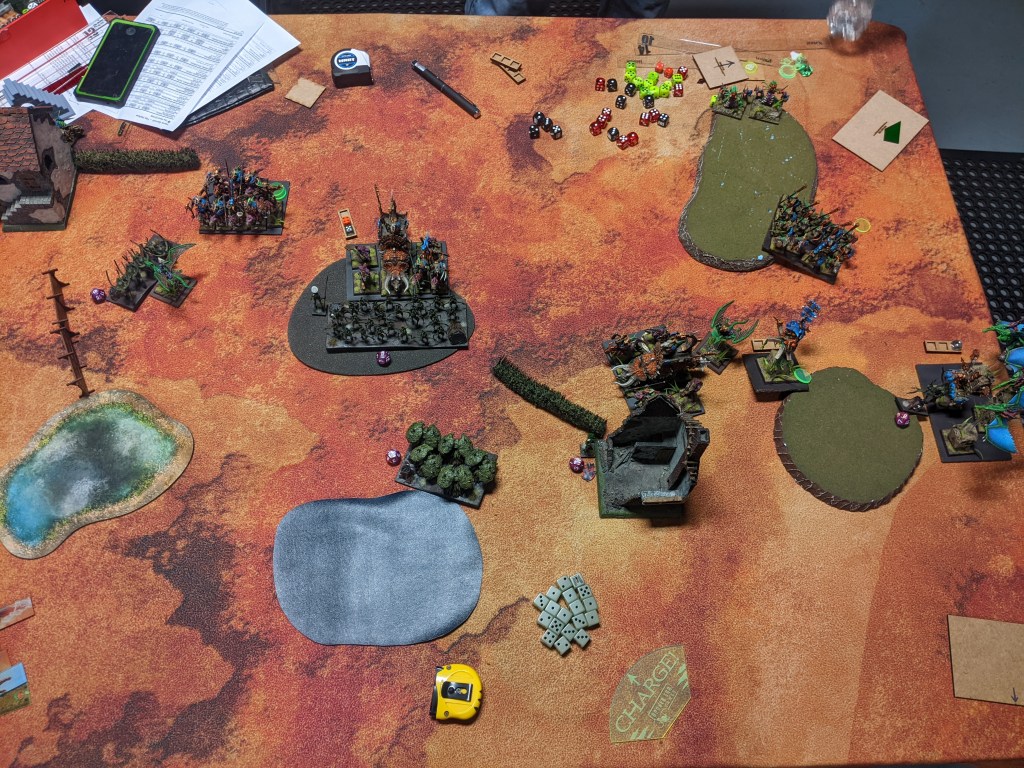
Free Dwarfs 3: I am feeling distinctly behind at this point, with all the counters I setup to retake the middle stuck on stupid Wraiths. To wit, both Greaters counter-charge their Wraith troops and slaughter them (the Earth horde in the center helps out in a flank because they have nothing else to do). The Orb Lord fails his headstrong, freeing the fast Wights to do whatever they want (!!), but at least the Earth horde on the left flank routs some Zombies, taking their token. The Mastiffs over there chomp 3 damage into the other Zombies.

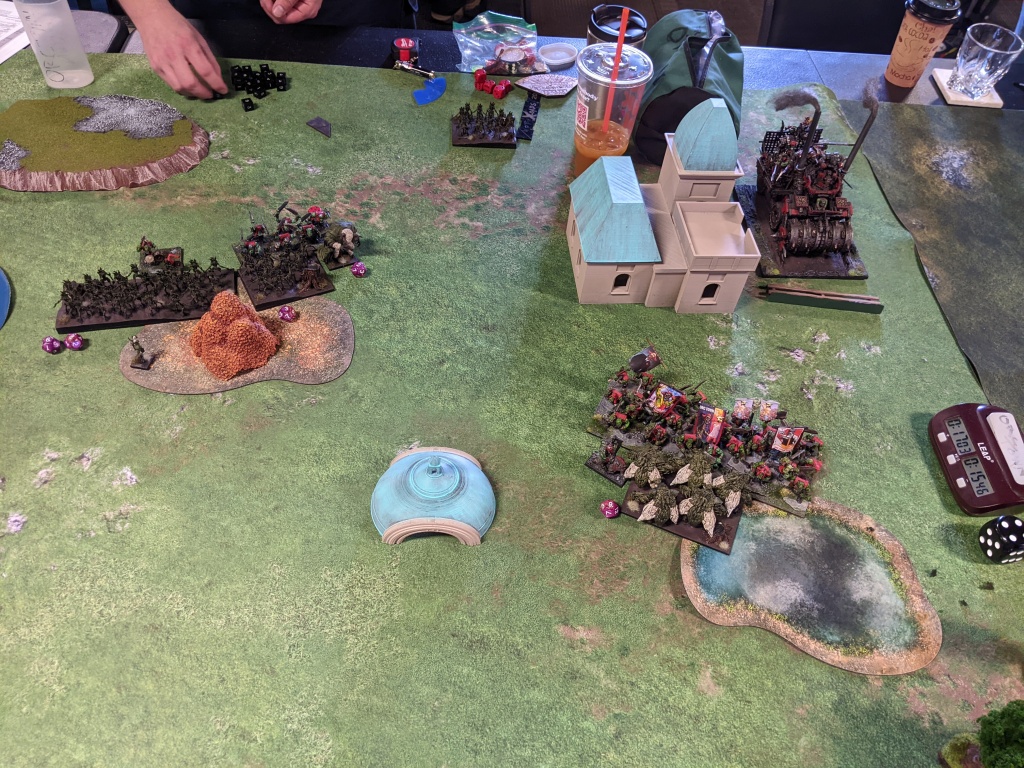
On the right, the Blade Lord flank charges (hindered) the sharpness Wights after the 2 token Mastiffs back 3.5″ away from the Vampasus in the woods. The Blade Lord and Craggoth smash 8 damage into the Wights but can’t nab the rout (Math-centric readers will note I should have done 10-11 damage, which is pretty gnarly with brutal tacked on, but my damage dice have been anemic this game.)

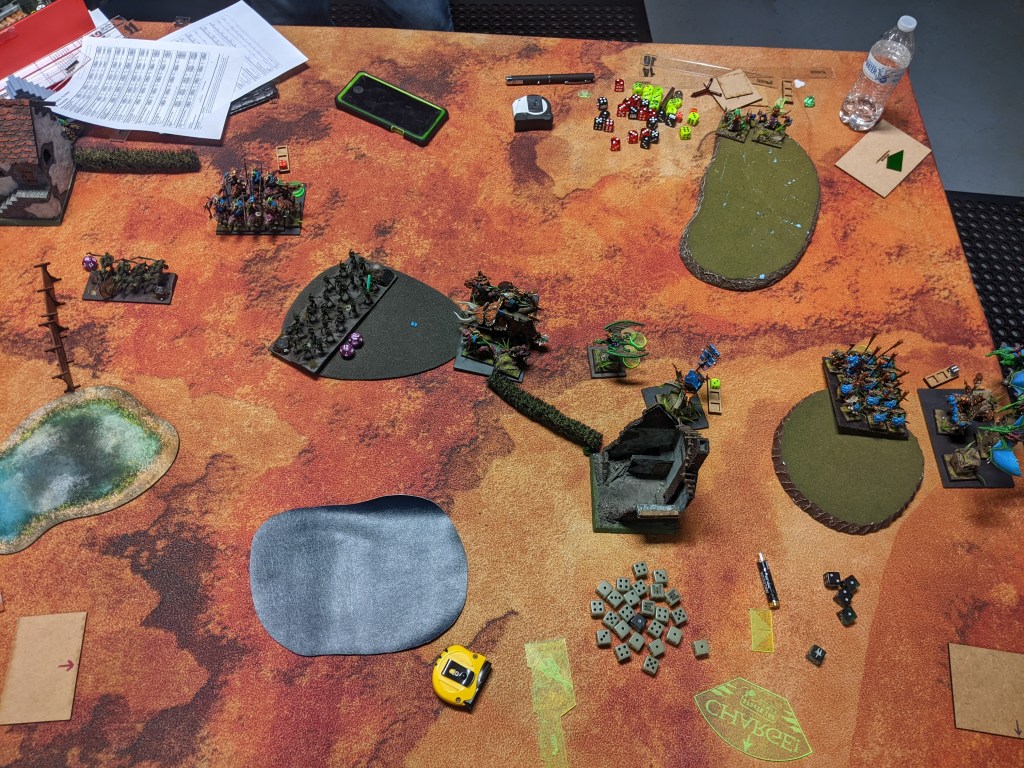
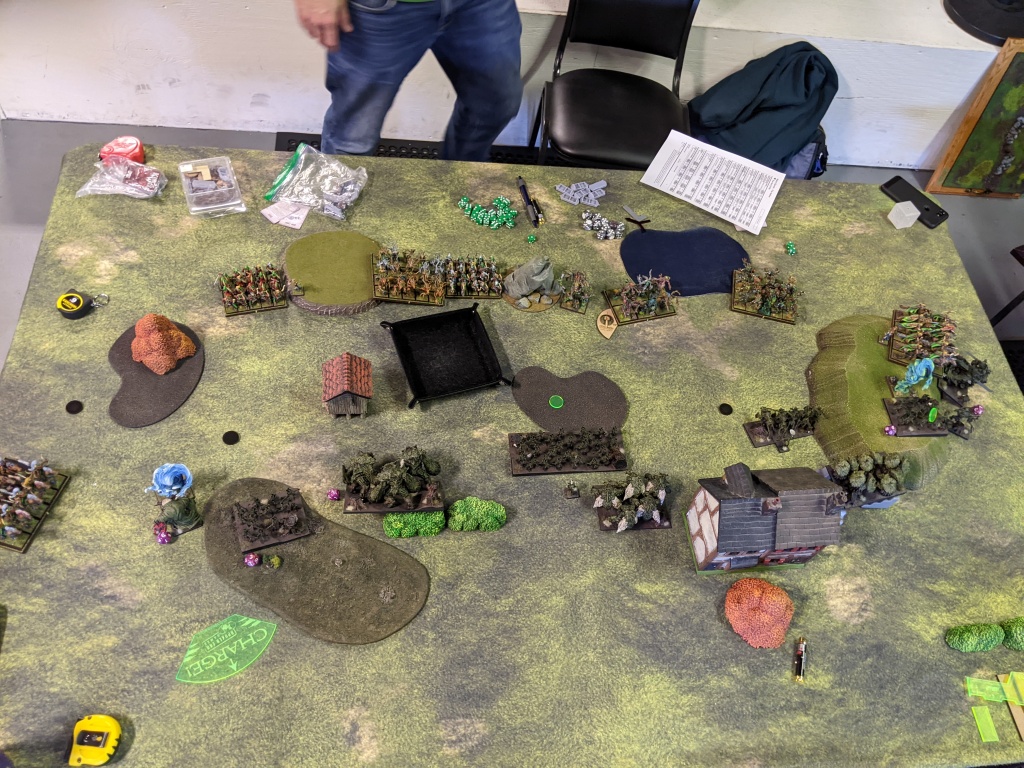
Undead 4: The Blade Lord is flanked by a (hindered) Vampasus and countered by the sharpness Wights, and is reduced to slag. Rip that guy. The Mastiffs on the left are also torn apart by Zombies, who scoop up their token, and the fresh Earth Elemental horde in the center, a De 6 -/18 unit, is one rounded by the strider Wights. What the living hell, Drew! But it’s not all bad news as the fast Wights don’t even waver the Orb Lord on 12 damage, and the Greater Earth charged by Soul Reavers holds firm on 9 damage, which is the first time Drew has rolled a statistically average round of damage.

Also the surge Vampasus on the left flies over and blocks the other Greater Earth from flanking the Soul Reavers and saving his buddy.

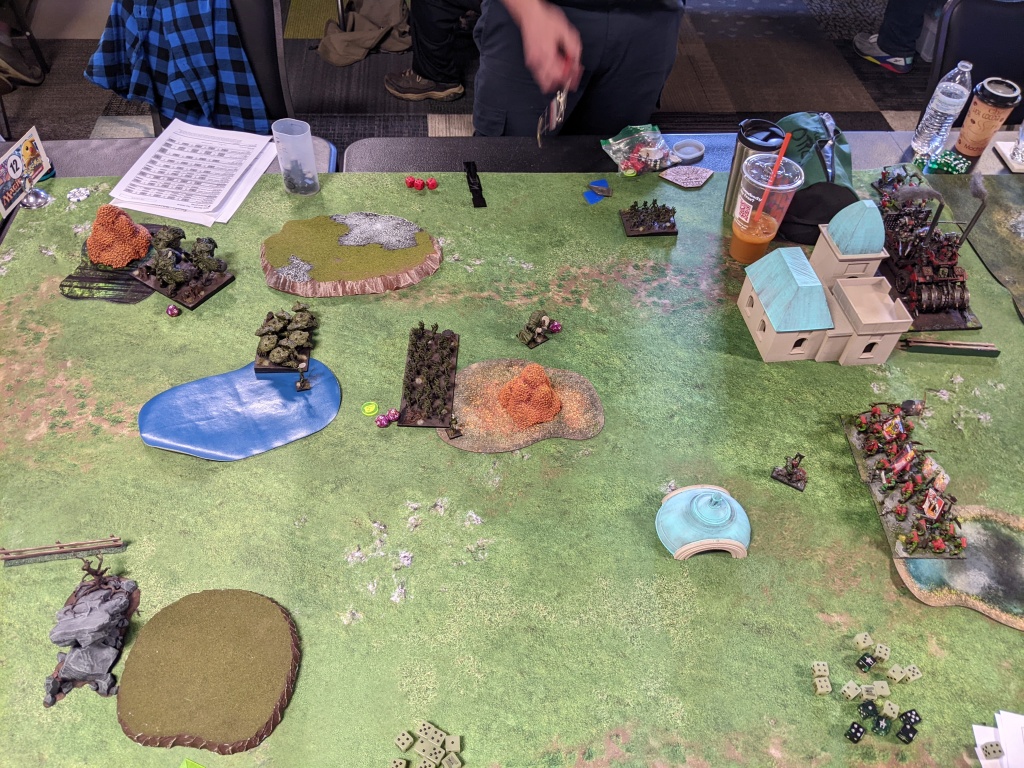
Free Dwarfs 4: I feel like I need a miracle to combat Drew’s insane damage dice at this point, but you what, I’ll take hot rout dice instead. The last of the Earth Elemental hordes (!) charges the fast Wights alongside the Orb Lord, putting the super ghosts to bed. Shortly after this, the Greater Earth in the lower left obliges the Vampasus and charges in, but I slam a double 10+ rout through and one round her! The other Greater Earth doesn’t work the same magic (5 damage on the Soul Reavers) but bane chanted (hindered) Mastiffs in the flank and Craggoth in the front does see the terror of the sharpness Wights ended as well. Two Wight hordes and one Vampasus is a heavy hit but Drew has two healthy hammers and two objective holders left to work with.

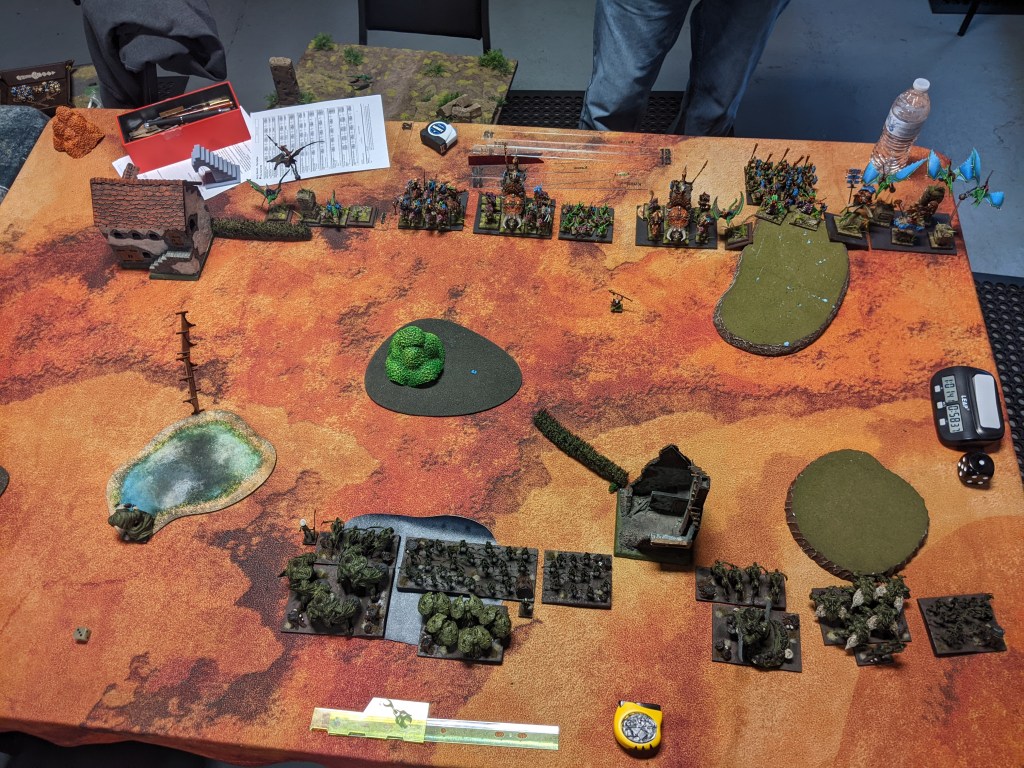
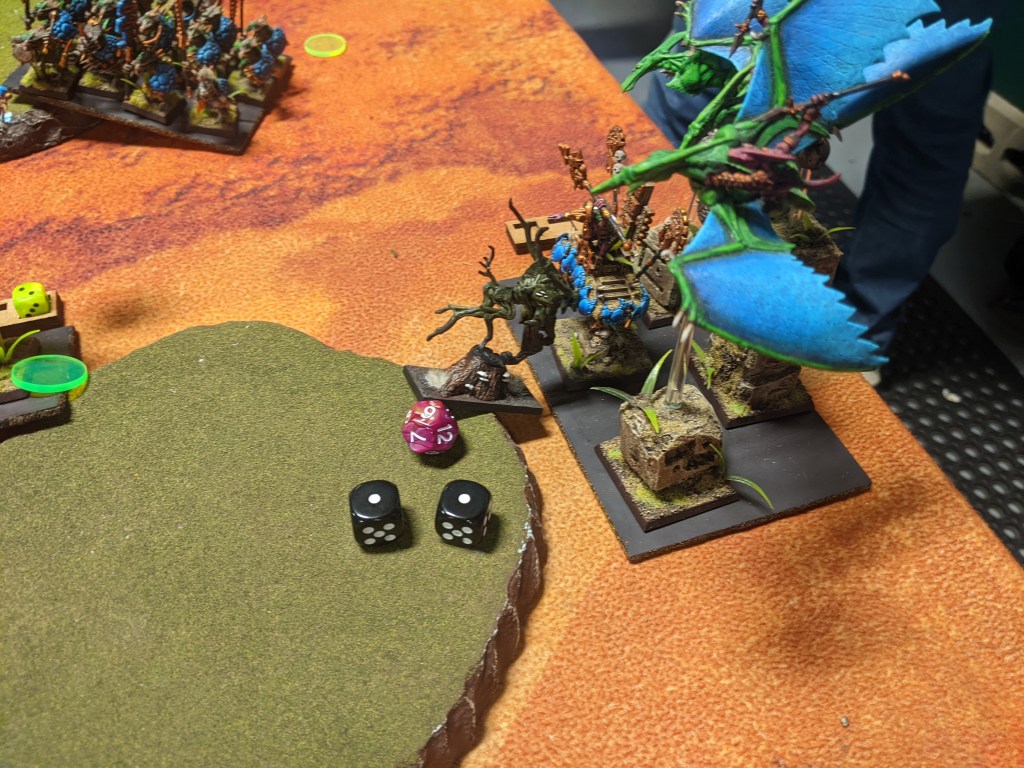
Undead 5: The Zombies (1 token) scramble 10″ into the flank of the triumphant Greater Earth, who takes 2 damage and cannot be bothered. The Soul Reavers (3 tokens) finish off the other Great Earth and prepare to receive his brother’s wrath, and the surviving Wights (their strider boots popped so they’re “just” a horde of Wights now) easily remove the last of my Mastiffs, scooping up their 2 tokens. The Vampasus once more spends a turn getting out of Craggoth’s LOS.

Free Dwarfs 5: The Orb Lord thunders into the rear of the Zombies, decimating them and taking their 1 token. The Greater Earth Elemental finally charges the 3 damage Soul Reavers, and routs them with the authority born of vengeance. He scoops up their 3 tokens (also the Stone Priest rear charged them to help but couldn’t wound). And Craggoth crashes into the last of the Wights, dealing 5 damage before he goes down.

Undead 6: With a Vampasus in the flank and Wights in the front, Craggoth succumbs to his wounds.

Free Dwarfs 6: I think for a while about just consolidating my position and winning 4-3, but realize that my Greater can’t escape the Wight’s 14″ charge, so may as well play for it. The Greater Earth drops his 3 tokens, ripping off into the Wights and dunking them too. He claims their 2 tokens, while the Orb Lord marches up and adds the GEE’s previous 3 to his 1.

Turn 7: Of course there’s another turn. Unable to see the Orb Lord, the Vampasus can either hinder charge a 2 damage Greater Earth Elemental or GTFO. He chooses discretion this time around, and the inspiring Necromancer flees for the hills as well.

I send my Greater powering after the Necromancer, forget that you can’t surge if you have tokens, but fall 1″ short of adding another kill marking to this Greater’s hull. Regardless, that’s 7-0 so a commanding …

FREEFORGED VICTORY

What a wild smashfest, and a real killing spree for that Greater Earth Elemental! He killed something like 800 points once he was allowed to move, single-handedly (cause he’s only got one 🙃) winning the game for me. Madness. It was certainly frustrating early on when Drew’s dice were hot fire, so my De 6 meant nothing, and my damage output was so bad that I had to trade down more than I already do. Happily we had all those rout spikes in Turn 4 and dug back out.

As for the list, I did decide to drop the throwing mastiffs and invest in the Priest a bit after this. I’m thinking of giving Wither & Perish (3) a try, still doesn’t give him anything to do on the way in, but does help me grind by making my dude’s effectively De 7 plus pushing some damage through against weak targets with a lot of nerve.

Until next time, happy holidays!

FREEFORGED 8: UNDEAD

One of my favorite things to do on Thanksgiving is game, which can be hit or miss depending on how much travel is involved. This year I wasn’t traveling, so a quick text to my buddy Jeff confirmed that I would be gaming! With some time to kill before he and his vamps arrived, I busied myself with a little hobbying in the kitchen that would be ready to deploy after the carnage …

FREE DWARFS
Earth Elementals Horde – Brew of Sharpness
Earth Elementals Horde
Stoneclaw Riders Regiment – Grenades
Mastiff Hunting Pack Regiment – Throwing Mastiff
Greater Earth Elemental
Dwarf Lord on Large Beast – Blade of the Beast Slayer
Dwarf Lord on Large Beast – Orb of Towering Presence
Free Dwarf Stone Priest – Stoneshapers; Surge (8), Martyr’s Prayer (7), Bane Chant (2)
2150 (12/22)

I alluded to wanting to take martyr’s prayer in the last report, so figured I should give it a shot. With the extra points I gave the Stone Priest the stoneshaper ability I discovered he didn’t come with any more (😬) and loaded the remaining Mastiffs up with bees. This would be my first time using throwing mastiffs, although I have certainly been on the receiving end.

UNDEAD
Soul Reaver Cavalry Regiment – Boots of Striding
Soul Reaver Cavalry Regiment
Soul Reaver Infantry Regiment – Chalice of Wrath
Soul Reaver Infantry Regiment – Staying Stone
Mummies Regiment
Mummies Regiment
Wraiths Troop
Wraiths Troop
Vampire Lord on Undead Horse – Pipes of Terror, Knowledgeable; Host Shadowbeast (3)
Lykanis – Orb of Towering Presence
Necromancer – Inspiring Talisman; Surge (6), Weakness (2)
Necromancer – Weakness (2)
2150 (13/22)

Jeff is pretty sick of running his Undead at this point and theoretically working on Elves now, which will be loaded with shooting and Drakons, neither of which his Undead have. But what they do have is weakness! I’d prefer the inspiring Necro had bane chant instead (and the third Necro was anything else) but eh, Jeff is hot for budget weakness casters so I mentally prepared to grind even harder. Martyr’s prayer, don’t fail me now!

We rolled up Fool’s Gold and I’m pretty sure it’s the first time either of us had played it 😅 I kind of prefer it to Smoke & Mirrors as there’s less mental load, but really whatever, it’s my first time playing a Pillage variant with this army so would be good practice for the ‘Forged. Jeff won the roll and had me go first, I think mostly out of indecision.

BATTLE

Turn 0: Battlelines! My Stoneclaws are still blank bases with drones on them, sorry readers. Also the inspiring Necromancer is the Warhammer Necro in a black cloak in the very center of the Undead lines.

Turn 1: The Freeforged struggle forward, with the Stoneclaws playing it cagey on the flanks. The only charge I give Jeff is his Vampire Lord into my blade Beast Lord …

… which Jeff takes 🫠 He hosts up and does a brutal 8 damage to my Beast Lord, who wavers but holds. Yowza was that closer than it needed to be. The rest of the Undead advance in a line, but Jeff does do some canny hiding of his Lykanis to protect him from Stoneclaws. Necros toss weakness onto both the Earth Elemental horde and Greater Earth Elemental that could mess with his Vampire Lord next turn.

Turn 2: Weakness or not, I send that Earth horde into the Vampire Lord, with the Blade Lord in the front when he passes headstrong. Bane chant fails on the horde but I roll like a maniac and drop the Undead blender hero in one go, reforming to face the incoming Mummies. The rest of the turn is spent holding vampires in place to buy me time to advance: the Orb Lord disorders the strider Soul Reaver Cav (4 damage), Mastiffs leap off the hill into the other Soul Reaver Cav (1 damage), and the other Mastiffs scamper into the right Soul Reaver Infantry (0 damage but they didn’t have any TC to strip anyway). Stoneclaws on the left back away from the Lykanis while the ones on the right threaten a dive into the Undead lines (and toss a grenade at the right Wraiths to no effect).

To get the murder out of the way, Jeff kills both Mastiff packs and backs his vamps up. The strider Soul Reaver Cav carve 5 damage into the Orb Lord, whose flank is officially being threatened by Soul Reaver Infantry as well, and the Mummies (hindered) charge the Earth horde that saw their master off but only do 2 damage. Wraiths nicely block the flank of the Mummies from the right Stoneclaws, while the Wraiths and Lykanis on the left play escort for their own Mummies’ advance. Finally, weakness is liberally applied to the Orb Lord and the right Greater Earth on the hill.

Free Dwarfs 3: Strap in, it’s going to be a violent if not decisive turn as we begin the grind. From left to right, a Stoneclaws regiment and the sharp Earth horde charge and shatter a Mummy regiment. The Orb Lord (now CS0) really doesn’t want to be flanked by the Soul Reaver Infantry in the woods, so withdraws 1″ from the Soul Reaver Cav, turns 90, walks towards the SRI and rotates to face … moments before a Greater Earth Elemental plows into the cav (~5 damage total). The other Soul Reaver Cav receive an Earth horde to the face (off the central hill) (7 damage total), and the Soul Reaver Infantry to the right are charged by the weakened Greater Earth (who may or may not have been on the hill) (6 damage total). The right Mummies are combo-charged by an Earth horde and the Blade Lord (5 damage), and finally, the Stoneclaws fly over the Wraiths and charge the weakness Necro lurking behind them (5 damage). Frustratingly they fail to pop the old sack of bones.

Worth noting that bane chant on the Earth Elementals fighting the Soul Reaver Cavalry failed (0 for 2).

Undead 3: Damage is poured across the battlefield as the vampires sink their fangs into the sweet, irony hides of the Freeforged. Jeff starts things off by rolling for the Soul Reaver Infantry (hindered) into the Orb Lord on 5 damage, as he’s inspiring all of my left flank. They do a wild 8 damage, bringing him to 13, before snaking the roll! Catastrophe! I am compelled to note that probability puts that at 5 damage and a rerolled 7 to rout, but Jeff cares not for maths.

Recovering from disaster, Jeff still has a lot of dice to roll. The Wraiths on the left pick things up by illegally flank charging the sharp Earth horde, who they couldn’t actually see past the H4 Stoneclaws but big shrug (1 damage). The Stoneclaws themselves are disordered by the Lykanis (2 damage), and the Greater Earth Elemental takes 4 damage from the disordered strider Soul Reaver Cav. The central Earth horde takes 5 damage from the other disordered SRC, and the SRI to the right shred 6 into their GEE – note the Wraiths who have stalled out 0.5″ from the big guy’s flank, Jeff being unable to roll the 2″ surge required. On the right, the Mummies hammer the Blade Lord to 9 damage but he holds.

Finally, weakness goes up on the sharp Earth horde preparing to blend the flank of the Orb Lord’s reavers. Note as well that all those vamp units have lifeleeched 2 damage and the Mummies on the right have gone from 5 damage to 0. Nice.

Free Dwarfs 4: All the bluff tokens turn over at the end of Turn 3, as seen in the first shot here. Jeff put one of his 1 pointers hard right amidst all that impassable terrain, and his other ones in my deployment zone. Not a bad idea – his Wraiths often jump the enemy line and can play for deep objectives, plus my dudes are slow and go in one direction while he can march and is overall quite fast. Obviously I’m content to grind for 4 points down the middle of the board.

Even with all the healing last turn, I aim to put some vamps into the dirt and start heading for points. We pay Jeff’s snake eyes back by flanking those Soul Reavers with the sharp Earth horde, whose weakness is countered by my bane chant (1 of 3 at last) and the Orb Lord in the front. They die the true death. The central Soul Reaver Cavalry are likewise turned to ashes by a regular Earth horde going to work, and the Soul Reaver Infantry next to them are buried by Stoneclaws in the flank and the Greater Elemental in their front. RIP to all those suckers.

In other news, the Lykanis is booped for 2 damage by disordered Stoneclaws, the last of the Soul Reaver Cavalry are wavered by their Greater Elemental on 9 damage, and the Mummies are driven back up to 9 damage by a particularly spirited Earth horde and Blade Lord combo.

Undead 4: With the execution of his vampires, Jeff is wildly spiraling away from this game but we persevere. Wraiths sandwich the central Earth Elementals, spooping them up to 12 damage but no rout. The Mummies on the right do kill the blade Beast Lord at long last, reforming to face the right Earth horde, and dropping to 4 damage in the process. And the Lykanis on the left jumps up and dunks his Stoneclaws up to 5 damage.

Triple weakness is tossed around again this turn, but only weakens the right Earth Elementals, failing to cast elsewhere twice.

Free Dwarfs 5: Heat blades rise and fall as the Freeforged end more of the Undead menace. From left to right, the sharp Earth Elementals EZ charge into the flank of the Lykanis fighting the Stoneclaws, routing the pup with ease. The Orb Lord lines up to race for a bottom token next turn (I don’t understand why he didn’t reform last turn to do something useful? Like kill the weakness Necro right next to him?), shortly before the Greater Elemental next to him ends the Soul Reaver Cavalry it’s fought turn after turn. The Earth Elementals trapped in the Wraith sandwich attempt to escape but only deal 3 damage to one of the Wraiths, while the Stoneclaws that could have rear charged the other troop of ghosts instead try to kill the inspiring Necromancer and overrun into them. They deal 2 damage and get stuck on the loathsome heretic (yes yes I got greedy here). However, some overruns work better than others as a Greater Earth Elemental crashes into and through a weakness Necro and into the flank of the Mummies, shattering them with the help of the weakened Earth horde to their front.

Bane chant, by the by, was attempted on the sandwiched Earth Elementals but failed (1 of 4).

Undead 5: The Wraiths tear the beleaguered Earth Elementals apart and face their large metal enemies. The inspiring Necro (disordered) attempts to ground some Stoneclaws but no dice, and the surviving weakness Necro also fails in whatever it was doing.

Free Dwarfs 6: The sharp Earth Elemental horde charges the last weakness Necro, crumbling it and claiming a point, as Greater Earth Elementals thunder into the Wraiths. The wounded troop expires while the other takes 3 damage. And I claim 3 other points, bringing me to 5 total, largely thanks to Stoneclaws.

Also I cast martyr’s prayer for the first time this edition, healing 2 damage from the Greater Elemental engaged with the Wraiths. Hell yea.

Undead 6: The Necromancer has a go at my Stone Priest, and while he lands the hit my caster is too tough to wound 😤 The Wraiths scrabble my Greater back to 6 damage.

Free Dwarfs 7: Of course there’s more 🤦‍♂️ The Wraiths are hit with 36 CS3 attaks and disappear, and Stoneclaws swoop down on the inspiring Necromancer and silence his babbling at last. And I cast martyr’s prayer, healing a Greater down to 2 damage because I can. Since I claim all but 1 point, this is a commanding …

FREEFORGED VICTORY

Poor Jeff, that’s two tablings in a row versus me, playing wildly different armies. It was instructive to see that I can grind one-to-one versus the most serious blenders in the game, which sort of became the game plan back in Turn 3 or whatever, even tho Jeff’s dice combined with LL2 meant that was a pretty high risk way to play it. He’s played his Undead for a long time and could really do with a new army that would let him learn new tactics and generally be more invested again.

As far as my testing goes, I never used my throwing mastiffs and I suspect I rarely will. When I mobilize my chaff it’s almost always to go get in the way, which necessitates running forward more than 6″ and not surviving, both of which are bad for getting a shooting attak off. Martyr’s prayer certainly existed? I suspect it’s only really going to be used in Turns 1-2 as I close with a shooting opponent. I can think of several games at Crossroads where it would have been great (i.e. the ones where I was getting shot) but it doesn’t come into play much ironically when the grind begins, where I would much rather be bane chanting to come out on top faster rather than pulling a few damage off to extend the grind. IMO people mostly take highly effective damage dealers when it comes to melee, not plink damage, and while the high end of MP is grand (7 damage! Imagine!), I don’t think the 3-4 you usually get is going to matter. Maybe only on De 6+ units? Clearly I am torn, but would rather have the third Mastiffs so adios for now.

The Stoneclaws continue to be great. While they frustrated me by failing to pick up Necromancers on demand, it was nice to have the option to reach over and slap a caster / look for overruns, which isn’t something I’ve had much of. The birds are also gods on Pillage scenarios, which I could have told you having faced Scorchies and their ilk before. I’ll admit to not liking them a bit for how easy they are to play 🙃

UP NEXT: Some kind of Herd wrap up to cap 2023!

FREEFORGED 7: NIGHTSTALKERS

The next tournament in the Northeast is my club’s own Dead of Winter on January 20 (2024), which is 2150 and has an added comp restriction of no more than three of any unit. At first, I thought this locked me into Herd for the second DoW in a row, which I was mostly ok with but not ultra excited about, as my list is really congealed at this point. I ended up with about 50 or so points to play with after Clash discounts on Tribal Spears, which I finagled into a Forest Warden – a unit I like, and that finally inspires as well. I played a couple games (tabled Undead, did bad things to Riftforged) but it wasn’t all that exciting after a year of Herd.

Then I realized I could take my plan for Freeforged 2300 (spoilers: adding birds) and just dial it back to 2150 really easily and still meet the comp. This keeps me painting and playing my new army, which is 100% where I prefer to be hobby-wise. Here’s the list:

FREE DWARFS
Earth Elementals Horde – Brew of Sharpness
Earth Elementals Horde
Stoneclaw Riders Regiment – Grenades
Mastiff Hunting Pack Regiment
Greater Earth Elemental
Dwarf Lord on Large Beast – Blade of the Beast Slayer
Dwarf Lord on Large Beast – Orb of Towering Presence
Free Dwarf Stone Priest – Conjurer’s Staff, Surge (8), Bane Chant (2)
2150 (13/23)

I was always going to add birds to the army, even before we got Clash confirmation that they would be in Free Dwarfs, and because my minis have guns on them I’m pretty much locked into grenades. These are wild shooting attaks if you aren’t aware of them: 12″, Att: 4, Ra: 4+, Piercing(1), Shattering, Blast(D3). No steady aim means 5+ at best, 6+ most the time, adding to the WTF dice factor. I kind of love it. The other difference between Stoneclaws and Frostclaws is that the Free Dwarf version trade Fury for Pathfinder and don’t freeze the target in melee. This is great by me and the pathfinder has come up in both my games so far. Fury is a lot less useful on regs, but also in general because of TC(2) and no CS.

The rest of the list should be familiar from 2300. I have an alternate load out with two Mastiff Packs that shoot plus martyr’s prayer on the Stone Priest … but I think I prefer having more drops and less points invested in a caster who is slow and can be turned off. On the flipside, MP(7) is really gnarly alongside all that D6+ :/ So I dunno. Going to paint the pups up anyway and see how things fall in January.

My buddy Cory is working on a new Nightstalker army and this would be his first game with his initial list, so forgive the proxies and blank bases (also excuse mine while you’re at it).

NIGHTSTALKERS
Blood Worms Legion – Hammer of Measured Force
Ravagers Horde
Butchers Horde
Butchers Horde
Shadowhounds Regiment
Soulflayers Regiment – Wind Blast (5)
Reapers Troop – Skirmisher’s Boots
Phantoms Troop
Mind-Screech – Singing Aberration (Lightning Bolt (6), Mind Fog (6), Wind Blast (6))
Dread-Fiend
2150 (21/26)

Sweet baby cats, that Blood Worm legion is going to eat anything it wants 😬 My goal is to feed it trash and I guess never engage it? Yuck. Otherwise Wind Blast (22) didn’t sound great, and Butchers seemed poised to open up some cans. Especially when you consider that I thought they were Me 3+ and not 4+ as is the reality of the situation.

We chose to play Hold the Line! because it’s new and a nice meld of Control and Dominate. Cory won the roll but had me go first, quite explicitly so he could blow me out of the scoring bands in the last turn. (Sorry ahead of time for the early game photos, I kept forgetting to take them and either remembered during his turn or just forgot. We’ll figure it out.)

BATTLE

Turn 0: Battelines! His blanks are Soulflayers, my blanks are Stoneclaws (with drones on them) or the third Mastiff pack.

Turn 1: The Freeforged trudge forward, with the left Stoneclaws getting into a weird position but threatening things? They outspeed the Soulflayers over there so I’m vaguely trying to push them back. I surge the central Greater Earth forward because he’s D6+ and -/19 in a puddle, and if he dies it’ll pull all those Butchers into my clutches. Except I wasn’t planning on 7 out of 8 dice catapulting him forward 😀

That 7″ surge puts the GEE into the Ravagers 12″ range, meaning they don’t have to move and light the big dummy up. Combined with a Mind-Screech’s lightning, he takes a concerning 5 damage, plus is blasted back 1″ or so. The rightmost Stoneclaws also cop 1 damage from lightning, and somebody else must have been pushed back by the Soulflayers? Hard to tell in these shots. The most relevant movement is the Shadowhounds zipping down the left flank and becoming unflankable by hugging the impassable over there.

Turn 2: I charge the right Stoneclaws (hindered on a wall) into the Dread-Fiend for 1 sweet damage, and try to shoot the Shadowhounds with my other birds but 7+ is tough. Otherwise my slow children struggle forward or are Mastiffs being sent into danger.

The Nightstalker side of things is more exciting (and pictured above). While Cory’s army doesn’t move much, it certainly pushes mine around. The left Stoneclaws and Earth Elemental horde are blasted backwards 4-5″ as is the orb Beast Lord on the right. Lightning and another round of Ravager shooting goes into the central Greater Earth, blasting him up to 8 damage. Phantoms block my rightmost Earth horde and the Blood Worms continue oozing through that forest. In combat, the Dread-Fiend chomps 4 damage onto the right Stoneclaws, wavering them.

Turn 3: (The shots above are again from the NS side of the turn, sorry.) It’s largely another delaying turn for me, as I send Mastiffs into the Shadowhounds (they disorder their shadowy cousins but not much else) and hit the left Butchers in the front and flank (hindered) with more Mastiffs, for 3 damage. The smoldering central Greater Elemental crashes into the Ravagers, beefing his attaks and doing just 2 damage. Woof. A combo-charge from the other Greater and right Earth horde rout the Phantoms and I leave the units side by side for Cory to decide what his Soulflayers and other Butchers are doing next turn. In Beast Lord news, the Blade Lord sneaks into the left Mind-Screech, popping decent damage into it, while the Orb Lord cycles into the Dread-Fiend when the Stoneclaws back up and nimble out of the way. Whiiiich I realize now is illegal, because they lost their nimble when they were disordered. (In my defense, I very rarely play flying units!) Anyway, the Orb Lord brings the Fiend to 5 damage.

In response, the Blood Worms continue to slowly press the issue on the left, as the right Soulflayers and Butchers combo the rightmost Earth Elemental horde (for a solid 9 damage). The central, sharp Earth horde is blasted backwards, as are the left Stoneclaws. Otherwise there’s a lot of counter-charging: the Shadowhounds rout their Mastiffs, the left Butchers smash the Mastiffs to their front, the Ravagers finish off their Greater Earth Elemental, and the Dread-Fiend does 2 damage to the Orb Lord. The Blade Lord is unphased by his Mind-Screech (who may have been wavered).

Free Dwarfs 4: Whelp, here we go. An Earth Elemental horde powers off the hill into the Blood Worms, might as well get that TC(1) while I can. The Stoneclaws supporting them are faced with continuing to play it cagey, contributing some wounds to the Blood Worms before being killed by the Shadowhounds, or locking down the left Soulflayers before being killed by the Shadowhounds. I decide to put the Soulflayers on the ground and charge in. Continuing to the right, the Blade Lord charges the Mind-Screech again, the sharpness Earth horde hits the Butchers beset by Mastiffs to their flank, Stoneclaws long bomb into the flank of the Ravagers, the surviving Greater Elemental hits the right Soulflayers, the Earth horde fighting Butchers fights Butchers, annnnd the Orb Lord continues scrapping with the Dread-Fiend.

A quiet farting sound can be heard as bane chant fails to cast on the non-sharp Earth horde, then the heat weapons begin to fall. From left to right: Stoneclaws do a sterling 5 damage to Soulflayers, the Earth horde punches 3 into the Blood Worms, the Blade Lord routs the Mind-Screech, and the sharp Earth Elementals cut down the Butchers, with the Mastiffs reforming to block the Reapers from charging the horde, who reform to face the Blood Worm flank. The central Stoneclaws slam the Ravagers up to 12 damage but biff the Nv check. The Greater Earth slams 5 damage into his Soulflayers, the final Earth horde hurts their Butchers but can’t hot hand the Nv check, and finally the Orb Lord drops the Dread-Fiend and faces said Butchers.

Nightstalkers 4: (The prelude to this carnage was captured in the previous shot.) The ‘Stalkers slap back in what feels like the beginning of the end. Shadowhounds and Soulflayers eat the left Stoneclaws, the Blood Worms take a massive 10 damage chomp out of the left Earth horde (who hold), and the Reapers grind 5 damage out of the Blade Lord. The Ravagers see their Stoneclaws off (THIS UNIT Y’ALL), the Soulflayers fighting the Greater Earth do no damage, and the Butchers break their Earth horde and stay facing forward as it protects them from a charge from the GEE.

Free Dwarfs 5: Nothing tricky for the Freeforged this turn. The sharp Earth horde flanks the Blood Worms, with more Earth Elementals in the front. The Blade Lord swings into the Reapers with just CS(1). The last of the Mastiffs try to finish off the Ravagers (hindered). The Greater Earth Elemental hits the Soulflayers again, and the Orb Lord flanks the Butchers (hindered).

The Stone Priest successfully bane chants the Orb Lord! After the murderizing is done, the Blood Worm legion is no more, the Reapers take 3 damage but hold, the Mastiffs land 1 damage on the Ravagers but can’t roll the 6 to kill (they waver), the Greater Earth wrecks the Soulflayers, and the Orb Lord pushes the Butchers to 11 damage but again can’t land the rout.

Nightstalkers 5: While Cory’s gribblies are looking light on the table, I feel like he’s got some game left in him? The Shadowhounds plow into the 10 damage Earth horde, routing them. The Soulflayers EZ charge into the flank of the Blade Lord fighting the Reapers, which I did not see coming, routing him as well. The Ravagers disengage from the Mastiffs in their swamp, letting the Mind-Screech lightning them for 1 damage. And the Butchers counter the Orb Lord in their flank, pounding him up to 7 damage.

Free Dwarfs 6: With the game ending, it’s time to finish some thoughts. The sharp Earth horde charges and routs the Shadowhounds, claiming the left zone in the process. The Mastiffs charge the Ravagers a second time (hindered forever), sneaking that 1 damage through and this time popping them. What a menace. The Greater Earth entrusts the Butchers’ demise to the Orb Lord, surging into the Mind-Screech’s flank and also being bane chanted for no functional purpose because I thought the Stone Priest still had his stoneshaper rule (turns out it’s optional in COK ’24). I roll like a muppet and do like 5 damage to the Mind-Screech with 24 CS(3) attaks but still waver it. Finally, the Orb Lord does cut the badly wounded Butchers down. He sidesteps into the right zone.

Nightstalkers 6: Cory dives his survivors into the central zone. If there’s a Turn 7 I’ll be able to claim all the zones, but as it is I’m up 4-3 and this is a …

FREEFORGED VICTORY

Credit to Cory on removing so many of my strong metal children! Early wind blast was annoying but apart from that the NS plan was pretty familiar to other large infantry with support style armies I’ve faced. Slow stuff in middle with faster and faster stuff on the flanks, which is basically what I did with the birds too. Speaking of birds, these are really amazing units that can do so much – which shouldn’t be a shocker to hear, I’m just really unused to using meta units and getting so much value. The shooting is definitely weird but I’ll be keeping it around, even if it plays a far distant fiddle to being able to slam in from the flanks and grab unexpected angles. Good stuff.

UP NEXT: Undead (again)!

THE HALLOW 24-25: DEAD OF WINTER DAY 2

(Months pass, seasons change, and yet these reports remain unsung … no longer!)

After a stellar first day, my green Herd are on Table 3 up against another familiar face but with some new toys courtesy of the Big Red Book.

GAME FOUR: BASILEANS

Basileans 2150

Elohi Horde – Wine of Elvenkind, Celestial Fury
Ogre Palace Guard Horde – Chalice of Wrath
Ogre Palace Guard Horde – Staying Stone
Sisterhood Scouts Regiment
Paladin Foot Guard Regiment – Orb of Towering Presence
Paladin Knights Troop – Skirmisher’s Boots, Aegis Fragment
Heavy Arbalest
Heavy Arbalest
Phoenix
Phoenix
Gnaeus Sallustis [1]
Priest – Conjurer’s Staff; Heal (3), Bane Chant (2)
13 (23)

I love Chris’ army, and Kings of Warmachine armies in general. He’s added a lot of shooting since my crabs last faced him, which is somewhat concerning, but fewer Elohi is a win? I tell myself as I prepare to overthink the single horde he has brought.

The fourth round was Booty, a modified Push where each token carried after the first gives -1 Sp down to a minimum of Sp 1. The tokens are otherwise standard loot tokens (so Sp 5 max, no surge, no nimble, no windblast, etc). Basilea\ went first because shooting.

BATTLE

Battlelines! Or slightly after the scouting phase anyway. He’s got two tokens in the hard left Paladin Foot Guard and one in the Sisterhood Scouts near them. I’ve got two in my Tribal Warrior horde and one in the Tribal Warrior reg on the right.

Turn 1: The Basileans form a #murdercrescent, with shooting removing the Centaurs protecting the Brutes and doing 7 damage to the Tribal Warrior horde and 2 to the regiment to the left. Ouch. The Hallow punches it up the center and baits with the Centaurs on the right.

Basileans 2: Chris’ forces largely drift around the left or back up, with the Knight troop flanking the bait Centaurs on the right. Shockingly they survive and are unwavered! Shooting wavers the Tribal Warriors in the central woods but crucially leaves my advanced Brutes holding on 7 damage.

Herd 2: My Lycan Alpha charges off to the left, grounding a Phoenix. The damaged Brutes power up the field into some Sisterhood Scouts, dunking them and spinning to face the Ogre Palace Guard duo. On the right, the Centaurs charge off to bother Gnaeus and the Knight troop is flanked themselves – again to limited effect! I had held the Lycans back as I didn’t want to get charged in response by the Elohi. The Stampede, assuming the right is in my control, heads off to pressure the center.

Basileans 3: On the left, the Phoenix waddles away to let the Foot Guard have a go at the Lycan Alpha. Meanwhile on the right, the Elohi swoop in and one round the Tribal Warriors (with a token), and the Knight troop gets in the way of the Lycan horde, poking some damage through in the process. Gnaeus finished off the Centaurs and prepares for next turn. Centrally, shooting clears off the rampaging Brutes and the OPG back up.

Herd 3: But they don’t back up far enough, thanks to the Great Chieftain’s WC aura. Tribal Warriors and Brutes charge the Palace Guard, with the Brutes wavering theirs thanks to bane chant (and kind of floppy dice). The Lycan horde on the right nukes the Knight troop in its way, with the Centaur Chief grounding the Elohi as the Stampede changes direction again and heads back to the right. Finally on the left, the Lycan Alpha withdraws and rears the orange Phoenix, keeping it disordered.

Basileans 4: The Basilean left slinks backward, with shooting largely whiffing against the Tribal Warrior horde. The Lycan Alpha is lightly pecked by the orange Phoenix and the Tribal Warriors downfield are wrecked by the functioning Palace Guard. On the right, the Elohi and Gnaeus assault the Stampede and only manage to waver it. Hell yea.

Herd 4: It’s officially on, dear readers. The surviving Brutes withdraw and charge the other Palace Guard, making space for the Tribal Warrior horde to plow into the mangled horde of ogres – they had to shed 1 booty token to go back to Sp 5 but worth. Both Palace Guard units are smashed. The Lycan Alpha continues grounding the orange Phoenix, as the Great Chieftain charges and shuts down the blue Phoenix. On the right, the Stampede bips some damage onto Gnaeus (only CS1 when disordered) but the Lycans rear charge the Elohi, decimating them (and taking my token back).

Basileans 5: The Sisterhood Scouts advance to block for the Foot Guard token caddies, but their shooting (and maybe the arbalests’, tho they had been cooling down over the course of the game) successfully wavers the Tribal Warrior horde. Gnaeus finishes off the Stampede and faces the Lycan horde. I’m sure the orange Phoenix slapped away at the Lycan Alpha.

Herd 5: The Brutes leapfrog the retreating Tribal Warrior horde, sadly unable to charge (I might have been able to turn the horde sideways and gotten the Brutes into the Sisters? But this would have offered a flank to the Foot Guard and given them a token, as well as gotten them closer to the central token) but picking up their token in the process, as I can see the writing on the wall. The Lycan Alpha continues disordering the regenerating Phoenix, with the Centaur Chief grounding the blue one this turn. The Lycan horde blends Gnaeus and the Great Chieftain heads off to kill some war engines.

Basileans 6: The Tribal Warrior horde is finally shot down. Phoenixes caw in distress.

Herd 6: The Brutes make contact with the Sisterhood Scouts, detonating them. The Great Chieftain flips over one Arbalest and both Phoenixes are disordered again. The Lycan Horde sails forward 10″ to be on the other side of the table.

Turn 7: We talk things over going into this extra round, and Chris is looking at a loss unless he can roll wildly and kill the Brutes in his turn. He can’t escape their charge with Sp 4 and we’re on his side of the table, so my 2 tokens count double compared to his 2. He goes for it but the Palace Guard don’t work any magic. My Brutes shatter his unit and scoop their tokens up, for a decisive …

HALLOW VICTORY (19-2)

This was a wild game that I didn’t feel particularly in charge of, thanks to his early shooting and the existence of Elohi 😛 I’m happy to have pulled it off, and I think Chris and I are now even in our matches? He might still be a win ahead with his damn Basileans.

GAME FIVE: SALAMANDERS

Salamanders 2150

Rhinosaur Cavalry Horde – Healing Brew
Rhinosaur Cavalry Horde
Scorchwings Horde – Fire-Oil
Scorchwings Regiment
Kaisenor Lancers Regiment – Boots of Striding
Salamander Primes Regiment – War-Bow
Ghekkotah Hunters Regiment
Komodon
Komodon
Rakawas, The Pale Rider [1]
Artakl [1]
Ghekkotah Skylord on Scorchwing
13 (24)

After a slow start, Eric had gradually pushed up the tables throughout the event, and would turn out to be an exceedingly nice dude (and my favorite opponent). Of the Salamander armies at the tournament, Eric’s was the one I was hearing the most about, in particular the bonkers numbers of shots it has. Obviously, charging into a wall of highly mobile shooting isn’t great for a Herd army but needs must!

The final round was Kill, modified so that units drop loot-esque tokens when they are killed. These tokens have no effect on movement in any way, however a unit must still have US to pick them up. You can hold friendly tokens and indeed should grab them, as the scenario was designed to punish shooting, as units killed at range drop their token into their footprint per usual. Ultimately I don’t like this scenario as it punishes individuals while benefiting US1 heroes, which the meta already does, and could be written to do the opposite but this is all academic. The Salamanders took first turn because shooting. This marks four games in a row where I went second not by choice.

BATTLE

Battlelines! Or rather Scouting Phase, as Artakl has scurried forward.

Turn 1: The Salamanders advance wearily and unleash a startling amount of shooting, with the 10 damage done to the right Brutes being the standout (5+ from the Komodons alone). The Hallow holds firm, then pushes up in response, with the leftmost Centaurs getting the party started by grounding the Scorchwing regiment. I’m a little at a loss for what to do overall but am hoping the Lycan Alpha can dive in from the left and help me open up that flank.

Salamanders 2: Which makes it an extra bummer when Eric 10+ wavers her! Shooting removes the right Brutes and continues hurting Tribal Warrior regiments. The Ghekko Hunters scamper into the right Centaurs and waver them, which is especially annoying when I realize I didn’t put the Lycan horde a full 1″ behind the Centaurs. Bleh.

Herd 2: I attempt to unjam the right by flanking the Hunters with hindered Tribal Warriors, but 24x 5+ / 3+ is too much of an ask and the Hunters are fine. The other Tribal Warriors charge Rakawas for a few damage and to block him up, as 300 points of Lycan mega-hammer picks up the Brutes’ kill token and waits. I think for a very long time about the left, and notice that if the Stampede helps those Centaurs out with the Scorchwing regiment, it can rotate after combat and disappear from the Rhinosaurs’ LOS, leaving only the milksop Lancers to take it on. It’s an easy kill and I go for it … and roll snake eyes. This disastrously gives said Rhinos the Stampede’s flank, and Eric the game. Ah well.

Salamanders 3: The Stampede is obliterated. The other Rhinosaurs flank and explode the Tribal Warriors who fluffed against the Hunters, as Rakawas nimbles around the other Tribal Warriors and helps the Hunters finish off those pesky Centaurs. Rakawas’ abandoned Tribal Warriors are cheerily wavered by the war-bow Primes (off a hill), and the Lycan horde does get shot a bit. Finally, Artakl jams the Tribal Warrior horde, doing token damage in the process.

Herd 3: I melt my clock and eventually realize I can charge Artakl with the Tribal Warriors horde, overrun 5″ into the central Rhinosaurs, and flip them over thanks to the Lycan Alpha in the flank. It’s not great odds (2/3 of a chance the overrun is no good!) but it’s what I got to open the left back up. I make a very real mistake and heal 1 damage off of the Tribal Warriors instead of bane chanting them (I didn’t realize Artakl is De 5+ and not 4+ but more importantly forgot I was aiming to fight the Rhinos, who definitely are De 5+ and I’ve got no TC behind the horde). I do next to no damage to Artakl on 3+ / 5+ yet I hot hand the Nv roll and rout the lizard twice, and I make the 5+ overrun, even if it’s hindered. The Rhinosaurs take 9 damage from the flanking Lycan Alpha, the Great Chieftain in the front, and the overrunning horde (match says 9-11, +2 if I hadn’t messed up bane chant), dread pushes this to 10 and I fail the break. Eric had offered to let me rewind and count the horde’s dice with bane chant on there but I couldn’t, that was well and truly my fault.

Elsewhere, the Lycan horde kills the Hunters (possibly because that was all I was offered, possibly because I didn’t fancy one rounding Rakawas) and turns to be out of Rakawas’ LOS but very much in the Rhinosaurs’. The Centaur Chief disorders the Scorchwing horde, and way over on the left the Centaurs finish off the Scorchwing regiment they had been fighting for 3 turns.

Salamanders 4: Lancers flank and kill the Lycan Alpha, Rhinosaurs (with Skylord in the flank) charge and kill the Lycan horde, Komodons light up the central Brutes a bit, and the Tribal Warrior horde survives the attention of the central Rhinosaurs. Eric hands me two snake eyes of my own this turn, with the blessed Centaur troop surviving against the left Skylord and the Centaur Chief bravely living to disorder the Scorchwing horde again.

Herd 4: The central Rhinosaurs are torn down by the Tribal Warriors and Brutes, as is the left Skylord by the Centaur troop. The Great Chieftain charges the Lancers to hold them down, and that lucky Centaur Chief disorders the Scorchwing horde again.

Salamanders 5: Rhinosaurs run down the central Brutes, the Lancers kill the Great Chieftain (!), and otherwise shooting pummels into the Tribal Warrior horde in the forest, pushing them well into the danger zone. Somebody shoots the Druid to death this turn.

Herd 5: The Lancers are mobbed and torn apart. I continue giving as many kill tokens as I can to the Centaurs, as I know the Tribal Warrior horde is not long for this world and I’m hoping I can get more than 1 point.

Salamander 6: The Tribal Warriors get properly Rhino’d, and the extreme range of the Salamander shooting drops the Centaurs at long last. Their 6! tokens drop in their footprint but even without a Turn 7 the Sallies have plenty of their own, making this a foregone …

HALLOW LOSS (1-20)

Not gonna lie, having a tough match up fall apart so immediately thanks to a snake eyes is a bad feel, but let’s be real, I haven’t been properly boned by snakes in a long, long time. Combined we actually had 5 snake eyes this game, making it all feel very weird, however Eric was a pleasure and I appreciate how accommodating he was as my game disintegrated before it could begin. He would go on to win Best Sports.

Dead of Winter 2023 turned out to be a far more eventful run for me than expected, with a lot more time spent on the top tables than I would have thought my Herd deserved. Ultimately I placed like I always do (just above the halfway mark), which checks out with the big wins and big losses. Great games all the same, and I appreciate my clubmates who pulled the event together with next to no help from me 😅

I’m super behind on reports at this point, but up next I’ll blast through some 2300 practice games, from when my Herd were training for the Pilgrimage GT. Stay tuned!

THE HALLOW 21-23: DEAD OF WINTER DAY 1

Gentle readers! I’m sorry to keep you waiting for that sweet, sweet Dead of Winter GT report you were promised a month ago. With the Pilgrimage GT this weekend (!), I find I’m once again up against the wall on my writing duties and well behind on batreps. To that end, I’m going to do full day recaps for this event but hopefully maintain some of the gravitas of what turned out to be a much more successful run than I expected going in.

Dead of Winter was a two day, 2150 point event held here in Albany, NY from January 29-30, 2023, and put on by my very own club, The Shambling Horde. For the second year of this tournament, our club overlords set an added comp twist that no triplicates were allowed, including units of the same size. While you could take 2x Ogre Warrior regiments and 1x Ogre Warrior horde, you couldn’t take 3x Ogre Warrior regiments, for example. I’m not a huge fan of this restriction, as I don’t find triples of units to be bad, but I do think raising it to ban unit quadruplets is cool and good and curtails spam in a more meaningful way, especially when combined with 1995+X style points comp. Regardless, I did appreciate being forced into a little more variety than I would usually run, and was very happy where my list landed. Also note that we used Blackjack Scoring (aka best scoring).

Herd 2150

Lycan Horde – Brew of Strength
Guardian Brute Horde
Minotaur Chariot Regiment – The Stampede [1]
Tribal Warrior Horde – Brew of Sharpness
Tribal Warrior Regiment
Centaur Bray Striders Troop
Lycan Alpha
Great Chieftain – Horn of the Great Migration [1]
Centaur Chieftain
Druid – Bane Chant (2), Heal (2)
13 (24)

I’ve talked about the list in other reports but here it is one more time! The Horn did make it into the final list, as a cool piece of tech that gives a useful aura when you want to go fast and occasionally puts dread onto somebody who isn’t being punched by Brutes. The list is basically a bunch of hammers with friends that either get them where they want to be or take care of the scenario so the hammers can focus on smashing face.

GAME ONE: ORCS

Orcs 2150

Fight Wagons Legion – Brew of Strength
Greatax Horde – Orcish Skullpole, Boots of Striding
Youngax Horde – Orcish Skullpole
Gore Riders Regiment – Staying Stone
Morax Regiment – Orcish Skullpole
Morax Troop
Morax Troop
War Drum
War Drum
Troll Bruiser – Orb of Towering Presence
Morax Mansplitter – Gnome-Glass Shield
Krudger – Gakamak’s Bloody Banner [1]
Krusher on Gore – Blade of Slashing
14 (27)

That’s right, we’re kicking off the tournament with Skullface! He’s brought his personal battlewagon, as many Morax as the comp allowed, a Greatax horde to hold the line, Youngax to be cheap unit strength, and support staff aplenty. My Herd are very punchy, but would I be able to out punch this Orcish warmachine??

The first round is Invade – you may notice that the scenarios are designed to tell a story of our armies moving into enemy territory, taking their stuff, fighting their way out, etc. The Herd went first, probably by choice given that it’s invade.

BATTLE

Battlelines! I don’t have a strong plan for the Youngax and US2 Troll Bruiser pushing down the right flank, but I assign some Brutes to keep them occupied. On the whole, sending just the Brutes that way is a mistake, I should have used them to break the center harder and then spin to face the US6 worth of invaders late game. Spoilers.

Turn 1: The Hallow moves up, flexing its charge ranges across the board. The Orcs present a unified front across the line, with the exception of the Gore Riders jamming the Stampede on the left and the Krusher venturing out on the right. First blood goes to the Mansplitter, who picks up his ONE throwing axe then hits and wounds a Tribal Warrior. Game on.

Herd 2: I know from experience that the Greatax need to be killed in one shot, so Lycans and Brutes both pound into them. The Stampede should easily kill the Gore Riders, especially with a little nudge from the Centaur Chief, and the Tribal Warrior horde can very likely one round some Morax, then take the retaliation on the chin. The rest of the Orc line is held in place to buy time.

After a flurry of dice, the Greatax are indeed dismembered, but the Gore Riders hold on snake eyes and the Morax regiment takes 14 damage and may have snaked as well. I try my best to shake it off but the momentum is already slipping.

Orcs 2: Thrilled to be fighting already, the Orcs counter-charge across the line, with both Morax regiments hitting the Tribal Warrior horde. A War Drum blocks the Lycan horde as Orc individuals lend their axes to the fights. The saddest note, however, was the Gore Riders charging the Centaur Chief and overrunning into the Stampede. I hate when I do this 😦

Thankfully it’s all up from there, with the Tribal Warriors holding on 13 damage and the units keeping the Morax troops back only wavering. The Centaurs thrown into the Fight Wagon legion do indeed die tho. RIP to those heroes.

Herd 3: The Hallow plunges its sharpened wooden appendage deeper into the Orcs this turn, as Brutes flank Morax on the left and Tribal Warriors flank more Morax on the right, with a lot of counter-charging happening elsewhere. In a bit of a throwaway move, the Great Chieftain charges the Krudger with the bloody banner, but amazingly he one-rounds him! This removes the inspiring from the left flank, leading to the death of the Gore Riders and War Drum. All the Morax except for the troop with Centaurs in their face are torn apart as well.

You can see I don’t know what to do about the right flank. The Brutes once again deign to charge, not trusting that they can one round the horde or the troll, but knowing they’ll die in return, thanks to either unit getting a flank (and no inspiring to be had!)

Orcs 3: The Fight Wagon careens into the Lycan horde lurking in the pond, crushing it despite the negative to hit. It turns to face the Stampede, letting the Brutes have its flank. The surviving Morax blend the Centaurs at last and prepare to die. On the right, the Youngax take the hindered charge into the stranded Brutes, with Troll Bruiser in the front and Krusher in the back. The green hammer wavers but holds.

Herd 4: The Fight Wagon is dismantled by the Stampede and Brutes on the left, and on the right the other Brutes counter-charge the Troll Bruiser and manage to one round him through weight of dice. In the center, the Tribal Warrior horde chooses to counter-charge the Mansplitter rather than dropping the War Drum (??), but at least they kill the punchy hero. This leaves a Tribal Warrior regiment and Lycan Alpha to deal with the wounded Morax – a shocking 2 damage later and the troop of blenders is totally fine. Yikes.

Orcs 4: Those Morax counter-charge and blend the Tribal Warrior regiment (and their US3), while the Krusher and Youngax finish off the right Brutes. The War Drum tries to clean up the mangled Tribal Warrior horde but can’t land a hit.

Turn 5: The Tribal Warrior horde shreds the War Drum and the Lycan Alpha savages the Morax troop. For the Orcs, the Youngax face their oppressors and the Krusher either launches himself into the Tribal Warriors horde, fails to hit, and is killed next turn, or readies himself this turn and has a go in Turn 6. Regardless, this is a resounding …

HALLOW VICTORY (20-1)

What a smashfest! Slugging it out with Skullface is always a pleasure, and this match was probably destined to come down to whoever hit first and hardest. Snake eyes notwithstanding.

GAME TWO: SYLVAN KIN

Sylvan Kin 2150

Forest Shamblers Horde
Sylvan Gladestalkers Regiment
Silverbreeze Cavalry Regiment
Hunters of the Wild Regiment
Greater Air Elemental
Tree Herder – Wiltfather [1]; Surge (8)
Nimue Waydancer [1] – Fireball (10), Wind Blast (5), Heal (4), Surge (4)
Elven Archmage – Inspiring Talisman; Surge (8), Bane Chant (2)
12 (22)

After dunking Orcs, I’m catapulted to Table 2 to face off against Sylvan Kin and my first two Greater Air Elementals. This also may be the first time I’ve ever faced Sylvan Kin? Thankfully no matter what happens, Darek is exceedingly nice and has a very pretty Warhammer army that is satisfyingly FMC.

The second round is Plunder (2 point tokens in green, 1 pointers in black). Sylvan Kin take the first turn, because shooting.

BATTLE

Battlelines! Scouting phase! The Sylvan Kin inch forward, mostly just putting Gladestalkers into range.

Turn 1: The Sylvan Kin deign to move much, knowing I’m headed to them. Some Tribal Warriors cop 3 damage from arrows. In return, the Hallow punches it forward, grabbing a 1 point token on the left and 2 pointer on the right. I’m a little freaked out by the Greater Air Elementals but I give them obvious charges as bait and prepare some redundancy if they get squirrely.

Sylvan Kin 2: Let’s just start with the boogeymen. The left Greater Air hops the wood and is surged 5″ into the Lycan Alpha by the Archmage, bopping her for 6 damage and wavering the beast. Nice! The right Greater Air plows directly into the 2 token Tribal Warrior regiment, doing them 6 damage (5 + Nimue’s cloak of death). Also on the right, Silverbreeze decide to charge the Lycan Horde, doing a respectable 7 damage (6 + cloak). Before all this happened, shooting drops the Centaurs with the loot and puts 2 damage on the Stampede. Not so bad.

Herd 2: Limited by my huge base size, I end up punching the Stampede and Tribal Warrior horde into the left Hunters of the Wild regiment, shattering it and splitting the Sylvan Kin line. The left Greater Air holds from a Tribal Warrior flank (who grab a token in the process), while the right GAE is disintegrated by Brutes (and the 2 token Tribal Warriors). The right Silverbreeze take 10 damage from the Lycan horde, but sadly hold tight. Brutes in the center prepare to deal with the Forest Shamblers, who are chaffed up with Centaurs.

Sylvan Kin 3: Battle is joined across the board!

The Lycan Alpha is driven off thanks to a Silverbreeze flank and a distressing number of waver tokens are handed out – the Tribal Warrior horde, Lycan Horde and right Brutes all waver under a storm of very good Kin rolling.

Herd 3: The Hallow retaliates in kind. Plucky Tribal Warrior regiments remove the Greater Air on the left and the Silverbreeze on the right, while Brutes thunder down the center and rout the Forest Shamblers in one go, and the Stampede rolls out of its mind and one-rounds the Gladestalkers who bloodied it last turn. A sad trombone can be heard in the distance, however, when the other Brutes fail to dunk the Hunters of the Wild scrabbling at them.

Sylvan Kin 4: The Tribal Warrior horde is smashed down by the Wiltfather (and Gladestalkers), as the mangled Brutes on the right are routed by the Hunters of the Wild. Darek spends some time thinking about the Tribal Warriors vs Silverbreeze situation in the bottom left and decides to trust in his shooting dice. This pays off as the Tribal Warriors (with token) are wavered! The right Tribal Warriors (with 2 point token) are also wavered this turn, thanks to Nimue’s fireball.

Herd 4: The Stampede revs up and one-rounds its second regiment of Gladestalkers (!), and the Hunters of the Wild on the right are blended by the Lycan horde. In the center, the Brutes swing into the Wiltfather for 7 damage, after a failed bane chant. Fighting Wiltdad is a marathon not a race, ok? Nimue is also charged and disordered by the Centaur Chief.

Sylvan Kin 5: The Silverbreeze gallop up from the bottom left to rear charge the Stampede, wavering it on 15 damage! The Wiltfather does a perfect 11 damage to the Brutes (10 + cloak)! Nimue tries to drive off the Tribal Warriors on the right but can’t land a wound (but does land her cloak)!

Herd 5: The Brutes drop the Wiltfather, moments before the Stampede turns and slams 7 damage into the Silverbreeze, I believe wavering them. Nimue is sandwiched between Tribal Warriors and Centaur Chief but survives. The Lycan horde grabs a 1 point token and Centaurs scoop up the 2 pointer in the center, with left Tribal Warriors headed for the final token.

Turn 6: Nimue swings at the token-laden Tribal Warriors on the right once again, damaging them this time but rolling snake eyes for the break (13 damage total)! Nimue survives the retaliation, but the Silverbreeze get Stampeded. I grab all the tokens and prepare the Lycan to scoop up the Tribal Warriors’ if Nimue goes ham on them in Turn 7, but the game ends here with a very decisive …

HALLOW VICTORY (21-0)

What a game! I was certainly helped by Darek committing his Greater Airs early and in places I could easily respond to them, but then his dice rolls with low to no crushing/piercing attaks pulled him out time and again. Lots of back and forth kept the game more interesting than I thought it would be vs shooting and GAEs.

GAME THREE: FORCES OF NATURE

Forces of Nature 2150

Fire Elementals Horde – Brew of Sharpness
Scorchwings Horde – Brew of Haste
Earth Elementals Horde
Water Elementals Regiment
Greater Air Elemental
Pegasus
Tree Herder – Surge (8)
Gladewalker Druid – Crown of the Wizard King, Ring of Harmony; Surge (8), Heal (4)
Druid – Conjurer’s Staff; Surge (4), Bane Chant (2), Heal (2)
12 (20)

I’ve only played Corey three times, between him running Crossroads GT and living on the top tables at most events – so here we are at Table 1 😅 I had heard he was printing / painting a new army this winter, and obviously I should have expected Nature. Lots of great sculpts, bright colors, and a powerful toolbox of units. This is a scary list, tho also more tuned than the stereotypical Nature list using the formation (of which there was one at this GT). The anviliest of anvils, an ultra hammer, a Sp 11 hyper flexible flying scoring shooting killing unit, and amazing thicc chaff join the pure value of two GAEs, a Tree Herder, Ringwalker, and budget Druid. Lots to love.

The third round is Salt the Earth, except we mess it up and don’t deploy a central objective. We agree to have the center two objectives be un-burnable. Nature chooses to go first.

BATTLE

Battlelines! It’s worth noting that Corey chose to take the side he’s on. That giant house on the left would indeed prove to be really hard to work with.

Turn 1: Nature sallies forth, offering the Hallow nothing. The Scorchwings spike off the right Centuars with a lucky opening salvo, then burn their objective. In response, I melt my clock trying to overthink the right Greater Air’s landing places, eventually shoving the Lycan up hard and challenging him to have a go.

Nature 2: I was so concerned about surge that I missed that the right GAE could just straight charge the Lycan Alpha. Sigh. She takes 7 damage and wavers. The Scorchwings abandon the flank while the other GAE hops behind the giant building (OH NO) and the Pegasis continues lurking back there too.

Herd 2: We hammer the Tribal Warrior horde and Brutes into the right Earth Elementals, cracking them and facing as much to the left as possible. The Lycan horde tackles the right Water Elementals over a wall but can’t finish the job. In less decisive moves, nobody can sit the Greater Air in the my lines down, but Centaurs and Tribal Warriors face it anyway. I can’t figure out how to stop the left GAE either – it’s going to hop the building and flank my Stampede. Should I have just suicided the Stampede into the left Water Elementals so it at least does something? Let’s find out together.

Nature 3: The Fire Elementals charge the Tribal Warrior horde, with the Tree Herder hanging back to help surge the right GAE into the rear of the Lycan Horde, which works a treat. Water Elementals hit them in the front for good measure. The left GAE is surged into the flank of the Stampede. Water Elementals hit them in the front for good measure. The Pegasus blocks the left Brutes … and then everybody dies. Including the Tribal Warriors, which was *checks the numbers* a mathematical oddity to be sure. The Scorchwings light the right Brutes up for 4 damage because can.

Herd 3: Things are collapsing a little faster than expected, but there’s always vengeance, m’right? The right Brutes launch off the hill into the Tree Herder, one rounding the big tree despite bane chant failing at the worst time. The other Brutes splatter the Pegasus that was giving to them. I’m allowed to touch the Greater Airs, so the Tribal Warriors on the left do 6 to theirs and the Lycan Alpha does 3 to the right one.

Nature 4: Fire and Rocks crash into the left Brutes as Scorchwings and Water descend on the right Brutes. They both die. The Tribal Warriors on the left are ended by Greater Air in the front and Water surged into their flank, and the Lycan Alpha is straight clubbed to death by one hindered Greater Air. At this point I am strongly considering giving her the Wingbane Cloak 😛

Herd 4: The Tribal Warriors try and fail to kill the right Greater Air, as the Centaurs try and fail to kill the Water Elementals (who are well regenerated at this point). If you squint, you can see the Great Chieftain charge the left Greater Air out of spite. Well, that plucky mushroom man with a spear kills the bastard, pushed over by dread 😀

Nature 5: Nature’s fury is vented on the rears of the Hallow’s last remaining scoring units. They die.

Herd 5: The Great Chieftain trips over the fence and doesn’t do much to some Water Elementals but the Centaur Chief kills the other Greater Air. Get some!

Turn 6: Corey grabs five objectives and the Scorchwings whiff on the Centaur hero, who goes on to kick the Druid as spitefully as possible. My Great Chieftain keeps stabbing some Water Elementals but really whatever. There’s no Turn 6, making this a staggering …

HALLOW LOSS (1-20)

I was hoping for a few more points, but you know, I’ll take that one point in a maybe-worst Herd into maybe-best Nature match. Corey is an absolute machine who didn’t move from the top two tables. One of these days, Reynolds!

Walking away with 42 of 63 points at the end of Day One was quite the achievement for me. I celebrated by having a couple drinks with my dog, somehow getting some sleep, then racking up for Day Two.

THE HALLOW 20: ABYSSALS

One last practice game for the Dead of Winter GT this weekend, and I’m up against Bill, our local Abyssals player. He threatened to bring his lightning hell, max Flamebearers list but decided to try out a less skewed army …

Forces of the Abyss 2150

Molochs Horde – Despoiler Champ; Blessing of the Gods
Molochs Horde – Despoiler Champ; Boots of Striding
Tortured Souls Horde
Tortured Souls Regiment
Flamebearers Regiment
Gargoyles Troop
Chroneas
Abyssal Fiend
Seductress – Gnome-Glass Shield
Abyssal Warlock – Veil of Shadows (3)
Zaz’u’szu the Betrayer [1] – Bane Chant (2-6), Lightning Bolt (4-8)
13 (22)

Bill has found himself in the same place I did when messing with Abyssals: Where the hammers at? He’s not an Abyssal Horsemen fan (Nv too low), and while he usually runs triple Molochs, 2150 points was too tight for all three of his hordes. Hence the Tortured Souls horde is here to see what it can do. There are 5-10 missing points in this list (depending on if it’s Veil 2 or 3), and I kind of think the TS horde might have had something? But it never came up, much like the Veil 😉

Herd 2150

Lycan Horde – Brew of Strength
Guardian Brute Horde
Minotaur Chariot Regiment – The Stampede [1]
Tribal Warrior Horde – Brew of Sharpness
Tribal Warrior Regiment
Centaur Bray Striders Troop
Lycan Alpha
Great Chieftain – Horn of the Great Migration [1]
Centaur Chieftain
Druid – Bane Chant (2), Heal (2)
13 (24)

This game I was testing out one more tweak, dropping the Druid’s reroll staff (which hasn’t worked in ages) and the Centaur Chief’s reroll sword for the horn of dread and WC (+1) on the Great Chieftain. The dread has some skornergy with the Brutes’ brutal, but I look forward to having it and the +1″ when facing other Sp 6 combat units. 19″ charges with the Lycans seems legit too. I’ve never run dread before either so that’s a cool thing to check off.

We played Push, using the tournament tweak that you can’t put more than two tokens in one unit. I made the Abyssals go first because 18″ shooting wants only one thing and it’s disgusting.

BATTLE

Battlelines! Abyssals (left to right): Tortured Souls in front of elite Molochs, Chroneas in front of Abyssal Fiend with Seductress, Flamebearers (1 token), Abyssal Warlock (1 token), Flamebearers (1 token) in front of Gargoyles, Zaz’u’szu, Tortured Souls in front of strider Molochs, Tortured Souls horde.

Herd (left to right): Lycan horde, Centaur Chief, Tribal Warriors regiment, Centaur Striders in front of Brutes and Great Chieftain, Tribal Warriors horde (1 token) in front of Druid, Centaur Striders in front of Brutes, Lycan Alpha, Tribal Warriors regiment (2 tokens), the Stampede.

Abyssals 1: The flanks of the demonic castle roll forward, with the Abyssal firebase holding firm. I swear, I fight two Flamebearer regiments with a Warlock sandwiched between them standing in cover every time I face the Abyss 😛

Zaz’u’s lightning does a single damage to the right Centaurs but wavers them! This is actually kind of terrible for me, well played Bill. (Zaz’u always chooses the Gargoyles as his betrayal target, and they’re always regening as a result. I probably won’t mention this again.)

Herd 1: The Hallow more or less surges forward. Lycan and Centaur Chief prepare a trap on the left, should the Abyss engage early, while the Stampede and Lycan Alpha get within max range of the Tortured Souls horde, protecting their Tribal Warriors carting two tokens. In the center, I actually wanted to shove into the woods to flood the Abyssal shooting bunker with targets, but the Tortured Souls on the right are threatening flanks on the Tribal Warriors horde and right Brutes, so I had to be unfortunately conservative. The Brutes prepared to be lit up. (Also the Druid cleans up the damage on the Centaurs.)

Abyssals 2: The only movement from the Abyss is the Tortured Souls horde disappearing behind the hill and the regiment sidestepping for reasons. Cue the firestorm.

Blessedly, the Brutes take a mere 6 damage and hold firm. Wheeeeew.

Herd 2: The first wave of green vengeance crashes into the Abyssal lines! Tribal Warriors and Centaurs charge the left Tortured Souls regiment, with Great Chieftain’s dread bubble in support, and the smoldering Brutes on the right charge the other Tortured Souls regiment. I figure they’re as good as dead so may as well pressurize those hammers hiding behind the hill. I punch up the center with the next wave of heavy hitters, luxuriating in the woods (and grabbing the center token with the Tribal Warriors horde), while the Lycan and Centaur Chief buddy nimble around the house to be a problem in coming turns. On the right, the Stampede moves within the Moloch’s charge range, assuming that they won’t be able to engage out of fear of the Brutes or not without the Tortured Souls horde moving somewhere it can’t do anything or doesn’t want to be.

Both Tortured Souls regiments are cast back to the pit from whence they came. The Brutes turn to face the Abyssal hammers, disrespecting the hindered Flamebearers entirely … and not seeing the Gargoyle flank, tho I would have dismissed that as well, such is my hubris.

Abyssals 3: The Abyss strikes back across the board. Molochs charge the Centaurs on the left and the Stampede on the right, the latter possible because the Tortured Souls horde indeed backs up and sits this turn out too. Canny play, Bill. The Chroneas and Abyssal Fiend plow into the Tribal Warriors horde in the forest, hindering the Fiend but not the striding Chroneas. The damaged Brutes are indeed flanked by the Gargoyles (with Zaz’u in the front), shortly before the Seductress flies over to menace the Druid next turn. The Abyssal fire base targets the poor Centaurs out in the open.

Cloak of Deaaaaaaath!

Those Centaur Striders who were wavered first turn and vaporized this turn. RIP. In combat, the Molochs decimate the Centaurs on the left, and waver the Stampede on the right (on a rock solid 10 damage). The Brutes are surprisingly driven off by the Gargoyles, with no help from Zaz’u who contributed no damage. Finally, the Abyssal titans stomp 7 damage into the Tribal Warriors horde but they’re fine.

Shot from the left showing the Lycan horde and handler lurking around the house.

Herd 3: Gentle readers, you know I’m down to grind, and so we do. Tribal Warriors and Brutes tackle the left Molochs, but not before the Tribal Warriors horde counters the Chroneas (limiting their slide). The Great Chieftain flanks the Chroneas as well. On the right, the Stampede fury counters the other Molochs, with flanking support from the Lycan Alpha. We discuss whether the Tribal Warriors can fight the Molochs too, but I decide that you can’t multi-charge if one of the chargers can’t actually Charge (in the Stampede’s case). Outside of charging, the Lycan and Centaur Chief move into position to assault the Flamebearers, and the Druid prepares to bane chant one last time before the Seductress does unspeakably sexy things to her.

Thankfully the BC goes off! And the Chroneas is blended, as are the left Molochs. The Stampede and Lycan Alpha likewise tag team the other Molochs to death. Bill is surprised at how easily the Molochs fall – I’m not 😤

Abyssals 4: The Forces of the Abyss are feeling a little light on the ground but there’s a lot of firepower and speed left. The Abyssal Fiend charges (hindered) the Tribal Warrior horde again, as the Seductress trips over some roots and (hindered) charges the Druid tending to them. The Abyssal fire base mobilizes, lining up some shots before the Hallow mobs them all. In a surprise move, the hero Gargoyles charge the two token Tribal Warrior regiment, giving me a concern! And Zaz’u and the Tortured Souls horde declare their relevance.

Firebolts and lightning put the Brutes on 7 damage, the Lycan Alpha on 3, and the Stampede on 13, wavering 😦 In combat, the Abyssal Fiend rolls around on the Tribal Warriors horde, putting them to 10 damage, the Seductress bad touches the Druid for 6 damage (she wavers), and the Gargoyles do 2 to the Tribal Warriors regiment.

Herd 4: Time to seal some deals and pack this game away, because I have some concerns about the right with the Stampede so mangled. The Lycan make contact at least, flanking some Flamebearers over a wall with Tribal Warrior friends. The Brutes flank the Abyssal Fiend for maximum carnage, with Tribal Warriors horde in the front. On the right, the Tribal Warrior regiment counters the Gargoyles and the Lycan Alpha chooses to shut down Zaz’u’s lightning. She had a lot of options: flanking the Abyssal Warlock in the center, shutting down the Flamebearers, grounding the Tortured Souls. Honestly she should have gone with the last option, but that’s a bit of hindsight speaking. I figured Zaz’u’s lightning could reach out and mess with my damaged token carriers worse.

*murder sounds* Many demons are smote, and Zaz’u takes 3 damage. (The Stampede turned in place between shots.)

Abyssals 5: It’s feeling like last gasps but Bill is playing for some serious points on the right. The Warlock charges the Brutes to hold them and/or kill them (7 damage so far), and the Seductress hits the Druid again to end her. Zaz’u counters the Lycan Alpha because, but the real move is the Tortured Souls horde jumping into the token-bearing Tribal Warriors.

Flamebearers toss firebolts into the Stampede but luckily can’t land a wound on 5+ / 4+ dice. In combat, the Druid submits under the Seductress’ heavy petting and the Tortured Souls mangle the Tribal Warriors, taking their tokens. Zaz’u and the Warlock do nothing but sure are in the way.

Herd 5: Blenders can be heard revving up as the Warlock is Bruted and the Flamebearers have 79 quality attaks leveled at their frail red bodies. The Stampede plows into the Tortured Souls horde and the Lycan Alpha shrugs and hits Zaz’u again (who has regened down to 1 damage). The Great Chieftain aims to sit the Seductress down, if not kill her.

The center of the board is almost entirely cleared of Abyssal taint. Zaz’u goes to 4 damage but sticks around. The Stampede does a solid 7 damage to the Tortured Souls but it’s not enough. And the Great Chieftain finds -1 to hit and De 6+ far too hard to crack, leaving the Seductress mobile and her Gnome-Glass Shield intact.

Abyssals 6: If Zaz’u isn’t wavered, he counters the Lycan Alpha? And the Seductress counters the Great Chieftain. The only actual business however is the Tortured Souls ending the Stampede.

Which they do, turning to face whatever the Hallow has for them. The Great Chieftain cops some damage too.

Herd 6: Try as I might, the Lycan horde can’t fit on the Tortured Souls, so it rear charges Zaz’u for murdery reasons, with the Lycan Alpha in the front. The Brutes join the Great Chieftain in trying to rid the world of the Seductress.

Zaz’u is detonated, and I think the Seductress may have been dragged down? The ensnare is killing me 😅 But with no Turn 7 and 5 tokens to the Abyssal’s 2, this is a convincing …

HALLOW VICTORY

I think it’s funny that the unit both Bill and I were bagging on all game, the Tortured Souls horde, was the power player that kept the Abyssals in the game, even securing them serious points – we’re using Blackjack at the GT, so 2 of 7 tokens is pretty meaningful for a minor loss. I do think they need any item, and my suggestion was the discounted Wine of Elvenkind. Their mobility is one of their few upsides, so what if even more mobile? With Helm of TC +1 as a back up.

While the Horn of the Great Migration wasn’t mindblowing, I ended up keeping it for my tournament list as a tech choice. Speaking of the GT, I’ll be back in the next week or so with the full rundown, so stay tuned. They’ve already announced our first round matchups, and I’m happy to announce my first game sees the return of a familiar face and his green horde …

THE HALLOW 19: OGRES

The tournament prep continued with a match versus Ogres, this time my club mate Drew’s really excellent Gnoll Ogres (Gnollgres). 3D prints from a variety of sources lovingly covered in hyena spots for ultimate sanity destruction. The dude has earned all the painting awards he wins with this army 🫡

Ogres 2150

Siege Breakers Horde – Helm of the Drunken Ram
Siege Breakers Horde – Chalice of Wrath
Hunters Horde – Brew of Haste
Boomers Horde – Fire-Oil
Warrior Chariots Regiment – Boots of Striding
Berserker Braves Regiment
Red Goblin Scouts Troop
Nomagarok [1] – Bane Chant (2+), Heal (4+), Lightning Bolt (4+)
Ogre Warlock – Lightning Bolt (3+), Drain Life (5+)
Berserker Bully
12 (23)

I swear, you’d have no idea Ogres were nerfed looking at this list. Loads of hammers with perfect items, the thickest of chaff, amazing mobile-scoring-inspiring shooting. The Helm is a fun throw back to when Siege Breakers had CS2 + TC1 naturally. I guess the double drain life is a more unique twist? But one I’m in favor of, Siege Breakers can and will grind out a loss to a win, so keeping them alive is never a bad idea. He dropped two other troops of Scouts to go from 2300 to 2150, picking up some upgrades in the process.

Herd 2150

Lycan Horde – Brew of Strength
Guardian Brute Horde
Minotaur Chariot Regiment – The Stampede [1]
Tribal Warrior Horde – Brew of Sharpness
Tribal Warrior Regiment
Centaur Bray Striders Troop
Lycan Alpha
Centaur Chief – Blade of Slashing
Druid – Conjurer’s Staff; Bane Chant (2), Heal (2)
Great Chieftain
13 (24)

Same list as when I dunked the Empire of Dust last game! Not feeling super hot about my chances but I do need to pressure test into Ogres so here goes.

We decided to play Raze, with the Ogres going first for one reason or another.

BATTLE

Battlelines! Ogres (left to right): Scouts, Bully, Braves, Nomagarok, fury Siege Breakers, Warlock, Hunters in the wood, Chariots, Braves in front of Boomers, Warlock, thunderous Siege Breakers. Herd (left to right): Centaurs, Lycan deployed back, Centaurs, Great Chieftain, Tribal Warriors regiment, Brutes, Druid, Tribal Warriors horde, Stampede, Lycan Alpha, Tribal Warriors regiment, Centaur Chief, Brutes.

Ogres 1: Roll out! Noms and his Warlocks call down a bunch of lightning as well, with mixed results.

Gnollgres looking dummy good.
Gently scorched vegetables.

Herd 1: I go deep into my metaphorical clock already, in large part because I don’t want to broach the center wood but can’t see much of anything thanks to its large size. The Hunters and the Chariots both have some serious range on me, with their 16″ outstripping my Brutes and Tribal Warriors horde but not necessarily my Stampede’s 17″ threat or Lycan Alpha’s 18″ nimble square. Ultimately, I pull back Centaurs on the left, pushing up the more central ones as bait or to cause a problem next turn, with Lycans in wait and Tribal Warrior reg as another layer of chaff. Centrally I vacate the woods and pressure just a bit with the Stampedes on the Chariots, with Alpha ready to go center or right.

On the right, I shove Tribal Warriors up to bait the thunderous Siege Breakers, which the Brutes very much would like to murder in response. The Druid heals up the Tribal Warrior horde and that’s that.

Ogres 2: The Gnolls play it extremely cagey, with only the left flank chaff venturing out, and the rest of the line holding or tip toeing forward, staying clear of that central forest. Lightning zaps the chaffing Centaurs for 2 damage and the right most Tribal Warriors for 1. The Red Goblin Scouts burn a token, taking the score to 1-0.

Herd 2: With the central Centaurs blessedly alive, I immediately throw them into the flank of the Ogre Chariots, powering the Stampede into their front as well. The other Centaurs join the Tribal Warriors fighting the Berserker Braves, as the Lycan horde crosses over into the Red Goblin Scouts. Finally, Lycan Alpha charges the central Braves to hold them up while the Tribal Warriors on the right hit the Siege Breakers, keen to do anything while their Brutes move into position. The central Brutes end up sitting 12″ away from the fury Siege Breakers, content to see if they want to take a hindered shot next turn, even with the Tribal Warrior horde waiting to piece trade.

Stampede and Centaurs open up this pit!

The Druid’s bane chant fails despite the reroll 😐 but things work out ok anyway. The Lycans blend the Scouts, the Centaurs and Tribal Warriors do 7 damage to their Braves and stall out, the central Centaurs and Stampede shatter the Ogre Chariots, the Lycan Alpha claws 3 damage into her Braves, and the right Tribal Warriors do precisely 1 damage to the TC Siege Breakers. When it comes to reforms, it’s worth noting that once the Stampede backed up D3″, the Centaurs were able to pivot enough to block the Hunters from fighting Brutes or the Stampede next turn.

Ogres 3: (I missed a before shot for this turn!) The Gnolls strike back with authority this turn, thanks in part to some very good Nv rolls. From left to right, the Braves counter and kill their Centaurs, the Bully charges and pops the wounded left Tribal Warriors, the Hunters finish off the central Centaurs, and the thunderous Siege Breakers decimate the right Tribal Warriors. The Lycan Alpha takes 4 damage from her Braves and wavers, the Stampede cops 4 damage from the Boomers for no effect, and the real indignity is the left Brutes taking 2 lightning damage and wavering. This royally impedes my momentum in the center, as the Stampede can only do so much. Oh! This will become important shortly, but the right Warlock drain lifes the Tribal Warriors smooshed by the thunderous Siege Breakers, and uses the heal on the Alpha’s Braves rather than the Siege Breakers.

Herd 3: With a little finagling, I discover that I can engage the Tribal Warrior horde if I take a deep breath and back the wavered Brutes up a full 3″. My heart hurts a little bit as I do so, but it does mean the Tribal Warriors can charge the (ensnaring) Hunters, offset enough that the fury Siege Breakers are in their front next turn. Before this charge happens, the Stampede thunders into the Boomers, for vengeance. Speaking of carnage, the Lycans on the left charge the 7 damage Braves and the Brutes on the right complete their mission and charge the 1 damage Siege Breakers. The Lycan Alpha refuses to regen but keeps standing in front of her Braves. Also, the Centaur Chief on the right zips in before the right Brutes and chomps on the right Warlock. Annnd the Great Chieftain wants to be useful, so charges the flank of the fury Siege Breakers over that wall.

The Druid’s rather critical bane chant on the Tribal Warriors fails despite the reroll 😐 but they manage to do 7 damage to the Hunters despite. The Stampede delivers 9 damage into the Boomers, however I show Drew what Brutes can do by more or less one rounding the thunderous Siege Breakers. More or less because I broke them twice precisely thanks to brutal and the single damage the Tribal Warriors did and the Warlock didn’t heal. Perfection. The Lycans gut the Braves on the left as they do. Note that the Berserker Bully is facing directly ahead, unable to see the Lycan or the Tribal Warriors. The right Warlock does take damage from the Centaur Chief, disordering. (And the Great Chieftain does no damage to the fury Siege Breakers.)

Ogres 4: The Gnolls should be dwindling away but Drew has so many tools left that this is far from over. Fury Siege Breakers and Hunters go into the Tribal Warriors horde, while the Boomers counter the Stampede and the surviving Braves hit the Alpha again. In square base town, the Bully tries to stand in the way of the Lycan horde (but is effectively blocking its LOS), while Warlocks wander around or counter charge the Centaur Chief over on the right.

Drew’s dice are all over the place when it comes to delivering the hurt. The central Brutes take a single pip of lightning damage from Noms and the Great Chieftain suffers 2 drain life damage from the central Warlock (used to heal the Hunters), shortly after which the Tribal Warriors take a mere 8 damage from hindered Siege Breakers and fully functional Hunters. The Boomers, however, shove the Stampede up to 10 damage, to no effect, and the Lycan Alpha is clubbed to 8 damage, likewise holding. The Centaur Chief takes 1 damage from the Warlock’s counter-charge.

Herd 4: At long last, the central Brutes make contact with the furious Siege Breakers, with the Tribal Warriors assisting and showing the Hunters the utmost disrespect. The Stampede, meanwhile, counters the Boomers and the Alpha regens down to 5 damage and gets to slap some Braves. The derpy Great Chieftain trips back over the wall and charges Noms, with dreams of disordering him. Not pictured are the Lycans juking the Bully in favor of burning a token and becoming A Problem next turn, and the Brutes on the right doing everything they can to make contact with the right Warlock but giving up because the Centaur Chief and the tower are well and truly in the way. The Centaur Chief counters its Warlock but doesn’t love it.

The Druid sticks the bane chant on the Tribal Warriors! And the Siege Breakers evaporate. I turn the central Brutes to face the left, which might put too much face in the Tribal Warriors but does make the Ogre heroes over there skedaddle. The Stampede nukes the Boomer and the Braves return to 3 damage. The right Warlock is also kicked to 5 damage by the Centaur Chief, wavering. And the Lycans do burn a token, evening the score at 1-1. The Great Chieftain fails to damage Noms 😦

Ogres 5: The Hunters aim to finish off the Tribal Warriors horde (on 8 damage) and the Braves head back into the Lycan Alpha yet again. The Bully zips away into the Herd backfield, but Noms faces the Brutes and prepares to magic itself to death or glory (with the nearby Warlock’s help).

Nomagarok’s lightning and the Warlock’s drain life only push the Brutes to 5 damage, and they hold. The Hunters however shred the Tribal Warriors (!), and the Lycan Alpha is again wavered, on 7 damage.

Herd 5: The Hallow descends once more. Repeatedly scorched Brutes slam into Noms, the Lycans plow through a wall into a Warlock, the Stampede flanks the Braves wailing on the Lycan Alpha, and the right Brutes crash into the flank of the other Warlock. The Great Chieftain charges the Hunters, knowing that even if his hindered, ensnared ass can’t wound them, at least he’ll be in the way thanks to mighty.

Bane chant happens, everybody dies. The Great Chieftain does 3 damage to the Hunters despite -2 to hit and only CS1. (Before combat, the Lycan Alpha remembered she’s really fast and can still be useful, so backs out 5.5″ to make a play for the right raze token late game.)

Ogres 6: The Hunters counter the Great Chieftain, tearing apart the poor mushroom man but flubbing the 4″ overrun into the Lycans on the wall. The Berserker Bully burns another token, bringing the score to 2-1.

Herd 6: At this point I realize that the game is very close. If the hindered Lycans can kill the ensnaring Hunters by themselves, with the Stampede sitting on the center objective, then I win, as the Lycan can burn another token. If they don’t rout the Hunters, I only draw, as I can’t get another scoring unit on the middle … even if I now realize the Lycan Alpha could have doubled back and just claimed the center. I didn’t see that, as I moved her first to make a Turn 7 play for my right token. The left Brutes, regardless of all this, charge the Bully for murderous purposes.

As is usually the case, this is all a moot point as the Lycan ream the Hunters, burning the token and taking the game to 3-2 in my favor. The Brutes also brute the Bully.

Herd 7: Annnnd then the Lycan Alpha burns the right token (as shown above), bringing us to 4-2 and a very solid …

HALLOW VICTORY

What a smashfest! It really opened up with that double charge on the Chariots after the Centaurs took next to no damage, giving me the momentum, even if I almost lost if Turn 2 with those wavers. I think the Bully’s facing issues were a more significant misplay than it seemed, as he could have chaffed up the green tide that was crashing onto the Ogres at that point. All the same, an encouraging test game for the Herd going into this weekend’s tournament.

I’ve got one more report to go before the tournament, will try to punch it out this week!

THE HALLOW 18: EMPIRE OF DUST

Happy new year! Got my first game of 2023 in this week against Mike, a newer local player I’d never met until that night. He rocked up with EOD, a faction I haven’t faced in quite a while, and possibly never with Herd?

Mantic Shobik looking regal af, with Monolith and Soul Snare / Well attending.

Empire of Dust 2150

Skeleton Spearmen Horde
Mummies Regiment
Mummies Regiment
Revenant Chariots Regiment
Scavengers Regiment
Scavengers Regiment
Skeleton Archer Cavalry Troop
Bone Giant
Soul Snare [1] – Drain Life (9)
Monolith [1] – Surge (8)
Idol of Shobik [1] – Heal (5)
Ahmunite Pharaoh – Eternal Guard, Knowledgeable [1], Surge (8), Host Shadowbeast (2)
Cursed High Priest – Surge (8)
14 (20)

Apparently Mike usually runs a more monster mash style EOD list, but he dropped the various wyrms to give chariots and a different hero mix a shot. We talked after the game about how to crank the list down a bit while still keeping the chariots in but bring back some of the punch he might be missing in this list – Mummy troops instead of Scavanger regs, for example. Minor spoiler there.

Herd 2150

Lycan Horde – Brew of Strength
Guardian Brute Horde
Minotaur Chariot Regiment – The Stampede [1]
Tribal Warrior Horde – Brew of Sharpness
Tribal Warrior Regiment
Centaur Bray Striders Troop
Lycan Alpha
Centaur Chief – Blade of Slashing
Druid – Conjurer’s Staff; Bane Chant (2), Heal (2)
Great Chieftain
13 (24)

Savvy readers will note that I’ve brought back the Centaur troops as dedicated chaff. I’m not really in love with the Sp 6 or the De 2+ of the Woodland Critters, on top of not really posing much of a threat to anybody, especially compared to the Centaurs’ Sp 8, De 4+ and punchy handful of Me 3+ attaks. The cost was losing some extraneous items and downgrading a Centaur Chief into a Great Chieftain, which is a fairly even trade all told. Less speed but a little more fight and the same mighty annoyance.

We decided to play Plunder for this game, one of my favorites as well as one of the missions for our upcoming 2150 tournament at the end of the month. Mike won the roll for first and had me take it away.

BATTLE

Battlines! The EOD are (left to right): Spearmen with Scavengers and Cursed Priest; Chariots with Bone Giant to the left, Shobik to the right, Horsemen to the front and Monolith behind; Soul Snare with Scavengers; Mummies to either side of the wood with the Pharaoh straddling them; Chariots hard right. The Herd are (left to right): Centaurs (off shot to left), Stampede, Warriors, Chieftain, Brutes, Alpha, Warriors, Brutes, Druid, Warrior horde, Centaurs, Centaur Chief, Lycan hard right.

Herd 1: I think for a moment, having not gone first in a long time, and then punch it forward. Tribal Warriors grab the center three tokens, with Brutes mounting the hill in support and hammers otherwise lurking. We don’t crest the right hill to see what the Chariots are up to, tho the Lycan blender has LOS and range around the side of the little hillock.

Empire of Dust 1: Scavengers swoop down on both loot-bearing Tribal Warriors, and otherwise the dry undead shamble forward. I realize about now that he has Surge (16) into almost any unit he wants, with the exception of the right Chariots, who are outside the Monolith’s 24″. Speaking of surge …

… it scoots the Spearmen, the central Mummies and the right Chariots 4″ forward each. Mike had just bought a new dice block and it was rolling aggressively average. The Soul Snare rips 4 damage into the central Brutes, the Archer Cav tag a wound onto the Lycan Alpha that she will never regenerate, and in combat the Scavengers do 1 damage to the left Tribal Warriors and 2 to the central ones.

This is a really long battlefield still, so here’s the left side (the green tokens are worth 2 points) …
… and here’s the right, moments before the blending begins.

Herd 2: It’s all claws on deck as everybody charges who isn’t a square-based individual! The Stampede crashes into the Spearmen’s waiting embrace (losing TC2 and taking a -1 to hit that I shouldn’t have but forgot about chariots not counting for phalanx), with the Alpha pouncing on their flank. The left Centaurs flank the Scavengers harrying the left Tribal Warriors, while in the center the left Brutes help the other Tribal Warriors out with their carrion problem. The central Brutes juke past the Scavengers and Mummies in the middle and power into the central Chariots, and the Tribal Warrior horde tests their mettle against the central Mummies. Mummy regiments are the business, but with the power of bane chant and sharpness behind them maybe I can cook the dice that hard? On the right, the Lycan, the Centaurs and the Centaur Chief pile on the Chariots.

A storm of dice later and so many undead have been returned to the dust from whence they came, though arguably his anvils and real hammers are still kicking so it’s not necessarily as bad as it looks. But about those anvils, the Spearmen take 11 damage, 8-9 of which is from the Alpha going absolutely bonkers, and the Mummies are pushed all the way to 13 damage by the Tribal Warriors. I can’t seal the deal sadly, so I fully expect them to heal back down to nothing in short order.

Empire of Dust 2: The Empire of Dust are looking a little downtrodden but there’s still work to do. Shobik lines up an easy surge flank on the Tribal Warrior horde with the Mummies countering in the front, while the right Mummies try their hand at the Centaurs, on the theory that if they can break them, they can turn and grind out the Lycan horde. 12 attaks on hindered 5+ is a tall ask but very slowly trying to slink away is a worse feel. On the left, the Spearmen counter the Stampede and the Archer Cav I think were supposed to shoot-n-surge into the damaged Brutes but he left them behind the tower, blocking their surge but at least meaning their shooting suffered no negatives.

Easy surge is easy! The Soul Snare whips the winged Brutes up to 7 damage, wavering them (the Archer Cav I think failed to wound after all that). Shobik lays into the horde, delivering a solid beating and pushing them up to 15 damage. The Tribal Warriors manage to waver, which is awkward but real bad for Shobik’s idol.

Meanwhile the flanks are uneventful. The right Mummies don’t even wound the Centaurs, elite or no, and the Spearmen do a single wound to the Stampede, striping their TC2 again.

Herd 3: Listen, I came here to roll dice and chew bubble gum, and I was all out of bubble gum at this point (fittingly because I was chewing it during this game 😅) The Stampede hits the Spearmen again, with Alpha flanking support. The wavered Brutes rotate in place enough to allow the other Brutes to flank Shobik. The Lycan flank the right Mummies, with Centaurs in the front. And the Great Chieftain solos the Archer Cav troop like a boss. Far on the left, the other Centaurs go grab a 2 point token.

*a chorus of blenders can be heard in the distance* The Empire takes another round of heavy hits as Spearmen, Mummies and indeed Shobik all fall. Plus the Great Chieftain one rounds the Archer Cav with a perfect 5 of 5 damage. At this point both Mike and I are wondering the same things: Is the Soul Snare that good? Will the Mummies out tough the whole Herd army? Can the Bone Giant recapture his former glory days as the EOD hammer? Or most importantly, when will this face melting end??

Empire of Dust 3: Despite running low on tools, the EOD have some moves left. The Bone Giant strides into the Lycan Alpha as the better of two options, with the Cursed Priest charging in along side because it’s that kind of game and he’s only got surge anyway so YOLO! The central Mummies charge the Tribal Warrior horde to finish them off, while the Pharaoh chooses discretion and slinks off toward the EOD backfield.

The Tribal Warriors are shattered by the Mummies, who take their 2 point token and lifeleech off their last damage, healing to full. Woof. Shortly before this, the Soul Snare punches the winged Brutes up to 11 damage but flubs the Nv roll. Speaking of flubs, the Bone Giant bops the Lycan Alpha up to 5 damage, for no result.

Herd 4: There are still EOD on the table, so I just keep that pedal to the floor. The Stampede hits the Cursed Priest, with an easy overrun into the Bone Giant’s flank, currently being counter-charged by the Lycan Alpha. The Great Chieftain continues his journey through the EOD DZ, charging into the Soul Snare. However the real carnage is the middle, where the Mummies cop Brutes and Tribal Warriors in the front, both off the hill, and Lycan in the rear, possibly also off a hill but I didn’t remember at the time, plus they were bane chanted anyway.

The Stampede pulverizes the Cursed Priest then delivers ~20 damage into the Bone Giant. The Lycan Alpha blows on him and he crumbles away. The Mummies similarly are devastated down to the molecular level before routing. The Soul Snare takes a hearty hit from the Great Chieftain but holds together, albeit disordered.

And with that, Mike graciously concedes, which combined with holding all the tokens makes for a …

HALLOW VICTORY

Pun and all 😐 We talked for a while after the game, and Mike’s feel was that he was too spread out and his army couldn’t support itself like he’s used to – the Pharaoh being pulled away from the Mummy regiments, for example, and having to choose one. I did deploy quite broadly, except my stuff is fast and can reinforce itself as needed, plus isn’t trying to win through combined arms. I do feel like the EOD suffered in list building, not quite having the hammers to dig themselves out, as well as probably misused the Scavengers, who could have helped get the Chariots some charges where they could have done some work. I quite like the EOD Chariots after the bows were made optional, -/16 De 4+ isn’t terrible and I had assumed they hit on 5+ like other skellies (in fact Me 4+). Sounds like Mummy troops are inbound, which I hear are great and punchier than I think.

I keep wondering how this game snowballed so hard, and giving me first was probably the first mistake. Yea, I got to grab early objectives so scenario-wise it was a misplay, but really I was able to crest the center hill immediately plus mobilize my chaff up, staggering them with hammer support as is my general plan. I can see why Mike let me go first – indecision as a new player and desire to be reactionary as a Dust player – however it did feel quite decisive quite quickly.

As for my list, the Hallow continues to feel strong, or at least fun. Brutes are terrifying with me behind the dice, the Lycan blender is a menace (and should be at 300 points) and I really dig the ‘cheap’ item-less Stampede. Funny to think of it as one of my anvils but at 16/18 and De 5+ it kind of is!

I’ll catch you next week with another report, I should be getting another game (or two?!) in this weekend as we continue tournament prep. Until then, merry gaming in the new year!

THE HALLOW 17: VARANGUR

So anyway, guess I’m taking Herd to Dead of Winter 😅 I took a look at how little time I have to build and paint Tortured Souls, versus painting already primed Woodland Critters (or nothing at all if I ran Centaurs as chaff), and decided Herd were way more realistic for this holiday season. Plus I vaguely understand the army better and have been painting new units that have never seen the table, so may as well. Pretty sure this is the list:

Herd 2150

Lycan Horde – Brew of Strength
Guardian Brute Horde – Brew of Haste
Guardian Brute Horde
Minotaur Chariot Regiment – The Stampede
Tribal Warrior Horde – Brew of Sharpness
Tribal Warrior Regiment
Woodland Critters Regiment
Lycan Alpha – Zephyr Crown; Wind Blast (5)
Druid – Conjurer’s Staff; Bane Chant (2), Heal (2)
Centaur Chief
Centaur Chief
13 (24)

Over the summer I realized that I need to lean into the Herd’s hammers if I want to have much fun or success (different things but related) with the army. Struggling my way to the enemy and then doing nothing is a bad feel … but struggling my way and then smashing something to bits, that’s ok in my book. While I would rather be running triple Brutes, I’ve given in to the upcoming GT’s format (no triples) with just two hordes of them, along with a couple more smashy friends and really quite a few control pieces to help them get there. I could monkey with items further – and believe me, my skin crawls at 135 points in items! – but these big ticket upgrades really help their units shine and/or match the minis I’m using (the flying Brutes, for example).

Varangur 2150

Snow Trolls Horde – Chalice of Wrath
Huscarls Regiment – Brew of Haste
Mounted Sons Regiment – Guise of the Deceiver
The Fallen Horde
The Fallen Regiment
Snow Foxes Regiment
Draugr Regiment
Cavern Dweller
Magus Conclave – Famulus
Lord on Frostfang – Snow Fox
Snow Troll Prime
12 (23)

Quite sure somebody in there has Boots of Striding? Probably some Mounted Sons. It’s a hardy list with good speed and lots of fight in it. Happy to see the Magus Conclave and Cavern Dweller make it in, and shout out to the Snow Troll Prime for being just damn awesome. Cory did consider some changes after the game, which I’ll touch on later.

We decided to play one of the missions from the upcoming tournament and keep it simple while we were at it: Invade it is! I won the roll, chose lazy gamer’s side, dropped my Warrior horde and away we went. Eventually the Varangur took the initiative.

BATTLE

Hallow 1: I respond to the Varangur advance by advancing much more cautiously. And by wind blasting the right Mounted Sons back 3″, out of alignment but still on the hill.

For a unit breakdown, Varangur are (L2R): Draugr, Fallen horde, Fallen reg, Snow Troll Prime, Snow Troll horde (Mierce rhino dudes), Cavern Dweller (more Mierce <3), Magus Conclave by the house, Huscarls behind Mounted Sons behind Snow Foxes, Frostlord to the right also behind Snow Foxes, and Mounted Sons.

Herd are (L2R): Lycan horde (worm thing) behind Woodland Critters next to Centaur Chief, Warrior reg next to wood filled with haste Brutes (white wings) and more Brutes, Woodland Critters in front of Lycan Alpha and Warrior horde, and Warrior reg in front of the Stampede and Centaur Chief.

Varangur 2: The eevil vikings and their monstrous allies slam into the vengeful forest dwellers. The Fallen reg tackles the left Woodland Critters, as the nimble and very fast Lycan horde stares at the nimble and very fast Fallen horde and its numerous allies. The Cavern Dweller plows into the central Tribal Warriors, while on the right I’ve successfully gummed things up with the other Woodland Critters, limiting the double-plus charge into the Warrior horde. Mounted Sons run down the Woodland Critters cavorting in their way, as the Frostlord holds down the Warrior horde and the other Mounted Sons crash into the last of the Tribal Warriors. Last but not least, the Snow Foxes make the ultimate sacrifice …

Snow Foxes swarm their natural prey, the docile and easy-going Stampede.

The Fallen regiment barely kills the Woodland Critters on 4-5 damage, overrunning to block the Lycans’ ability to pivot – which was smart, because they 100% had a nimble charge into the Fallen horde behind. The Cavern Dweller mauls the central Tribal Warriors, wavering them on 6 damage (out of only 7 attaks). The Mounted Sons vs Woodland Critters ends as you’d expect, with the Mounted Sons reforming to face Brutes, and the Frostlord picks up 9 dice and does 9 damage to the Warrior horde. Whoa. The rightmost Mounted Sons similarly crank the dice, delivering 10 damage to their Tribal Warriors, but snake eyes the rout, creating a roadblock for their path into the Stampede … which is compounded when the Snow Foxes nibble a single wound through on the Stampede, stripping its TC2 😐

Before all this, the Magus Conclave zaps 3 damage into the Lycan Alpha, 2 of which she’ll never regen.

Hallow 2: With the second Varangur wave posed to crash in next turn, I need to strike back hard and/or make things complicated. The flanks are easy since I don’t have many choices there. On the left, the Lycans charge 1 mm into the Fallen regiment blocking them, with their Centaur Chief charging the Fallen Horde to hold them in place. On the right, the Stampede boops into the Snow Foxes and the miraculously alive Tribal Warriors counter their Mounted Sons. The Tribal Warrior horde counters the Frostlord, intent on tearing this meta boogeyman down over two turns … if they don’t succumb first, 9 damage a turn is too stronk 😦

I spend a while thinking about the mess in the center. The Huscarls have a charge into my right Brutes, but they’ll have a double charge if I can’t drop the Mounted Sons too. I could fade them into the woods and hope Cory can’t roll 4+ to hit, or I could at the least smash the Sons and let the Huscarls do their worst. Brutes and Lycan Alpha charge the Sons to do just that. This leaves the Cavern Dweller protected from my haste Brutes by my wavered Tribal Warriors. I’m at a loss until I see the Magus Conclave has crept forward – one 13″ charge later and my Brutes are in Cory’s back line.

The Fallen reg is blended and the Lycan horde deigns to face the Draugr, given them its flank in a clear act of hubris. The Centaur Chief smacks 2 damage (after IR) into the Fallen horde. Centrally, the haste Brutes dunk the Conclave, spinning to face the Snow Trolls and Cavern Dweller. The slow Brutes and Alpha shatter the Mounted Sons (on like 20 damage), and the Brutes turn enough that the 2.5mm of base overhang when the Huscarls hit them will hinder them on the woods. The (bane-chanted) Warrior horde shreds 8 damage into the Frostlord, wavering the big bad! The Warrior reg smacks 4 damage into their Mounted Sons, and the finally the Stampede detonates the Snow Foxes, despite being only CS1.

Varangur 3: Cory starts by teaching me a thing about nimble foot hordes, as the Fallen horde withdraws (for -1 to hit), jukes the Centaur Chief and charges the Lycan horde lurking in the pond. Draugr scamper into their flank (hindered). The Cavern Dweller turns 90 degrees and walks away from the central Tribal Warriors, making space for the Snow Trolls to mash into them (hindered). The hindering continues as the Huscarls thunder off the hill into my waiting Brutes, swinging one guy’s foot through the central wood. The surviving Mounted Sons have another go at their Tribal Warriors on the right, as the wavered Frostlord backs up 4.5″.

The Fallen gently shit the bed, moments before the Draugr unleash their raw power.

The Tribal Warrior regs both detonate, but miraculously (to me anyway) the Brutes survive the Huscarls on 7 damage and the Lycan horde only wavers on 8. Which is especially nice because I don’t think they’re inspired 😮

Hallow 3: A shrill shrieking can be heard across the field as the Hallow descends in force, led by the Lycan Alpha aiming to block or kill the Frostlord herself. The Stampede plows into the Mounted Sons, offset because the Centaur Chief over there didn’t want to get mulched on a counter charge in case this went south. Which is crazy talk once the Warrior horde mobbed the eevil knights’ flank too. The slow Brutes counter charge the Huscarls, hoping to mangle them before getting killed next round, and the haste Brutes hop into the flank of the Cavern Dweller. Sorry big boy. On the left, the Centaur Chief attempts to do anything to the Fallen Horde that might buy the Lycan horde some time to shake its waver.

Speaking of Lycans, I am so bad at 5+ regens y’all 😀 But I do manage to get the Lycan horde back down to 5 damage – take that, Draugr!

The Lycan Alpha wavers the Frostlord again (10 damage), and the Mounted Sons are reduced to a red smear on the hill. Shockingly, the (bane-chanted) Brutes one round the Huscarls … but when you hit 80% of the time with 30 attaks I guess that’ll happen 😉 The Cavern Dweller also gets Bruted, and over on the left the Centaur Chief does hearty damage to the Fallen horde and wavers them.

Varangur 4: With just three functioning units, the Varangur turn is short but still violent. The Snow Trolls charge the haste Brutes and, despite being hindered and hitting on 5+, one round the horde! Somebody’s mad! The Draugr can’t work similar magic in the Lycan horde’s flank, failing to hit once.

Hallow 4: On the right, the Stampede flanks into and through the Frostlord, CS1 + TC3 off the hill leaving no question to his fate. On the left, the Lycan horde and Centaur Chief finish off the Fallen horde, then prepare to clean up these damn Draugr next turn. Centrally, nobody wants to broach the safety of the woods, having seen how painful Snow Trolls on 5+ to hit can be – plus my Brutes are damaged so probably can’t take the first punch, no matter how furiously the Druid is healing them with her Heal (2).

Finally, we meet as equals. There can be only one slash fourteen.

Varangur 5: The Dragur manage to jab a single filthy dagger into the Lycan horde but they hold. The Snow Trolls don’t want to breach the central wood either.

Hallow 5: The Lycan horde blends the Draugr and turns to face the Snow Troll Prime, and otherwise the Herd are fecking cowards and turn to maximize Invade points.

Varangur 6: The Snow Troll Prime has a go at the Lycans’ in the puddle they’ve never moved from all game, but can’t do much hindered. The Snow Troll horde meanwhile shoves into the center, what with the Hallow distracted.

Hallow 6: The Lycan horde and Centaur Chief tag-team the Snow Troll Prime, almost certainly killing him. The war of the woods sees my Brutes and Stampede turn to face the Snow Trolls in case there’s a Turn 7, and the Lycan Alpha wind blasts them for good measure but the Trolls’ leader point remains in the woods.

Blessedly that’s game, and a decisive …

HALLOW VICTORY

I was quite sure the Varangur were going to eat my Herd’s lunch – they’re fast, tougher and on the whole fightier than me, plus Cory is no slouch. His dice were also really solid, with the exception of the Fallen and a couple places Turn 2 where he lost momentum and I was able to take it back. The old pop-n-spin off the Magus Conclave was clutch and allowed me to escape a piece trade situation, compounded by my Centaur Chief wavering the Fallen horde and keeping my Lycan mega-hammer in the game.

More importantly, I enjoyed running my Herd again, something I haven’t said in a while! Hammers plus scenario / control pieces is a good feel and suits how I want to be playing if I’m not doing a combined arms control approach.

Going into the game Cory was pretty sure he’d be swapping Huscarls out for more Snow Trolls, and after the game the Cavern Dweller’s fate was sealed as well. Here’s his possible redux:

Varangur 2150

Snow Trolls Horde – Chalice of Wrath
Snow Trolls Horde – Dwarven Ale
Mounted Sons Regiment – Brand of the Warrior
The Fallen Horde
The Fallen Regiment
Snow Foxes Regiment
Snow Foxes Regiment
Draugr Regiment
Cavern Dweller
Magus Conclave
Lord on Frostfang – Snow Fox
Lord – Axe of the Giant Slayer; Brand of the Warrior, Devoted Icon (Stealthy), Snow Fox
Snow Troll Prime
13 (23)

Another control piece and another source of Very Inspiring feel great, and I dare say the Lord is going to do the murder work that the Cave Dweller would be doing just as well if not more often, since he’s smaller and can make it into more combats more often (i.e. by not being targeted by everyone). The brutal on the Mounted Sons is a surprising move but I think it’s a canny one. Stealthy isn’t going to be useful against all opponents, while brutal definitely is – and the Lord’s rocking a stealthy aura that works on the Sons as needed. Also Snow Trolls are great, certainly better anvils than Huscarls and pretty scary in combat when dice or time are on their side.

Thanks for reading, have a Merry Solstice and Happy New Year! Catch you in 2023 for more carnage.

FORCES OF NURGLEKIN: ADVENTURES IN COUNTS AS

Gentle readers! Sorry for the lack of reports, but unfortunately it’s been extremely hard to get games in this Fall, as everybody’s availability vanished and the wait time for the BRB to arrive squashed a lot of enthusiasm for our existing armies. Well, we’ve finally got our Big Red Books … just in time for the holidays to smash into whatever free time we might have 😐

That said, my club recently announced its GT dates and details, which has lit some fires. Last weekend of January will be the second Dead of Winter GT here in Albany, NY – 5 games, 2150 points, no triples of any kind. While I think this is pretty reactionary and am pretty sure no quads makes for more varied lists, it’s interesting to say the least and I’ll be there no matter the comp (that’s a lie, I probably can’t make a Highlander (no duplicates) list with any army I own!) This Zweilander format, as I’ve dubbed it, does invalidate all my current armies – I use a lot of triples or quadruples for theme / skew – however I’m down to play something different.

Of the four armies I currently have, the Scuttlers (Trident) could be rebuilt but wouldn’t be a shooting army any more and would probably need the return of the Gigas; Bloodfire (Salamanders) is based around Fire Elemental hordes and Ember Sprites, which I’d be limited to 2x hordes + 2x regiments of at most (the duplicate limit is per unit per size); the Hallow (Herd) I recently rebuilt into a Brute hordes and Tribal Warriors regs checkerboard thing; and my WHFB legacy Nurgling army was last run as a Ratkin army in 2E built around 3-4 hordes of elite infantry. I reported my Nurglekin games over on DakkaDakka as well as my old blogspot (check out a weirdly competent tournament run here). The Nurglekin are also individually based and in the midst of an eternal redux, making them the most flexible for tinkering …

So over the last month I chopped up a couple Zombicide minis and started converting a new wave of Ratkin weird tek. I played a 2300 game against Cory’s Salamanders and really enjoyed it! Ratkin 3E is a strange faction but the playstyle felt good to return to, with a nice mix of grind and responsive shooting. Here are the few shots I’ve got of that game, which I believe was a draw thanks to a Turn 6-7 Mother Cryza lightning bolt rout:

The announcement of the Zweilander format curtailed my enthusiasm a bit (goodbye triple Shocktroop hordes) but I pushed on for a while. As time with no games dragged on, I found myself less enthused by the double horde build and wanting to mess around with a totally new direction for the green carpet, one that would let me use some WMH minis I’d earmarked for the army but Ratkin doesn’t support, as it has no tall 50mm units.

Specifically for this bastard!

Enter the Abyssals. While I’ve looked at the Abyssal list before, as it’s the usual home for WHFB Chaos Daemons, I’ve never actually played as them, and have a good track record of beating them at events. Abyssals seem pretty middle of the road, with ok anvils, decent mid-range shooting, mediocre hammers, multiple annoying flyers, an interesting selection of monsters and solos, and a fantastic titan in the Abyssal Fiend. On rate, I’m a fan of Lesser Abyssals and would use them for the Nurgling bulk of the army. The list also has many heroes for me to use all the Confrontation minis that make up the army’s individuals. And most importantly, Abyssals have lots of tall 50mm options for my boy Omodamos: Despoiler Champion, Chroneas, Manifestation of Ba’el, and the Well of Souls. Dash28 tells me the Well is the big brain choice, but I love how weird the Chroneas is, plus in an army that hits on 4+ I really want to hit on 3+, preferably all the time thanks to Strider. I came so close to trying out Ba’el in a game, however I’ll be real, I waver and kill Ba’el whenever I run into him. The dude is fine and his LB7 would be great for the army, I’d just rather have a weirder, fearless option.

The Zweilander format presented some challenges to my triple Lower Abyssal hordes plan, but here’s where I’ve landed after two test games vs Undead:

  • In both my test games I ran double Tortured Souls hordes but wow are those not good hammers! Did they really only lose nimble from 2E? Maybe they had CS2 before too? I’m shocked at how incompetent they are, even in the flank, and the H2 is a real liability on flyers. I’m hoping that the points saved from dropping one to a regiment (i.e. the correct size for the unit) and put back into killy items will help them both do their jobs better. Plus it gives me a fast chaff unit in the regiment.
  • The Abyssals, Guard or Lower, have been ok. I’m always itching to drop them to De 3+ and CS1 but the prevalence of P0-1 shooting is keeping me at De 4+ for now. I might swap the Lower Abyssal regs to CS1, so they might ever do some damage (I grabbed a flank in one of my games and did a whole 4 damage even bane chanted), but in theory they should be decent little 115 point anvils with De 4+ and regen 5+. A regen value, by the way, that I am really struggling with – Trident’s 4+ has ruined me 😛
  • Chroneas has been fun, Me 3+ CS3 is nice and chunky, Cloak of Death is brilliant. Temporal Ruptures is neat although would be much better if the Chroneas could heal itself, since it’s one of the only parts of the army without its own sustain. Which, yes, it could do with drain life but after taking DL8 in my first game I agree with the Internet, the upgrade is a trap. Cheaper is best.
  • The hero blend is a combination of models I want to use and duplication limits due to the comp meaning I can’t just run triple Champs. The more I use the Seductress, the more I love her, what a great toolbox hero. I haven’t run her with LB yet, but I had the points spare and for consistency and more ranged pressure I like the spell on her. For a brief time she had BC (for the Tortured Souls mostly) but I didn’t cast it, preferring to get her stuck in. She had Pipes of Terror in my second game, which is probably the go to if I wasn’t taking Boomstick. Finally, the Abyssal Warlock. An obviously great 3E hero who currently spends his days casting bane chant on the Abyssal hordes. It’s a living! With so many individuals I’ve decided to invest a few points into the new Host Shadowbeast, which I think has legs with the otherwise weak CS1 of the Abyssal individuals. I’ve tacked on Knowledgeable for an extra +1 from the spell, 10 points that otherwise would become Slashing + Crushing for the Champions. That might be better? Since it’s always on and not reliant on the Warlock not casting BC, but eh, I prefer simpler lists with fewer items if I can.

Let’s wrap this up with some mini-reports. In Forces of Nurgle 1: Undead, my buddy premiered yet another redux of his Undead army:

It’s a very solid list, with the exception of the Lute which I assured Jeff that wolf would probably never get a chance to strum. Relying on the Lykanis for inspiring will often hold them back from going rambo, but with only Att 5 maybe that’s for the better? Keeps them close for combo-charging instead of trying for flank pressure.

We played classic Loot, with the Revenant Hordes eventually getting a token each and proving far too hard for me to shift with their LL2+ and my terrible dice. The highlight for me was slowly whittling down and routing his Soul Reaver Cav with one Abyssal Champion, thanks to wavering them halfway through the process. Shadowbeast +4 gave him the boost he needed to finish them. The lowlight, tho, was taking seven flanks from Goreblights, only one to two of which were thanks to surge …

One of seven Goreblight flanks, each one of which killed a unit.

I was obviously having trouble protecting my hordes’ and regs’ flanks or blocking the Goreblights out, despite having all these dumb individuals wandering around getting into trouble. Like smashing a Soul Reaver unit late game and then going back to back to block out the final token out of spite:

The Undead did get a Turn 7 to try to grab the third token too, but my Apostates of Darkness successfully held the hill:

Despite these late game heroics, this was a decisive NURGLEKIN LOSS. I went back to the drawing board, waffled around with including Ba’el, kept the Chroneas and rematched the Undead a couple days later. He ran the same list, except with the Necromancer swapped to a Revenant Champion w/ Tome of Darkness + Surge (5) and no Lute on that Lykanis. I assured him that ‘wasting points’ on a model you’d rather bring (he hates his Necro) and is only marginally better is both Cool and Good.

In Forces of Nurgle 2: Undead, we rolled up Push. He loaded all his tokens on the Aegis Revenants and successfully grabbed the center token with the Hann’s Revenants, so again put me in the position of needing to crack very tough hordes with a relatively toothless army. Here’s us squaring off on the left:

You can also see me feeding my trash Abyssal regiments to bop the horde or sleedbump things. I messed up and should have blocked the central Goreblight so it couldn’t (SPOILER) flank me in coming turns 😦 But such was the theme of the weekend.

Like so! This is after that Goreblight flanked to the right, killing an Abyssal Guard regiment and spinning to face this flank, which it walked into. Dammit, me. This horde did survive tho, as the Goreblight rolled normal hits for the first time all weekend (my opponent’s dice were FIRE on all his 4+ while mine were wet garbage), and I got to experience the power of the sacrificial imp double regen, which was great fun 😀

Eventually we crack both Rev hordes, then both roll a bunch of snake eyes in a row that extend the rout of the Undead longer than it needed to be. Highlights: the same Abyssal Champ wavering and eventually routing the same Soul Reaver Cav from Game 1; the Chroneas withdrawing (-1 to hit!) and rear charging some Soul Reaver infantry, only to snake eyes them on 16 damage and die in return; both Tortured Souls hordes mobbing the other Soul Reaver infantry, only to snake eyes them on 16 damage and die in return* (well one anyway); an Abyssal Guard unit with 4 tokens scooting off into the sunset on Turn 4 while all this carnage played out on the left. I eventually got the 3 tokens from that Rev Horde as well, making this a dominating NURGLEKIN WIN.

* If you were concerned about Soul Reaver Infantry’s damage output after the nerf, don’t be! They still hit shockingly hard, especially when you’re Jeff and you consistently wound 13+ times with those 20 attaks.

So after these games and a weekend spent in the kitchen with Abyssals, I’m not sure how I feel. The list I posted above is neat and has some tools behind it and I’m down to try it again … but in game, I gotta say rolling 4-5+ all the time is a real slog. I’m pretty sick of playing armies that don’t feel like they do anything, which is how I felt playing my Herd before I added more to them this summer and embraced the hammers that Herd have available. Ironically, I find myself wondering if I should just play the Hallow, which has some very cool 3D sculpts and is my newest paint, rather than putting work into revising my infantry-centric Nurglekin, whether they’re Abyssals or Rats or whatever. But I worry that Herd don’t have enough going on for me, a control player at heart who doesn’t like alpha strike.

Anyhoo, thanks for reading all this! I’ll hopefully be back before the year ends with a proper report or two as we prep for Dead of Winter.